
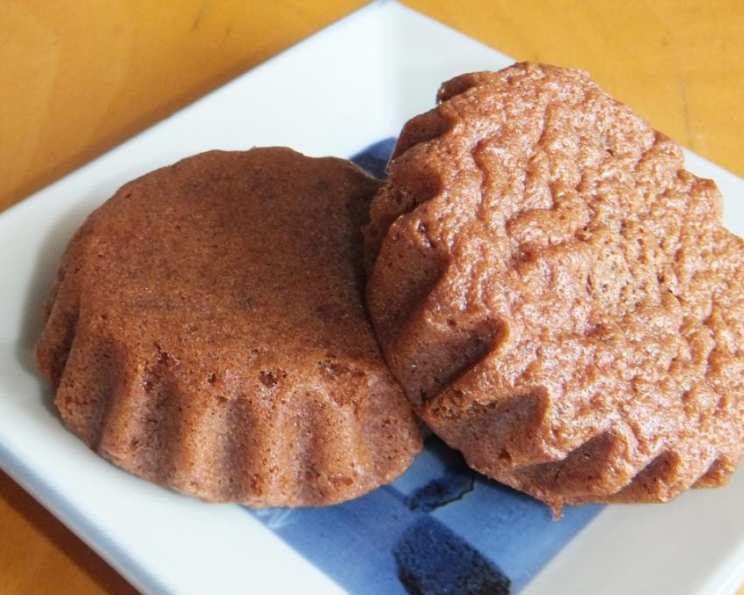
Chocolate Madeleines: A Taste of Elegance
I still remember the first time I tasted a madeleine. It was during a trip to Paris, a tiny, shell-shaped cookie offered alongside a steaming cup of café au lait. The delicate crumb, the subtle sweetness, and the comforting warmth filled me with a sense of contentment I’ll never forget. Now, years later, I’ve taken that simple pleasure and elevated it with the rich, decadent allure of chocolate, creating a treat that’s both sophisticated and utterly irresistible.
Recipe Overview
- Prep Time: 20 minutes
- Cook Time: 7 minutes per batch
- Total Time: 1 hour 27 minutes (includes chilling)
- Servings: Varies based on madeleine pan size
- Yield: Approximately 36 madeleines
- Dietary Type: Not specified
Ingredients
- ¾ cup all-purpose flour
- ½ cup unsweetened cocoa
- 1 pinch salt
- 4 large eggs
- 1 cup sugar
- 12 tablespoons unsalted butter, melted and cooled
- Butter, for buttering the madeleine tins
Equipment Needed
- Madeleine tins
- Sifter
- Large mixing bowl or stand mixer
- Whisk
- Pastry brush
- Refrigerator
Instructions
-
Begin by preparing your dry ingredients. In a bowl, sift together the all-purpose flour, unsweetened cocoa, and salt. This ensures a light and airy texture for your madeleines, preventing any lumps of cocoa from lingering in the final product.
-
In a large bowl, or the bowl of an electric mixer, combine the eggs and sugar. Whisk them together vigorously until the mixture becomes thick and takes on a pale, lemon-colored hue. This step is crucial for incorporating air into the batter, contributing to the characteristic “hump” of a perfect madeleine.
-
Gently fold the sifted flour mixture into the egg mixture. Be careful not to overmix at this stage, as this can develop the gluten in the flour, resulting in a tougher madeleine. Use a light hand and stop mixing as soon as the flour is just incorporated.
-
Gradually fold in the melted and cooled butter. Ensure the butter is cooled to avoid cooking the eggs and causing the batter to separate. Again, be gentle and mix only until the butter is fully incorporated.
-
Using a pastry brush, generously butter the madeleine tins. This is essential for preventing the madeleines from sticking and ensuring they release easily, preserving their delicate shell shape. Don’t skimp on the butter!
-
Spoon the batter into the prepared madeleine tins, filling each about ¾ full. This allows room for the madeleines to puff up during baking, creating their signature hump.
-
Refrigerate the filled madeleine pans, along with any remaining batter, for at least one hour. This chilling period is vital. The temperature contrast between the cold batter and the hot oven is what helps to create the classic madeleine hump. This step also allows the gluten to relax, resulting in a more tender crumb.
-
Preheat your oven to 425 degrees Fahrenheit (220 degrees Celsius). Ensure your oven is properly preheated before baking, as this is crucial for achieving the desired texture and rise.
-
Bake the madeleines until they are firm and puffed, about 7 minutes. Keep a close eye on them, as baking times can vary depending on your oven. They should be golden brown around the edges and spring back lightly when touched.
-
Immediately turn the madeleines out from the molds. Wipe out the molds to remove any crumbs or excess butter. Allow the molds to cool before continuing with the next batch. This ensures each batch bakes evenly and releases cleanly.
-
Continue baking the madeleines until all of the batter is used, repeating steps 5-10.
Expert Tips & Tricks
- Don’t overmix the batter! Overmixing develops the gluten in the flour, leading to tough madeleines.
- Chilling is key! The chilling period is essential for creating the signature hump and tender crumb. Don’t skip it!
- Use a generous amount of butter to grease the molds. This prevents sticking and ensures easy release. You can also lightly dust the buttered molds with flour for extra insurance.
- For an even more intense chocolate flavor, add a tablespoon of espresso powder to the dry ingredients.
- If you don’t have a madeleine pan, you can use mini muffin tins, but the shape won’t be traditional.
Serving & Storage Suggestions
Madeleines are best enjoyed slightly warm or at room temperature on the same day they are made. Their delicate texture and subtle flavor are at their peak freshness immediately after baking.
To store leftovers, place them in an airtight container at room temperature. They will keep for 1-2 days, but their texture will start to soften over time.
Madeleines can also be frozen for longer storage. Wrap them individually in plastic wrap and then place them in a freezer-safe bag or container. They can be frozen for up to 2 months. To thaw, simply remove them from the freezer and let them come to room temperature.
These chocolate madeleines are delightful on their own, but they also pair beautifully with a variety of accompaniments. Try serving them with a cup of coffee or tea, a scoop of vanilla ice cream, or a drizzle of melted chocolate.
Nutritional Information
| Nutrient | Amount per Serving (estimated) | % Daily Value (estimated) |
|---|---|---|
| Calories | 150 kcal | 8% |
| Total Fat | 8g | 12% |
| Saturated Fat | 5g | 25% |
| Cholesterol | 40mg | 13% |
| Sodium | 15mg | 1% |
| Total Carbohydrate | 18g | 6% |
| Dietary Fiber | 1g | 4% |
| Sugars | 10g | – |
| Protein | 2g | 4% |
Please note: Nutritional information is an estimate and may vary based on specific ingredients and serving sizes.
Variations & Substitutions
- Spice it up: Add a pinch of cinnamon or cardamom to the dry ingredients for a warm, aromatic twist.
- Citrus zest: Incorporate the zest of an orange or lemon for a bright, refreshing flavor.
- Nuts: Fold in some chopped nuts, such as almonds or pecans, for added texture and flavor.
- Gluten-free: Substitute the all-purpose flour with a gluten-free blend for a gluten-free version. You may need to experiment with the amount of liquid to achieve the right consistency.
- Dairy-free: Use a dairy-free butter substitute. Be mindful of the taste to ensure it complements the chocolate.
FAQs (Frequently Asked Questions)
Q: Why are my madeleines flat and not puffy?
A: The most common reason for flat madeleines is not chilling the batter for long enough. Make sure to refrigerate the batter for at least an hour before baking. Also, ensure your oven is fully preheated to the correct temperature.
Q: Can I use a different type of cocoa powder?
A: Yes, you can use Dutch-processed cocoa powder for a richer, more intense chocolate flavor.
Q: How do I prevent the madeleines from sticking to the pan?
A: Generously butter the madeleine tins and, for extra precaution, lightly dust them with flour.
Q: Can I make the batter ahead of time?
A: Yes, you can make the batter a day in advance and store it in the refrigerator. Just be sure to give it a good stir before spooning it into the madeleine tins.
Q: Why did my madeleines turn out dry?
A: Overbaking is a common cause of dry madeleines. Reduce baking time by a minute or two. Additionally, ensure accurate measurements, particularly with the flour.
Final Thoughts
Chocolate madeleines are more than just cookies; they’re a little piece of edible luxury. The combination of delicate texture, rich chocolate flavor, and elegant shape makes them a perfect treat for any occasion. I encourage you to try this recipe and experience the simple joy of baking these delightful little cakes. Share your creations with friends and family, and don’t be afraid to experiment with different flavors and variations. Happy baking!