
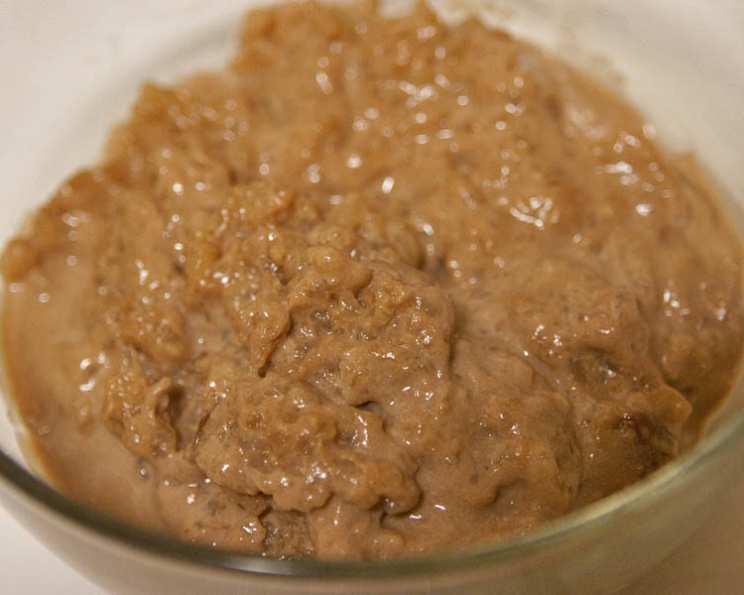
Chocolate Milk Creamy Rice Pudding Made the Old Fashioned Way
I remember vividly the first time I tasted rice pudding. It wasn’t some fancy, meticulously crafted dessert from a Michelin-starred restaurant. It was a simple, humble bowl made by my grandmother, her hands gnarled with age but still capable of magic in the kitchen. The creamy, comforting warmth chased away the chill of a rainy afternoon, each spoonful a reminder of her love and the cozy haven of her kitchen. While I adored her classic version, with its whisper of nutmeg and plump raisins, I always felt a twinge of longing for the familiar comfort of chocolate milk. So, I embarked on a culinary quest, blending my grandmother’s wisdom with my own chocolate cravings, to create this deeply satisfying chocolate milk rice pudding.
Recipe Overview
- Prep Time: 5 minutes
- Cook Time: 3 hours 30 minutes
- Total Time: 3 hours 35 minutes
- Servings: 8-10
- Yields: 10 cups
- Dietary Type: Not specified
Ingredients
- 1/2 cup medium grain white rice
- 1/2 cup arborio rice
- 1/2 cup raw sugar (or granulated or light brown)
- 1/8 teaspoon salt
- 1 (12 ounce) can evaporated milk
- 1/2 gallon cold whole chocolate milk (I look for whole milk for this as the original recipe I started with said skim doesn’t work but 2% will)
Equipment Needed
- Large baking dish (at least 10 cup capacity)
- Fork
- Trivet
Instructions
- First, you’ll need a baking dish that can comfortably hold at least 10 cups. It’s crucial that the dish remains ungreased. If you want to halve the recipe, feel free.
- Set your oven temperature to 275 degrees F. The low and slow approach is the key to achieving the creamy texture we’re after.
- Position the oven shelf to low center. Keep the dish near the front of the oven so you can easily reach in and stir.
- In the baking dish, stir together all the raw ingredients: the medium grain rice, the arborio rice, the raw sugar, the salt, the evaporated milk, and the cold whole chocolate milk. The milk will be cold and take awhile to start cooking; don’t worry, that’s part of the process.
- Cook uncovered for 40 minutes, then reach in with a fork and stir thoroughly.
- Cook for another 40 minutes, and stir again. By this point, the rice may have started to swell.
- Cook for an additional 35 minutes, and give it another stir. The rice should be significantly swollen, starting to stick together in clumps. This is where the magic happens! Stir a lot, using your fork to mash down the clumps and get into the bottom edges of the baking dish. Try to separate as many grains as possible.
- Cook for another 30 minutes, and stir. This time, you’ll notice that most of the rice will not have clumped together again.
- Early on, a skin will form on the top of the pudding. Don’t be alarmed. Just stir it back in each time until the very last bake.
- After another 30 minutes of baking, the pudding should be nearly done. Stir one last time. Some of the rice should be floating near the top, and the mixture will appear slightly runny.
- Bake for a final 20 to 30 minutes. This time, allow a skin to form on the surface. This final skin adds a delightful textural contrast to the creamy interior.
- Remove the baking dish from the oven and place it on a trivet to cool.
- The hardest part: patience! It’s best to wait until the rice pudding has cooled entirely to room temperature or is just slightly warm before diving in. If you eat it while it’s hot, it will be very runny, and the remaining pudding won’t have its ideal creamy consistency. The pudding thickens considerably as it cools.
- Store the rice pudding covered in the refrigerator. It will continue to thicken as it chills, becoming even more sticky, chewy, and wonderfully creamy in spots.
- I don’t know what would happen if you warmed the milk first, but I think it wouldn’t be the same.
- The cooking time may be up to 1/2 hour more than stated.
Expert Tips & Tricks
- Don’t rush the process. The low oven temperature and long cooking time are essential for developing the creamy texture and preventing the rice from burning.
- Scrape the bottom. Be sure to scrape the bottom and sides of the baking dish while stirring to prevent sticking and ensure even cooking.
- Embrace the skin. That final baked skin is not a flaw; it’s a feature! It provides a lovely textural contrast to the creamy pudding beneath. If you really dislike it, you can stir it in after baking, but I encourage you to give it a try.
- Cold chocolate milk matters: While 2% will work in a pinch, whole chocolate milk will give you the richest, creamiest results.
Serving & Storage Suggestions
Serve the chocolate milk rice pudding chilled or at room temperature. A dollop of whipped cream or a sprinkle of shaved chocolate can add a touch of elegance.
Store leftover rice pudding covered in the refrigerator for up to 3-4 days. It will thicken as it chills. You can reheat it gently in the microwave, but be aware that it may become slightly looser in texture. I personally prefer to enjoy it cold, straight from the fridge.
Nutritional Information
| Nutrient | Amount per Serving | % Daily Value |
|---|---|---|
| Calories | 192.9 kcal | N/A |
| Calories from Fat | N/A | 16% |
| Total Fat | 3.3 g | 5% |
| Saturated Fat | 2 g | 9% |
| Cholesterol | 12.3 mg | 4% |
| Sodium | 82.5 mg | 3% |
| Total Carbohydrate | 36.1 g | 12% |
| Dietary Fiber | 0.7 g | 2% |
| Sugars | 12.5 g | 49% |
| Protein | 4.5 g | 9% |
Nutritional information is an estimate and may vary based on specific ingredients and serving sizes.
Variations & Substitutions
- Spice it up: Add a pinch of cinnamon or a dash of vanilla extract to the rice pudding for a warmer, more complex flavor.
- Fruit forward: Stir in dried cranberries, chopped cherries, or even some mini chocolate chips.
- Vegan option: While this recipe is already dairy-heavy, you could experiment with non-dairy chocolate milk and plant-based evaporated milk alternatives. However, the results may vary significantly.
- Sweetener swap: Experiment with maple syrup or honey instead of sugar, though this will subtly alter the flavor.
FAQs (Frequently Asked Questions)
Q: Why does this recipe take so long to cook?
A: The low and slow cooking process allows the rice to gradually absorb the chocolate milk, resulting in a creamy texture and preventing burning.
Q: Can I use a different type of rice?
A: While medium-grain white rice and arborio rice are recommended for their creamy texture, you could try using short-grain rice. Avoid long-grain rice, as it will not produce the desired consistency.
Q: How do I know when the rice pudding is done?
A: The rice pudding is done when the rice is tender, the mixture has thickened, and a skin has formed on the surface. Some of the rice should be floating near the top, and it will look runny, but it will thicken more upon cooling.
Q: Can I make this ahead of time?
A: Absolutely! In fact, the rice pudding is even better when made a day ahead of time, as it allows the flavors to meld and the texture to thicken.
Q: My rice pudding is too runny. What did I do wrong?
A: Don’t worry; it will thicken as it cools. If it’s still too runny after cooling, you may not have cooked it long enough. Next time, increase the final baking time by 15-30 minutes.
Final Thoughts
This chocolate milk creamy rice pudding is more than just a dessert; it’s a warm hug in a bowl, a comforting reminder of simpler times. I encourage you to try this recipe and experience the magic of transforming humble ingredients into something truly special. Don’t be afraid to experiment with variations and make it your own. And, please, share your creations and feedback! This pudding pairs wonderfully with a cup of coffee or a glass of chilled milk. Happy cooking!