
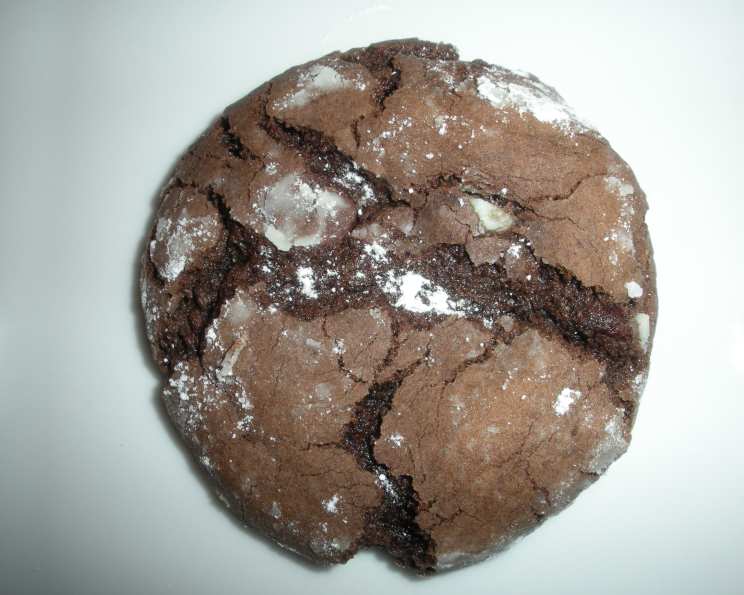
Chocolate Mint Snowcaps: A Festive Holiday Treat
My grandmother’s kitchen always smelled of peppermint and chocolate during the holidays. I remember sneaking into the kitchen as a child, the aroma instantly transporting me to a wonderland of twinkling lights and family laughter. These Chocolate Mint Snowcaps evoke those cherished memories—a perfect balance of rich fudge, refreshing mint, and a dusting of snowy sweetness. Every bite brings me back to her warm kitchen, and I’m thrilled to share this simple yet delightful recipe that carries a piece of my heart.
Recipe Overview
- Prep Time: 15 minutes
- Cook Time: 8-10 minutes
- Total Time: 25 minutes
- Yields: Approximately 36 cookies
- Dietary Type: Vegetarian
Ingredients
- 1 (18 ounce) package fudge cake mix
- 1/3 cup vegetable oil
- 2 eggs
- 1 cup mint chocolate chips
- Confectioners’ sugar, for rolling
Equipment Needed
- Large mixing bowl
- Measuring cups and spoons
- Cookie sheet
- Spoon or cookie scoop
- Wire rack
Instructions
-
Preheat your oven to 350 degrees F (175 degrees C). Make sure your oven rack is positioned in the center for even baking.
-
In a large bowl, combine the dry cake mix, vegetable oil, and eggs. Using a spoon, mix the ingredients until a dough forms. The mixture will seem crumbly at first, but keep mixing until it comes together. Work out any clumps of dry cake mix with the spoon, ensuring everything is well incorporated.
-
Gently stir in the mint chocolate chips. Distribute them evenly throughout the dough. Avoid overmixing at this stage to prevent the dough from becoming tough.
-
Using a tablespoon or a small cookie scoop, scoop out portions of the dough and shape them into 1-inch balls.
-
Place a generous amount of confectioners’ sugar in a shallow bowl. Roll each dough ball in the sugar until it’s completely coated, resembling a miniature snowball.
-
Arrange the sugar-coated cookies on an ungreased cookie sheet, spacing them about 2 inches apart. This allows for proper air circulation and prevents the cookies from sticking together as they bake.
-
Bake for 8 to 10 minutes, or until the cookies are set and the tops appear cracked. Keep a close eye on them, as baking times may vary depending on your oven.
-
After baking, let the cookies cool on the baking sheet for one minute. This allows them to firm up slightly before transferring them to a wire rack.
-
Carefully remove the cookies from the baking sheet and place them on a wire rack to cool completely. This will prevent the bottoms from becoming soggy.
Expert Tips & Tricks
- Don’t overbake: These cookies are best when they are slightly soft in the center. Overbaking will result in dry, crumbly cookies. Check for doneness around the 8-minute mark by gently pressing the edge of a cookie. It should feel firm and set.
- Chill the dough: If you find the dough too sticky to handle, chill it in the refrigerator for 15-20 minutes before rolling. This will make it easier to form the cookies into balls.
- Evenly sized cookies: For uniform baking and a professional look, use a cookie scoop to ensure all the cookies are the same size.
- Double dip for extra snow: For an even more dramatic “snowcap” effect, roll the cookie dough balls in confectioners’ sugar twice. Roll once before placing on the baking sheet, and then lightly roll again after they’ve cooled slightly.
- Flavor boost: Add a few drops of peppermint extract to the dough for an even more intense mint flavor. Be careful not to add too much, as it can be overpowering.
- Troubleshooting: If your cookies spread too thin during baking, it could be due to a few reasons. Ensure your oven is preheated to the correct temperature, and avoid using melted butter instead of vegetable oil. Chilling the dough before baking can also help prevent excessive spreading.
Serving & Storage Suggestions
These Chocolate Mint Snowcaps are perfect served warm with a glass of cold milk or a cup of hot cocoa. They also make a delightful addition to holiday cookie platters and gift boxes.
- Storage: Store the cooled cookies in an airtight container at room temperature for up to 3 days. To maintain their freshness, consider adding a slice of bread to the container to absorb excess moisture.
- Freezing: For longer storage, you can freeze the cookies in a single layer on a baking sheet before transferring them to a freezer-safe bag or container. They can be frozen for up to 2 months. Thaw them at room temperature before serving.
- Reheating: While these cookies are delicious at room temperature, you can warm them up slightly in the oven or microwave for a soft, gooey treat.
Nutritional Information
| Nutrient | Amount per Serving | % Daily Value |
|---|---|---|
| Calories | 104.9 kcal | N/A |
| Calories from Fat | 53 kcal | 51% |
| Total Fat | 5.9 g | 9% |
| Saturated Fat | 1.6 g | 8% |
| Cholesterol | 11.8 mg | 3% |
| Sodium | 121.3 mg | 5% |
| Total Carbohydrate | 13.3 g | 4% |
| Dietary Fiber | 0.6 g | 2% |
| Sugars | 8 g | 31% |
| Protein | 1.4 g | 2% |
Note: Nutritional information is an estimate and may vary based on specific ingredients and portion sizes.
Variations & Substitutions
- Different Cake Mix: Experiment with different cake mix flavors, such as devil’s food or chocolate fudge, for a unique twist.
- Different Chocolate Chips: Substitute the mint chocolate chips with other varieties, such as dark chocolate, white chocolate, or even peanut butter chips.
- Nuts: Add chopped walnuts, pecans, or almonds to the dough for added texture and flavor.
- Gluten-Free: Use a gluten-free cake mix to make these cookies gluten-free.
- Vegan: While this recipe is not inherently vegan, you can experiment with egg replacers and vegan chocolate chips to create a vegan version. Look for vegan-friendly cake mixes as well.
- Seasonal Adaptations: In the fall, add a teaspoon of pumpkin pie spice to the dough for a warm, autumnal flavor.
FAQs (Frequently Asked Questions)
Q: Can I use melted butter instead of vegetable oil?
A: While you can substitute melted butter for vegetable oil, the cookies may spread more during baking. Vegetable oil helps maintain a more compact cookie shape.
Q: My cookie dough is too sticky to handle. What can I do?
A: If the dough is too sticky, chill it in the refrigerator for 15-20 minutes before rolling. This will make it easier to form the cookies into balls.
Q: Can I make the dough ahead of time?
A: Yes, you can make the dough ahead of time and store it in the refrigerator for up to 24 hours. Allow the dough to come to room temperature slightly before rolling into balls.
Q: How do I prevent the cookies from sticking to the baking sheet?
A: Ensure you are using an ungreased baking sheet. Parchment paper can also be used.
Q: Can I add peppermint extract to the dough?
A: Yes, adding a few drops of peppermint extract to the dough will enhance the mint flavor. Be careful not to add too much, as it can be overpowering.
Final Thoughts
These Chocolate Mint Snowcaps are a testament to the joy of simple baking and the power of cherished memories. They’re incredibly easy to make, perfect for involving kids in the kitchen, and guaranteed to bring a smile to everyone who tries them. So, preheat your oven, gather your ingredients, and get ready to create a batch of these festive treats. I encourage you to experiment with different variations and make them your own. And please, share your creations and experiences – I’d love to hear what you think!