
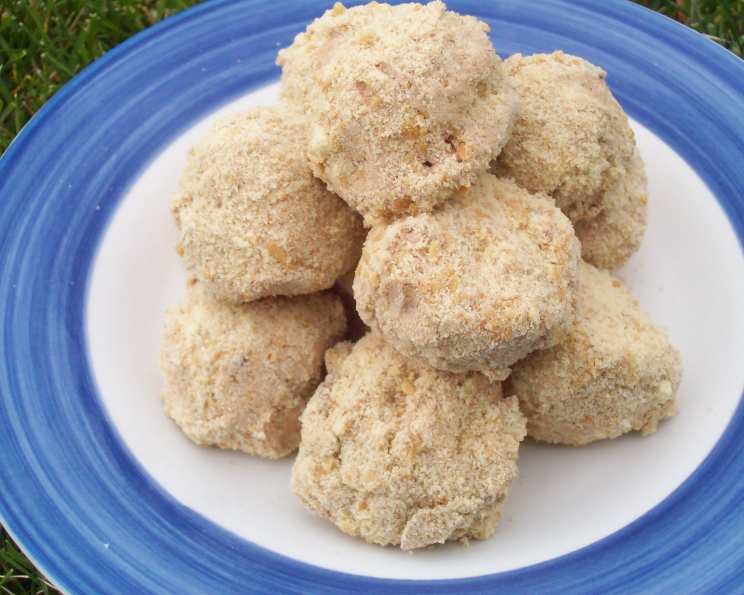
Decadent Chocolate Mousse Balls: A Sweet Treat That’s Surprisingly Simple
My grandmother, a woman who believed chocolate could solve any problem, had a secret weapon in her dessert arsenal: these Chocolate Mousse Balls. I remember being barely tall enough to reach the counter, perched on a stool, mesmerized as she’d effortlessly whip them up. The anticipation was almost unbearable as they chilled, transforming from a liquid dream into bite-sized spheres of chocolatey heaven. They were always the star of every holiday gathering, a testament to her love and a source of pure, unadulterated joy for all of us kids. Now, I make them for my own family, keeping her memory alive with every delicious bite.
Recipe Overview
- Prep Time: 20 minutes
- Chill Time: 3 hours
- Total Time: 3 hours 20 minutes
- Yields: 3 dozen
- Serves: 18
- Dietary Type: Vegetarian
Ingredients
- 6 (1 5/8 ounce) milk chocolate candy bars (1.55 oz each bar)
- 1 (12 ounce) container frozen whipped topping, thawed
- 1 cup crushed vanilla wafers
Equipment Needed
- Saucepan
- Mixing bowl
- Rubber spatula
- Measuring cup
- Cookie sheet or tray
- Wax paper or parchment paper
Instructions
-
Melt the chocolate: In a saucepan over low heat, carefully melt the milk chocolate candy bars. Be sure to stir frequently to prevent burning. You can also use a double boiler or microwave if you prefer. If microwaving, heat in 30-second intervals, stirring in between, until melted and smooth.
-
Cool the chocolate: Allow the melted chocolate to cool for 10 minutes. This is crucial because adding hot chocolate to the whipped topping will cause it to melt.
-
Combine chocolate and whipped topping: Place the thawed whipped topping in a large mixing bowl. Gently fold in the cooled, melted chocolate using a rubber spatula. Be careful not to overmix, as this can deflate the whipped topping. You want to achieve a homogenous, evenly colored mixture.
-
Chill the mousse: Cover the bowl with plastic wrap and chill in the refrigerator for at least 3 hours. This chilling period is essential for the mixture to firm up enough to be shaped into balls.
-
Shape into balls: After chilling, remove the chocolate mixture from the refrigerator. Using a spoon or a small cookie scoop, shape the mixture into 1-inch balls. Work quickly, as the mixture will soften as it warms up.
-
Coat with vanilla wafers: Place the crushed vanilla wafers in a shallow bowl or plate. Gently roll each chocolate ball in the vanilla wafer crumbs, ensuring it’s fully coated.
-
Store: Place the finished Chocolate Mousse Balls on a cookie sheet lined with wax paper or parchment paper. Store them in a covered container in the refrigerator or freezer until ready to serve.
Expert Tips & Tricks
- Melting the chocolate: Use a double boiler or microwave for a more controlled melting process and to prevent burning the chocolate.
- Cooling the chocolate: Patience is key! If the chocolate is too hot, it will melt the whipped topping and result in a runny mixture.
- Preventing sticking: Lightly grease your hands with butter or cooking spray before shaping the balls to prevent the mousse from sticking to your fingers.
- Variations: Experiment with different flavors of chocolate, such as dark chocolate or white chocolate.
- Crunch Factor: Toast the crushed vanilla wafers lightly in a dry pan for an extra nutty flavor and crunchy shell.
- Get the kids involved: This is a great recipe to make with children. They can help with crushing the wafers, shaping the balls, and rolling them in the crumbs.
Serving & Storage Suggestions
Serve these delightful Chocolate Mousse Balls chilled, straight from the refrigerator. Arrange them artfully on a platter for a party or simply enjoy them as a sweet treat after dinner.
- Room Temperature: These are best served cold. They will soften quickly at room temperature, especially in warm weather.
- Refrigerator: Store in an airtight container in the refrigerator for up to 3 days.
- Freezer: For longer storage, freeze the Chocolate Mousse Balls in an airtight container for up to 2 weeks. Thaw in the refrigerator for a few hours before serving.
Nutritional Information
| Nutrient | Amount per Serving | % Daily Value |
|---|---|---|
| Calories | 139.6 kcal | N/A |
| Calories from Fat | 82 g | 59% |
| Total Fat | 9.2 g | 14% |
| Saturated Fat | 6.2 g | 31% |
| Cholesterol | 3.4 mg | 1% |
| Sodium | 16.4 mg | 0% |
| Total Carbohydrate | 13.2 g | 4% |
| Dietary Fiber | 0.5 g | 2% |
| Sugars | 12 g | 48% |
| Protein | 1.4 g | 2% |
Note: Nutritional information is an estimate and can vary based on specific ingredients and portion sizes.
Variations & Substitutions
- Chocolate Variety: Use dark chocolate for a richer, more intense flavor. White chocolate can be used for a sweeter, creamier taste.
- Crumb Coating: Instead of vanilla wafers, try using crushed graham crackers, finely chopped nuts (such as pecans or walnuts), or even cocoa powder.
- Liqueur Infusion: Add a tablespoon or two of your favorite liqueur (such as coffee liqueur or rum) to the melted chocolate for an adult twist.
- Spice it up: A pinch of cayenne pepper in the melted chocolate adds a subtle kick.
- Dairy-Free Adaptation: While the original recipe uses dairy products, you could explore substitutions such as dairy-free chocolate and coconut whipped cream to create a vegan-friendly version, although the texture will be slightly different.
FAQs (Frequently Asked Questions)
Q: Can I use a different kind of chocolate?
A: Absolutely! Experiment with dark, semi-sweet, or even white chocolate to create different flavor profiles. Just be sure to adjust the sweetness level accordingly.
Q: What if my chocolate mousse mixture is too runny?
A: If the mixture is too runny after chilling for 3 hours, place it back in the freezer for another 30-60 minutes to firm it up further.
Q: Can I make these ahead of time?
A: Yes, these are great for making ahead! Store them in an airtight container in the refrigerator for up to 3 days or in the freezer for up to 2 weeks.
Q: The vanilla wafer crumbs are not sticking to the mousse balls, what can I do?
A: You may have rushed the process or the mousse mixture may not be cold enough. Return the mix back to the fridge to firm up some more before attempting to roll them.
Q: Can I add anything else to the mousse mixture?
A: Certainly! Feel free to add chopped nuts, mini chocolate chips, or a swirl of peanut butter for extra flavor and texture.
Final Thoughts
These Chocolate Mousse Balls are a testament to the fact that sometimes the simplest recipes are the most satisfying. They’re easy to make, incredibly delicious, and always a crowd-pleaser. So go ahead, whip up a batch and share the joy with your loved ones. I guarantee they’ll be asking for more! And be sure to share your variations and tips in the comments below – I’d love to hear how you’re making this recipe your own. Happy baking!