
Decadent Dream: The Easiest Chocolate Mousse Pie You’ll Ever Make
The first time I tasted chocolate mousse pie, I was at my grandmother’s house. The air hung thick with the scent of vanilla and something deeply, darkly chocolate. My grandmother, a whirlwind in the kitchen, presented it with a flourish – a cloud of whipped cream atop a silky, shimmering chocolate filling. One bite, and I was hooked. It was airy, yet intensely chocolatey, a delightful contrast of textures that danced on my tongue. Now, years later, I’ve perfected my own version, inspired by her love and made unbelievably easy.
Recipe Overview
- Prep Time: 10 minutes
- Cook Time: 0 minutes (chilling only)
- Total Time: 2 hours 10 minutes
- Servings: 6-8
- Yield: 1 pie
- Dietary Type: Vegetarian (check whipped topping ingredients for suitability)
Ingredients
- 1 prepared 9 inch pie shell (graham cracker or chocolate wafer)
- 1 (5 7/8 ounce) package instant chocolate pudding mix
- 2 cups cold milk
- ¾ cup whipped topping
GARNISH
- Chocolate curls
- Whipped cream
Equipment Needed
- Mixing bowl
- Whisk or electric mixer
- Measuring cups and spoons
- Spatula
- 9-inch pie plate
Instructions
- In a medium-sized mixing bowl, combine the instant chocolate pudding mix and cold milk.
- Using a whisk or electric mixer, blend the mixture together until it thickens. This should take about 5 minutes. You’ll notice the pudding base transforming from a liquid to a smooth, creamy consistency. It’s important to mix thoroughly to avoid any lumps.
- Gently fold in the whipped topping using a spatula. Be careful not to overmix, as this can deflate the mousse. You want to maintain the airiness.
- Spoon the chocolate mousse mixture into the prepared pie shell. Spread it evenly to fill the crust.
- Chill the pie in the refrigerator for at least 2-3 hours. This allows the mousse to fully set and the flavors to meld together beautifully.
- Before serving, garnish with additional whipped cream and chocolate curls, if desired.
Expert Tips & Tricks
- For a richer flavor, use whole milk or even half-and-half instead of skim milk.
- To intensify the chocolate notes, add a tablespoon of unsweetened cocoa powder to the pudding mix before adding the milk.
- If you’re short on time, you can freeze the pie for about 30 minutes to speed up the setting process. However, be careful not to freeze it solid.
- To prevent the crust from getting soggy, brush the bottom of the pie shell with melted chocolate before adding the mousse filling.
- For a more decadent experience, use a high-quality chocolate pudding mix. The better the pudding, the better the pie.
- Make-ahead tip: Prepare the mousse filling up to 24 hours in advance and store it in the refrigerator. Assemble the pie just before serving.
- Dealing with a lumpy mixture?: If your pudding mixture is lumpy, try whisking it vigorously or using an immersion blender to smooth it out.
Serving & Storage Suggestions
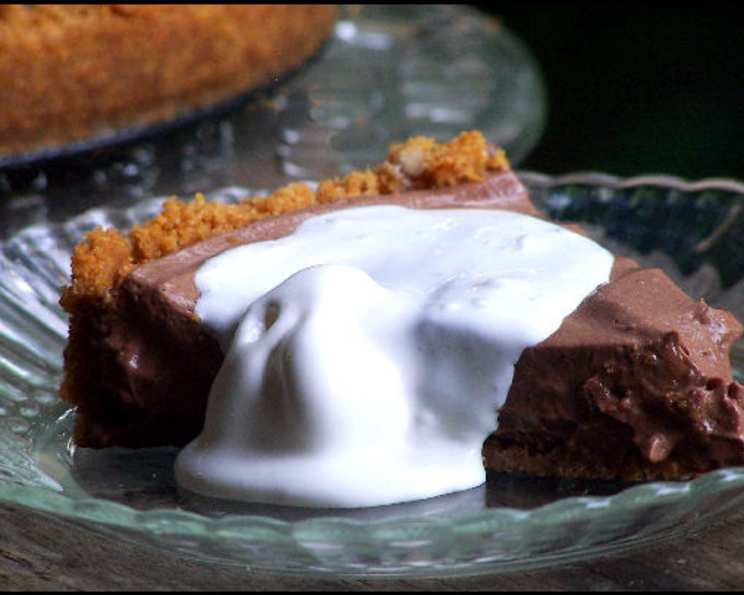
This Chocolate Mousse Pie is best served chilled, directly from the refrigerator. A dollop of whipped cream and a sprinkle of chocolate curls elevate the presentation, but it’s equally delicious on its own.
Store any leftover pie in the refrigerator, covered tightly with plastic wrap or in an airtight container. It will keep for up to 3 days. While freezing is possible, it can affect the texture of the mousse, making it slightly icy. If you do freeze it, thaw it in the refrigerator overnight before serving.
This pie is perfect as a simple dessert after a weeknight dinner or as a show-stopping centerpiece for a special occasion. It pairs beautifully with a glass of cold milk, a cup of hot coffee, or even a dessert wine like a late-harvest Riesling.
Nutritional Information
Please note that the following values are estimates and can vary based on specific ingredients used.
| Nutrient | Amount per Serving | % Daily Value |
|---|---|---|
| Calories | 282 kcal | 14% |
| Total Fat | 12 g | 18% |
| Saturated Fat | 5 g | 25% |
| Cholesterol | 17 mg | 6% |
| Sodium | 576 mg | 24% |
| Total Carbohydrate | 39 g | 13% |
| Dietary Fiber | 1 g | 4% |
| Sugars | 15 g | 30% |
| Protein | 4 g | 8% |
Variations & Substitutions
- Gluten-Free: Use a gluten-free pie crust made from gluten-free graham crackers or a nut-based crust.
- Dairy-Free: Use a dairy-free milk alternative (such as almond, soy, or oat milk) and a dairy-free whipped topping. Ensure your pudding mix is also dairy-free.
- Peanut Butter Chocolate: Swirl in a few tablespoons of peanut butter into the chocolate mousse filling before pouring it into the crust.
- Mint Chocolate: Add a few drops of peppermint extract to the pudding mixture for a refreshing twist. Garnish with fresh mint leaves.
- Mocha Mousse: Add a teaspoon of instant coffee granules to the pudding mix for a mocha-flavored mousse.
- Seasonal Fruit: Top the pie with fresh berries or sliced fruit for a colorful and flavorful addition.
FAQs (Frequently Asked Questions)
Q: Can I use a homemade pie crust instead of a store-bought one?
A: Absolutely! A homemade graham cracker or chocolate crust will add an extra layer of flavor and texture. Just be sure to blind bake it before adding the filling.
Q: What if I don’t have whipped topping?
A: You can use freshly whipped cream instead. Whip heavy cream with a little sugar until stiff peaks form.
Q: Can I make this pie vegan?
A: Yes! Use a dairy-free milk alternative, dairy-free whipped topping, and a vegan-friendly instant chocolate pudding mix.
Q: How long will the pie last in the refrigerator?
A: The pie will stay fresh in the refrigerator for up to 3 days if stored properly in an airtight container.
Q: Can I freeze this pie?
A: Freezing is possible, but the texture of the mousse may change slightly. If you do freeze it, thaw it in the refrigerator overnight before serving.
Final Thoughts
This Chocolate Mousse Pie is more than just a dessert; it’s a celebration of simple pleasures and the joy of sharing good food with loved ones. Easy to make and utterly irresistible, it’s a guaranteed crowd-pleaser. So, gather your ingredients, follow the steps, and prepare to indulge in a slice of chocolate heaven. I encourage you to experiment with the variations, make it your own, and let me know what you think. Pair it with a scoop of vanilla ice cream or a drizzle of chocolate sauce for an extra touch of indulgence. Happy baking!