
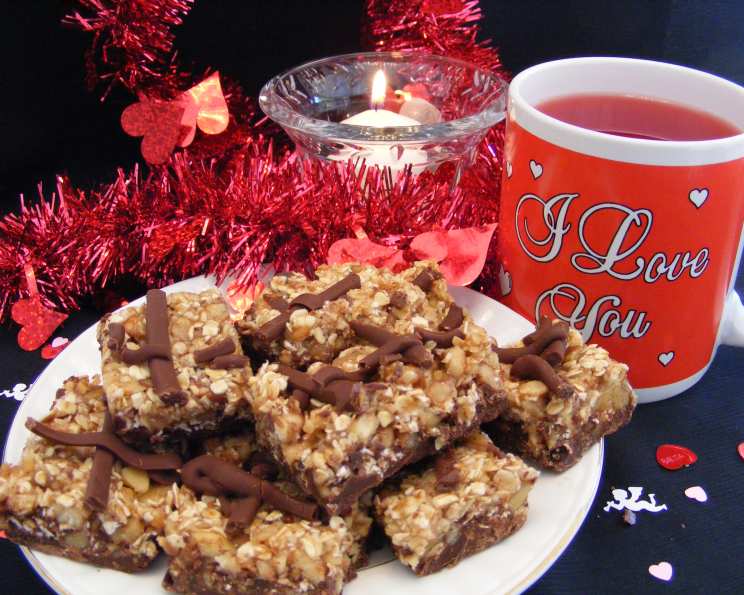
Decadent Chocolate Nut Bars: A Symphony of Sweet and Crunchy
There’s a certain magic that happens when chocolate and nuts collide. As a kid, my grandmother always had a stash of homemade nut bars hidden away in her pantry. The aroma alone, a heady blend of toasted nuts and rich chocolate, transported me to a place of pure comfort and joy. Each bite was an explosion of textures and flavors – the satisfying crunch of the nuts, the smooth, melting chocolate, and that subtle hint of sweetness that lingered long after the last crumb was gone. I’ve spent years trying to recreate that perfect balance, and this recipe comes closest to capturing the essence of those cherished childhood memories.
Recipe Overview:
- Prep Time: 20 minutes
- Cook Time: 20 minutes
- Refrigeration Time: 4 hours
- Total Time: 4 hours 40 minutes
- Yields: 24 bars
- Dietary Type: Not specified
Ingredients:
- 1/2 cup uncooked quick oats
- 1/2 cup hazelnuts, chopped
- 1/2 cup walnuts, chopped
- 3/4 cup confectioners’ sugar
- 8 ounces semi-sweet chocolate chips
- 1 tablespoon shortening
- 2 tablespoons butter
- 1/2 teaspoon salt
- 1/3 cup corn syrup
- 1/2 teaspoon vanilla
Equipment Needed:
- 8-inch square baking pan
- Foil
- Baking sheet
- Large bowl
- Small heavy saucepan
- Microwaveable bowl
- Plastic wrap
Instructions:
-
Preheat your oven to 350°F (175°C). Accuracy in oven temperature is key for even toasting.
-
Line an 8-inch square baking pan with foil. Press the foil firmly into the corners to completely cover the pan and leave a 1-inch overhang on all sides. This overhang will act as handles, making it easy to lift the bars out later.
-
Spread the quick oats on an ungreased baking sheet. Bake for 8-10 minutes, or until they are lightly golden brown. Keep a close watch, as oats can burn quickly. Let them cool completely, then transfer them to a large bowl.
-
Reduce the oven temperature to 325°F (160°C). This lower temperature will help prevent the nuts from burning.
-
Spread the chopped hazelnuts and walnuts on the same baking sheet. Bake for 9-11 minutes, or just until the cut sides begin to brown lightly and become fragrant. Over-baking the nuts can result in a bitter taste. Allow them to cool completely before adding them to the toasted oats.
-
Add the confectioners’ sugar to the bowl with the oats and nuts. Stir to combine thoroughly. Set this mixture aside.
-
Heat the semi-sweet chocolate chips and shortening in a small, heavy saucepan over very low heat. Stir constantly until the chocolate is completely melted and smooth. Using a heavy-bottomed saucepan will help prevent the chocolate from scorching. Remove from heat immediately once melted.
-
Spread the melted chocolate evenly on the bottom of the prepared 8-inch square pan. Make sure the layer is consistent in thickness for a beautiful presentation.
-
Let the chocolate stand in a cool place for 15-20 minutes, or until the chocolate mixture begins to set, but is not yet firm. You want it to be slightly tacky so the nut mixture adheres well.
-
Combine the butter and salt in a microwaveable bowl. Microwave on HIGH for 20-30 seconds, or until the butter is melted and foamy. Be careful not to let the butter splatter.
-
Stir in the corn syrup into the melted butter. Let the mixture cool slightly, then add the vanilla extract.
-
Pour the corn syrup mixture into the oat and nut mixture. Stir just until everything is moistened and evenly coated. Be careful not to overmix, as this can make the bars tough.
-
Gently spoon the oat and nut mixture over the layer of chocolate in the pan. Spread evenly, pressing gently into the corners to ensure a compact layer.
-
Score the top lightly into 4 strips, then score each strip into 6 pieces. This will create 24 evenly sized bars and make cutting easier later.
-
Cover the pan tightly with plastic wrap and refrigerate for at least 4 hours, or until the bars are firm. This chilling period is crucial for the bars to set properly.
-
Remove the bars from the pan by lifting the foil edges. Place them on a cutting board.
-
Cut along the score lines into 24 pieces. Remove the foil.
-
Store the chocolate nut bars in an airtight container in the refrigerator. This will help them retain their texture and prevent the chocolate from melting.
Expert Tips & Tricks:
- Toast your nuts and oats: Don’t skip toasting! It intensifies their flavor and adds a delightful crunch.
- Use high-quality chocolate: The better the chocolate, the better the bars will taste.
- Don’t overbake: Overbaking the oats or nuts can lead to a bitter taste. Keep a close eye on them in the oven.
- Press firmly: When pressing the nut mixture into the pan, make sure to compact it well for a cohesive bar.
- Chill thoroughly: The chilling period is crucial for the bars to set properly and be easy to cut.
Serving & Storage Suggestions:
These chocolate nut bars are perfect as an afternoon treat, a dessert for a party, or a thoughtful homemade gift. Serve them chilled or at room temperature, depending on your preference.
- Storage: Store the bars in an airtight container in the refrigerator for up to 1 week. For longer storage, you can freeze them for up to 2 months. Wrap them individually in plastic wrap before freezing to prevent freezer burn.
- Serving: Cut the bars into smaller pieces for a bite-sized snack. They pair wonderfully with a glass of cold milk, a cup of coffee, or a scoop of vanilla ice cream.
Nutritional Information:
Nutritional information is an estimate and may vary based on specific ingredients and portion sizes.
| Nutrient | Amount per Serving | % Daily Value |
|---|---|---|
| Calories | 125.5 kcal | N/A |
| Calories from Fat | 69 kcal | 56% |
| Total Fat | 7.7 g | 11% |
| Saturated Fat | 2.7 g | 13% |
| Cholesterol | 2.5 mg | 0% |
| Sodium | 56.5 mg | 2% |
| Total Carbohydrate | 14.9 g | 4% |
| Dietary Fiber | 1.2 g | 4% |
| Sugars | 10.2 g | N/A |
| Protein | 1.5 g | 2% |
Variations & Substitutions:
- Nut Variations: Feel free to swap out the hazelnuts and walnuts for other nuts like almonds, pecans, or macadamia nuts. Just be sure to chop them to a similar size.
- Chocolate Variations: Experiment with different types of chocolate, such as dark chocolate, milk chocolate, or even white chocolate. You can also use chocolate chunks instead of chips for a more rustic look.
- Add-ins: Get creative with add-ins like dried cranberries, raisins, shredded coconut, or a sprinkle of sea salt on top.
- Gluten-Free Option: Ensure the quick oats are certified gluten-free to make this recipe suitable for those with gluten sensitivities.
- Corn Syrup Substitute: You can substitute the corn syrup with honey or maple syrup, but it may slightly alter the flavor and texture.
FAQs (Frequently Asked Questions):
Q: Can I use regular rolled oats instead of quick oats?
A: While quick oats are recommended for their finer texture, you can use regular rolled oats. Just pulse them in a food processor a few times to break them down slightly before toasting.
Q: Can I make these bars ahead of time?
A: Absolutely! These bars are great for making ahead. They can be stored in the refrigerator for up to a week, making them a convenient option for parties or gatherings.
Q: What if my chocolate seizes while melting?
A: A tiny bit of moisture can sometimes cause chocolate to seize. Try stirring in a teaspoon of vegetable oil or shortening to help smooth it out. If that doesn’t work, unfortunately, the chocolate may be unusable.
Q: Can I freeze these chocolate nut bars?
A: Yes, you can freeze them for up to 2 months. Wrap them individually in plastic wrap before freezing to prevent freezer burn.
Q: Why are my bars crumbly and not holding together?
A: This could be due to not packing the oat and nut mixture firmly enough into the pan or not chilling the bars for a sufficient amount of time. Make sure to press firmly and chill for at least 4 hours.
Final Thoughts:
These Chocolate Nut Bars are more than just a recipe; they’re a journey back to simpler times and a celebration of the perfect marriage of chocolate and nuts. I encourage you to try this recipe and experience the delight of creating these delicious bars in your own kitchen. Don’t be afraid to experiment with different variations and make them your own. And most importantly, share them with the people you love! After all, food is best enjoyed when shared.