
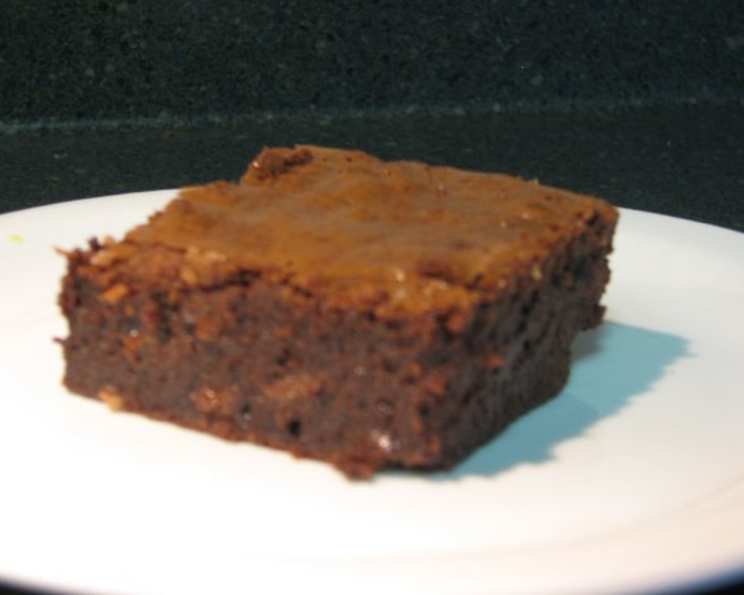
Chocolate Overload Brownies
I can still remember the time my little brother attempted to bake brownies for my mom’s birthday. He’d seen her meticulously melt chocolate for ganache, and he thought he could replicate the magic. The result? A gritty, burnt mess that tasted vaguely of sadness. Undeterred (and covered in chocolate himself), he presented them with a flourish. We all laughed, but secretly, I vowed to master the perfect brownie – one so rich and decadent it would erase all memories of that first, disastrous attempt. These Chocolate Overload Brownies are my answer – a symphony of chocolate that even my brother would be proud of.
Recipe Overview
- Prep Time: 15 minutes
- Cook Time: 40 minutes
- Total Time: 55 minutes
- Servings: 16
- Yield: 16 brownies
- Dietary Type: Vegetarian
Ingredients
- 6 ounces unsalted butter
- 1/4 cup extra virgin olive oil
- 12 ounces Hershey’s semi-sweet chocolate chips, divided (8 ounces for melting, 4 ounces for adding to batter)
- 1 cup all-purpose flour
- 1/4 cup cocoa powder
- 1/2 teaspoon salt
- 4 large eggs
- 1 1/3 cups sugar
- 2 teaspoons vanilla extract
Equipment Needed
- 9×9-inch square baking pan
- Double boiler (or heatproof bowl and saucepan)
- Mixing bowls
- Sifter or fine-mesh sieve
- Whisk
Instructions
-
Begin by preheating your oven to 350°F (175°C). While the oven heats, grease a 9×9-inch square baking pan thoroughly. You can use butter, oil, or baking spray. Lining the pan with parchment paper with an overhang also makes removing the brownies much easier.
-
Next, it’s time to melt the chocolate and butter. In a double boiler, combine the butter and 8 ounces of the semi-sweet chocolate chips. If you don’t have a double boiler, you can create one by placing a heatproof bowl over a saucepan filled with about an inch of simmering water, ensuring the bottom of the bowl doesn’t touch the water.
-
Gently stir the butter and chocolate mixture until completely melted and smooth. Once melted, remove from the heat and gently stir in the olive oil until fully incorporated and the mixture is shiny. Allow the mixture to cool slightly before proceeding – this is important to prevent the eggs from cooking when added later.
-
In a separate mixing bowl, sift together the all-purpose flour, cocoa powder, and salt. Sifting ensures there are no lumps and that the dry ingredients are evenly distributed, resulting in a smoother brownie texture. Set aside this dry ingredient mixture.
-
In another mixing bowl, whisk together the eggs, sugar, and vanilla extract until well combined. You don’t need to over-whisk; just ensure the sugar is mostly dissolved and the mixture is slightly lightened in color.
-
Now, the fun part: combining the chocolate and egg mixtures. Slowly add the cooled chocolate mixture to the egg mixture a little at a time, whisking constantly to prevent the eggs from cooking. Continue whisking until the two mixtures are fully combined and you have a smooth, glossy batter.
-
Gradually add the flour mixture to the chocolate batter, mixing until just combined. Be careful not to overmix, as this can lead to tough brownies. Mix until the flour streaks disappear.
-
Fold in the remaining 4 ounces of chocolate chips. This adds extra bursts of chocolatey goodness throughout the brownies.
-
Transfer the batter to the prepared baking pan and spread evenly.
-
Bake in the preheated oven for 40 minutes. To test for doneness, insert a toothpick into the center of the brownies. It should come out with a few moist crumbs clinging to it. Avoid overbaking, as this will result in dry brownies.
-
Once baked, let the brownies cool in the pan for 20 minutes before removing them. Cooling helps them set and makes them easier to cut.
-
After cooling, remove the brownies from the pan (if you used parchment paper, simply lift them out) and cut them into squares.
-
These brownies are delicious both warm and cool. For an extra indulgent treat, serve with a scoop of vanilla ice cream while they’re still slightly warm.
Expert Tips & Tricks
- For extra fudgy brownies: Reduce the baking time by a few minutes. The center should be slightly gooey.
- To avoid overbaking: Keep a close eye on the brownies during the last few minutes of baking. The edges should be set, and the center should still be slightly soft.
- Make-ahead tip: The batter can be prepared a day in advance and stored in the refrigerator. Bring it to room temperature before baking.
- Chocolate Variation: Experiment with different types of chocolate chips, such as dark chocolate, milk chocolate, or white chocolate.
- Nutty Addition: Add chopped walnuts, pecans, or almonds to the batter for a nutty crunch.
Serving & Storage Suggestions
Serve these Chocolate Overload Brownies slightly warm or at room temperature. They pair perfectly with a scoop of vanilla ice cream, a dollop of whipped cream, or a dusting of powdered sugar. For a grown-up treat, serve alongside a glass of red wine or a cup of strong coffee.
Store leftover brownies in an airtight container at room temperature for up to 3 days, in the refrigerator for up to a week, or in the freezer for up to 2 months. To reheat, warm in the microwave for a few seconds or in a low oven until heated through.
Nutritional Information
| Nutrient | Amount per Serving | % Daily Value |
|---|---|---|
| Calories | 323.8 kcal | N/A |
| Calories from Fat | 178 kcal | N/A |
| Total Fat | 19.9 g | 30% |
| Saturated Fat | 10.2 g | 51% |
| Cholesterol | 75.7 mg | 25% |
| Sodium | 94.2 mg | 3% |
| Total Carbohydrate | 36.9 g | 12% |
| Dietary Fiber | 1.9 g | 7% |
| Sugars | 28.4 g | N/A |
| Protein | 3.6 g | 7% |
Note: Nutritional information is an estimate and may vary based on specific ingredients and preparation methods.
Variations & Substitutions
- Gluten-Free Brownies: Substitute the all-purpose flour with a gluten-free all-purpose flour blend.
- Dairy-Free Brownies: Use a dairy-free butter alternative and dairy-free chocolate chips.
- Espresso Brownies: Add a teaspoon of instant espresso powder to the dry ingredients for a mocha flavor.
- Peanut Butter Swirl Brownies: Drizzle melted peanut butter over the batter before baking and swirl with a knife.
- Mint Chocolate Brownies: Add a few drops of peppermint extract to the batter for a refreshing twist.
FAQs (Frequently Asked Questions)
Q: Why is my brownie batter so thick?
A: It’s normal for brownie batter to be thick due to the high fat content from the butter and chocolate. Just make sure everything is well combined.
Q: How do I prevent my brownies from being too dry?
A: Avoid overbaking! Check for doneness a few minutes before the recommended baking time. A toothpick inserted into the center should come out with a few moist crumbs.
Q: Can I use a different size baking pan?
A: Yes, but you may need to adjust the baking time. A larger pan will result in thinner brownies and require less baking time, while a smaller pan will result in thicker brownies and require more baking time.
Q: What kind of cocoa powder should I use?
A: Dutch-processed cocoa powder will give a richer, darker chocolate flavor, while natural cocoa powder will have a slightly more acidic taste. Either will work well in this recipe.
Q: Can I freeze these brownies?
A: Yes, these brownies freeze well. Wrap them tightly in plastic wrap and then in foil, or store them in an airtight container. They can be frozen for up to 2 months.
Final Thoughts
These Chocolate Overload Brownies are more than just a dessert; they’re a chocolate lover’s dream come true. With their fudgy texture, intense chocolate flavor, and simple preparation, they’re perfect for any occasion, from a casual weeknight treat to a special celebration. So, preheat your oven, gather your ingredients, and prepare to indulge in a truly decadent experience. Don’t be afraid to experiment with variations and make them your own. And most importantly, share your creations with friends and family – they’re sure to be a hit! Pair these with a cold glass of milk or a scoop of ice cream for the ultimate comfort food experience. Enjoy!