
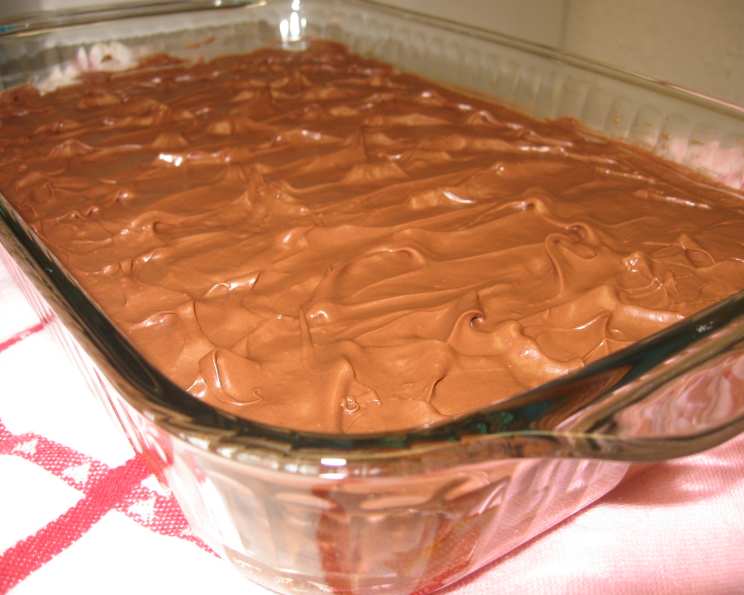
Decadent Chocolate Peanut Butter Bars: A Symphony of Sweet and Salty
The scent of peanut butter and chocolate, mingling and swirling in the warm air of the kitchen, always takes me back to my childhood. My grandmother, a woman who believed in the power of simple pleasures, would often bake these bars on rainy afternoons. The sheer joy on my face as I sunk my teeth into the chewy, chocolate-studded goodness is a memory I cherish, and now I’m thrilled to share that same joy with you.
Recipe Overview
- Prep Time: 15 minutes
- Cook Time: 25-30 minutes
- Total Time: 40-45 minutes
- Yields: Approximately 24 bars
- Dietary Type: Not Gluten-Free
Ingredients
- 1 cup creamy peanut butter
- 6 tablespoons butter, softened
- 1 1/4 cups sugar
- 3 eggs
- 1 teaspoon vanilla extract
- 1 cup all-purpose flour
- 1/4 teaspoon salt
- 2 cups milk chocolate chips or semi-sweet chocolate chips, divided
Equipment Needed
- Large mixing bowl
- Electric mixer
- 13×9 inch baking pan
- Measuring cups and spoons
- Rubber spatula
Instructions
-
Begin by preheating your oven to 350 degrees Fahrenheit (175 degrees Celsius). This is a crucial first step, ensuring the bars bake evenly.
-
In a large mixing bowl, cream together the peanut butter and softened butter using an electric mixer. Beat until the mixture is smooth and fully combined, about 1 minute. Softened butter is essential for achieving a creamy texture; if you forgot to take it out in advance, microwave it in 5-second intervals until just softened, being careful not to melt it.
-
Add the sugar, eggs, and vanilla extract to the peanut butter mixture. Beat until light and creamy, ensuring the sugar is fully incorporated. This step is where the batter starts to develop its structure and sweetness.
-
In a separate bowl, whisk together the all-purpose flour and salt. This ensures even distribution of the salt throughout the batter, enhancing the overall flavor profile.
-
Gradually blend the dry ingredients (flour and salt) into the wet ingredients (peanut butter mixture). Mix until just combined. Be careful not to overmix, as this can lead to tough bars. A few streaks of flour are perfectly fine at this stage.
-
Stir in 1 cup of the chocolate chips into the batter. This adds a delightful chocolatey burst within the bars themselves.
-
Spread the batter evenly into an ungreased 13×9 inch baking pan. Make sure the batter reaches all corners of the pan for uniform thickness.
-
Bake for approximately 25-30 minutes, or until the edges begin to brown and a toothpick inserted into the center comes out with moist crumbs. Keep a close eye on the bars, as baking times can vary depending on your oven.
-
Remove the pan from the oven and immediately sprinkle the remaining 1 cup of chocolate chips over the hot cookie layer. The residual heat will soften the chips.
-
To create a smooth, glossy chocolate topping, either let the bars sit for 5 minutes, allowing the chocolate chips to soften from the heat of the bars, or return the pan to the oven for 1 minute. This additional minute will ensure the chips are perfectly melty.
-
Spread the softened chocolate chips evenly over the top using a spatula. This creates a rich, decadent chocolate layer that complements the peanut butter base.
-
Cool the bars completely in the pan before cutting into squares. This allows the bars to firm up and makes them easier to slice.
-
Once cooled, cut into bars and serve. Enjoy the delightful combination of peanut butter and chocolate!
Expert Tips & Tricks
- For an extra chewy texture, underbake the bars slightly. They will continue to set as they cool.
- If you prefer a richer chocolate flavor, use dark chocolate chips instead of milk or semi-sweet.
- To prevent the chocolate from cracking when cutting, use a warm knife. Run the knife under hot water and dry it before each slice.
- For a more intense peanut butter flavor, use natural peanut butter. Just be sure to stir it well before using, as the oil tends to separate.
- Add a sprinkle of flaky sea salt on top of the melted chocolate layer for a sophisticated sweet-and-salty contrast.
Serving & Storage Suggestions
These Chocolate Peanut Butter Bars are perfect served at room temperature. They pair wonderfully with a cold glass of milk, a scoop of vanilla ice cream, or a hot cup of coffee.
To store, keep them in an airtight container at room temperature for up to 3 days. For longer storage, refrigerate them for up to a week, or freeze them for up to 2 months. To freeze, wrap the bars individually in plastic wrap and then place them in a freezer-safe bag or container. Thaw at room temperature before serving.
Nutritional Information
Note: Nutritional information is an estimate and may vary based on specific ingredients used.
| Nutrient | Amount per Serving | % Daily Value |
|---|---|---|
| Calories | 220 kcal | 11% |
| Total Fat | 12g | 18% |
| Saturated Fat | 5g | 25% |
| Cholesterol | 30mg | 10% |
| Sodium | 70mg | 3% |
| Total Carbohydrate | 25g | 8% |
| Dietary Fiber | 1g | 4% |
| Sugars | 18g | 36% |
| Protein | 4g | 8% |
Variations & Substitutions
- Gluten-Free: Substitute the all-purpose flour with a gluten-free all-purpose blend. Be sure to choose a blend that contains xanthan gum or add it separately to help bind the ingredients.
- Dairy-Free: Use a dairy-free butter alternative. Ensure the chocolate chips are also dairy-free.
- Different Nut Butters: Try almond butter or cashew butter instead of peanut butter for a unique flavor profile.
- Add-ins: Get creative with add-ins! Consider chopped nuts, pretzels, or even a layer of caramel.
FAQs (Frequently Asked Questions)
Q: Can I use chunky peanut butter?
A: While creamy peanut butter is preferred for a smoother texture, you can use chunky peanut butter if you enjoy the added crunch.
Q: My bars are too crumbly. What did I do wrong?
A: Overmixing the batter can sometimes lead to crumbly bars. Also, ensure you’re using the correct amount of butter and that it’s properly softened.
Q: Can I make these ahead of time?
A: Absolutely! These bars are perfect for making ahead of time. They store well in the refrigerator or freezer.
Q: How do I get a clean cut when slicing the bars?
A: Use a warm, sharp knife and wipe it clean between each cut. Cooling the bars completely also helps.
Q: My chocolate chips didn’t melt completely. What should I do?
A: If the chocolate chips aren’t melting properly, try placing the bars under the broiler for a few seconds, watching very carefully to prevent burning. Alternatively, you can melt the chocolate separately and spread it over the top.
Final Thoughts
I truly believe that food has the power to transport us back to cherished moments and create new memories. These Chocolate Peanut Butter Bars are more than just a dessert; they’re a taste of nostalgia, a reminder of simpler times, and a celebration of the perfect combination of sweet and salty. So, gather your ingredients, preheat your oven, and embark on this delicious baking adventure. I can’t wait to hear what you think!