
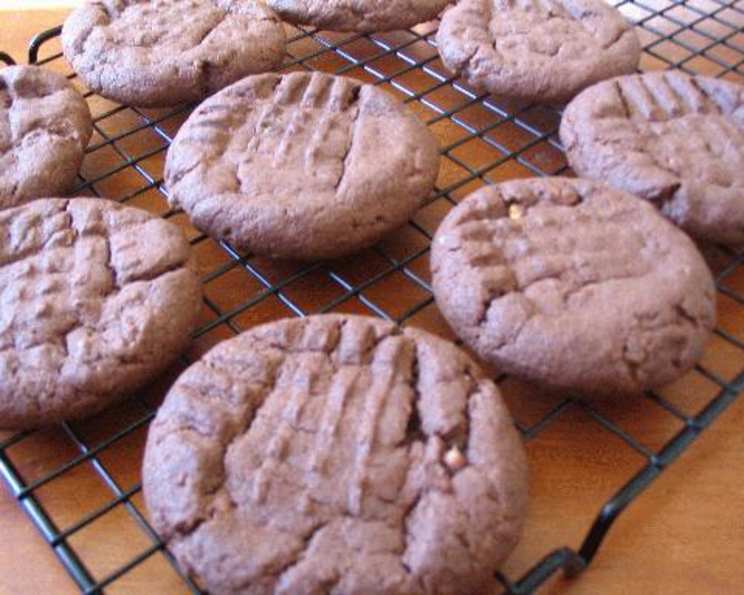
Chocolate Peanut Butter Cookies: A Childhood Classic, Elevated
There’s a specific smell that instantly transports me back to my grandmother’s kitchen – a heady mix of warm peanut butter, melting chocolate, and the comforting scent of baking cookies. She always had a jar overflowing with these treats, their distinctive crisscross pattern etched into each one. Every bite was pure joy, a perfect balance of salty and sweet that always left me wanting more. I’ve spent years refining her original recipe, but the essence – that irreplaceable taste of childhood – remains untouched.
Recipe Overview
- Prep Time: 15 minutes
- Cook Time: 8-10 minutes
- Total Time: 23-25 minutes
- Yields: Approximately 48 cookies
- Dietary Type: Vegetarian
Ingredients
- 1 cup peanut butter (creamy or chunky, your preference!)
- ¾ cup butter or margarine, softened
- ¾ cup sugar
- ¼ cup brown sugar, packed
- ½ cup cocoa powder, unsweetened
- 1 large egg
- 2 teaspoons vanilla extract
- ½ teaspoon baking soda
- 1 ¼ cups all-purpose flour
Equipment Needed
- Mixing Bowls
- Electric Mixer (stand or hand mixer)
- Measuring Cups and Spoons
- Baking Sheets
- Parchment Paper (optional, for easier cleanup)
- Fork
Instructions
-
Preheat your oven to 375°F (190°C). Make sure your oven rack is positioned in the center.
-
In a large mixing bowl, cream together the peanut butter and softened butter (or margarine) using an electric mixer. Beat until the mixture is light and fluffy. This is a crucial step for achieving a tender cookie. Don’t rush it!
-
Gradually add the sugar and brown sugar to the peanut butter mixture, beating until well combined and the mixture is light and airy. The sugar should be fully incorporated.
-
Incorporate the cocoa powder, egg, vanilla extract, and baking soda. Mix until everything is thoroughly combined and the batter looks smooth and rich.
-
Gradually add the flour to the wet ingredients, mixing on low speed until just combined. Be careful not to overmix, as this can result in tough cookies. Stop mixing when the flour is almost fully incorporated, then finish mixing by hand with a spatula.
-
Roll rounded tablespoons of the dough into balls, approximately 1 1/4 inches in diameter. This size will yield perfectly portioned cookies.
-
Place the dough balls on ungreased baking sheets (or baking sheets lined with parchment paper) leaving about 1 1/2 inches of space between each cookie. This prevents them from sticking together as they spread during baking.
-
Use a fork to flatten each cookie, pressing down in a crisscross pattern. This not only gives the cookies their signature look but also helps them bake evenly. Dip the fork in sugar between cookies to prevent sticking.
-
Bake for 8-10 minutes, or until the tops of the cookies look dry. Be careful not to overbake, as they will continue to firm up as they cool. The edges should be set, but the centers might still appear slightly soft.
-
Remove the baking sheets from the oven and let the cookies cool on the baking sheets for a few minutes before transferring them to a wire rack to cool completely. This prevents them from breaking while they are still warm and delicate.
Expert Tips & Tricks
- Peanut Butter Perfection: Using a high-quality peanut butter makes a world of difference. Opt for natural peanut butter (just peanuts and salt) for the best flavor. If using natural peanut butter, be sure to stir it well before measuring.
- Soft Butter is Key: Ensure your butter is properly softened. It should be soft enough to easily indent with your finger but not melted. This is essential for achieving a light and fluffy texture.
- Cocoa Considerations: Dutch-processed cocoa powder will give a deeper, more intense chocolate flavor. However, natural cocoa powder works just as well.
- Don’t Overmix: Overmixing the dough develops the gluten in the flour, resulting in tougher cookies. Mix just until the ingredients are combined.
- Preventing Sticking: If your cookies are sticking to the baking sheet, try lining it with parchment paper or a silicone baking mat.
- Make-Ahead Dough: The cookie dough can be made ahead of time and stored in the refrigerator for up to 3 days. Bring the dough to room temperature slightly before rolling and baking. You can also freeze the dough for longer storage (up to 2 months).
- Even Baking: For even baking, rotate the baking sheets halfway through the baking time.
Serving & Storage Suggestions
These Chocolate Peanut Butter Cookies are delicious served warm or at room temperature. They pair perfectly with a glass of cold milk, a scoop of vanilla ice cream, or a hot cup of coffee.
Store leftover cookies in an airtight container at room temperature for up to 5 days. For longer storage, freeze the cookies in a single layer on a baking sheet, then transfer them to a freezer-safe bag or container. Frozen cookies can be stored for up to 2 months. Thaw at room temperature before serving.
Nutritional Information
| Nutrient | Amount per Serving | % Daily Value* |
|---|---|---|
| Calories | 85 kcal | 4% |
| Total Fat | 5.8 g | 8% |
| Saturated Fat | 2.5 g | 12% |
| Cholesterol | 12 mg | 4% |
| Sodium | 60 mg | 2% |
| Total Carbohydrate | 7.2 g | 2% |
| Dietary Fiber | 0.7 g | 2% |
| Sugars | 3.7 g | N/A |
| Protein | 2 g | 4% |
*Percent Daily Values are based on a 2,000 calorie diet. Your daily values may be higher or lower depending on your calorie needs.
Variations & Substitutions
- Chunky Chocolate Peanut Butter Cookies: Add chocolate chips (milk, dark, or white) to the dough for an extra chocolatey treat.
- Peanut Butter Cup Cookies: Press a mini peanut butter cup into the center of each cookie immediately after baking.
- Gluten-Free Chocolate Peanut Butter Cookies: Substitute the all-purpose flour with a gluten-free blend. Be sure to use a blend that contains xanthan gum for best results.
- Vegan Chocolate Peanut Butter Cookies: Replace the butter with a vegan butter alternative and the egg with a flax egg (1 tablespoon ground flaxseed mixed with 3 tablespoons water, let sit for 5 minutes to thicken).
- Salted Caramel Chocolate Peanut Butter Cookies: Drizzle melted caramel and sprinkle sea salt over the cooled cookies.
- Spice it Up: Add a pinch of cinnamon or cayenne pepper to the dough for a warm and spicy kick.
FAQs (Frequently Asked Questions)
Q: Why are my cookies flat?
A: Your butter may have been too soft, or you may have overmixed the dough. Make sure your butter is softened but not melted, and mix the dough until just combined.
Q: Why are my cookies dry and crumbly?
A: You may have added too much flour, or you may have overbaked the cookies. Measure the flour accurately, and bake the cookies until the tops look dry but the centers are still slightly soft.
Q: Can I use natural peanut butter?
A: Yes! Natural peanut butter works great, but be sure to stir it well before measuring.
Q: How do I prevent the fork from sticking when making the crisscross pattern?
A: Dip the fork in sugar between each cookie. This will help prevent sticking and create a nice sugary crust.
Q: Can I freeze the cookie dough?
A: Yes, you can freeze the cookie dough for up to 2 months. Roll the dough into balls, place them on a baking sheet, and freeze until solid. Then, transfer the frozen dough balls to a freezer-safe bag or container. Bake from frozen, adding a few extra minutes to the baking time.
Final Thoughts
These Chocolate Peanut Butter Cookies are more than just a recipe; they’re a hug in cookie form. The perfect blend of chocolate and peanut butter creates a symphony of flavors that will delight your taste buds and warm your soul. So, gather your ingredients, preheat your oven, and get ready to create some delicious memories. Don’t be afraid to experiment with variations to make them your own! And most importantly, share them with loved ones and enjoy the simple pleasure of homemade cookies. I’d love to hear about your experience and any creative twists you add – happy baking!