
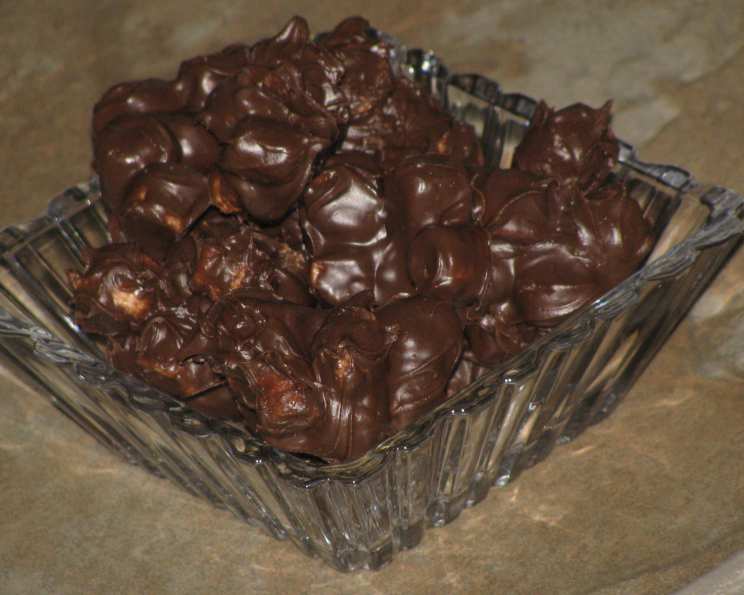
Chocolate Peanut Butter Pebbles: A Sweet Nostalgia Trip
I can almost smell it now: the rich aroma of melted chocolate mingling with peanut butter, a scent that instantly transports me back to childhood. My grandmother, a woman whose love language was undeniably baking, would whip up these delightful Chocolate Peanut Butter Pebbles every holiday season. They weren’t fancy, but they were perfect—a symphony of textures and flavors that always disappeared within minutes. Watching her carefully drop spoonfuls of the mixture onto waxed paper, a small smile playing on her lips, is a memory I cherish. Now, I carry on that tradition, and I’m so excited to share this incredibly simple yet deeply satisfying recipe with you.
Recipe Overview
- Prep Time: 10 minutes
- Cook Time: 5 minutes
- Total Time: 15 minutes (plus several hours chilling)
- Yields: 36-48 pieces
- Dietary Type: Vegetarian
Ingredients
- 1 (12 ounce) package semi-sweet chocolate chips
- 1 cup crunchy peanut butter
- 4 cups miniature marshmallows
Equipment Needed
- Large saucepan or microwavable bowl
- Spoon
- Waxed paper
- Cookie sheets
Instructions
- In a large saucepan or a large microwavable bowl, melt the chocolate chips and peanut butter together. If using a saucepan, use low heat and stir constantly to prevent burning. If microwaving, heat in 30-second intervals, stirring in between, until melted and smooth.
- Stir until well blended. This is a crucial step! Make sure the chocolate and peanut butter are fully incorporated for a consistent flavor and texture.
- Cool the mixture for 5 minutes. This slight cooling helps prevent the marshmallows from completely melting and disappearing into the chocolate. You want them to retain some of their texture.
- Add the marshmallows and stir until they are well coated. Gently fold them in so they are covered in the chocolate-peanut butter mixture. Avoid over-stirring, as this can break down the marshmallows and make the mixture sticky.
- Drop by teaspoonfuls onto waxed paper covered cookie sheets. A small cookie scoop also works well for this step, ensuring uniform pebble sizes. Make sure the pebbles are spaced out slightly to prevent them from sticking together while chilling.
- Refrigerate for several hours or until firm. This chilling time is essential! The pebbles need to solidify completely before they can be enjoyed.
Expert Tips & Tricks
- Use good quality chocolate: The better the chocolate, the richer the flavor of your pebbles. Don’t be afraid to experiment with different percentages of cacao for a more intense chocolate experience.
- Don’t burn the chocolate: Whether you’re melting the chocolate on the stovetop or in the microwave, be careful not to overheat it. Burnt chocolate has a bitter taste that will ruin the whole batch. Low and slow is the key!
- Customize the peanut butter: While crunchy peanut butter adds a delightful textural element, you can use creamy peanut butter if you prefer a smoother finish. You can also experiment with different flavors of peanut butter, such as honey roasted or chocolate peanut butter.
- Add a pinch of salt: A small pinch of salt to the melted chocolate mixture enhances the sweetness and brings out the flavors of the chocolate and peanut butter.
- Make them festive: For holidays, you can add sprinkles or other edible decorations before the pebbles set. Red and green sprinkles for Christmas, pastel sprinkles for Easter, etc.
- Prevent sticking: If the pebbles are sticking to the waxed paper, lightly grease the waxed paper with cooking spray before dropping the mixture onto it.
Serving & Storage Suggestions
These Chocolate Peanut Butter Pebbles are best served chilled. They make a wonderful addition to dessert platters, party snacks, or simply a sweet treat to enjoy on your own.
- Storage: Store the pebbles in an airtight container in the refrigerator for up to a week. You can also freeze them for up to a month. Thaw them in the refrigerator before serving.
- Serving: Arrange the pebbles attractively on a plate or in a bowl. You can also dust them with powdered sugar or cocoa powder for a more elegant presentation.
Nutritional Information
| Nutrient | Amount per Serving | % Daily Value |
|---|---|---|
| Calories | 105 kcal | N/A |
| Calories from Fat | 57 kcal | N/A |
| Total Fat | 6.4 g | 9% |
| Saturated Fat | 2.3 g | 11% |
| Cholesterol | 0 mg | 0% |
| Sodium | 40.3 mg | 1% |
| Total Carbohydrate | 12 g | 4% |
| Dietary Fiber | 1.1 g | 4% |
| Sugars | 8.9 g | N/A |
| Protein | 2.2 g | 4% |
Note: Nutritional information is an estimate and may vary based on specific ingredients and portion sizes.
Variations & Substitutions
- Vegan Chocolate Peanut Butter Pebbles: Use vegan chocolate chips and vegan marshmallows to make this recipe plant-based.
- Nut-Free Option: Substitute the peanut butter with sunflower seed butter or another nut-free alternative.
- Dark Chocolate Version: Use dark chocolate chips for a richer, more intense chocolate flavor.
- White Chocolate Version: Use white chocolate chips for a sweeter, more decadent treat.
- Spice it up: Add a pinch of chili powder to the melted chocolate mixture for a surprising kick.
- Add-ins: Stir in chopped nuts, dried fruit, or pretzels for added texture and flavor.
FAQs (Frequently Asked Questions)
Q: Can I use regular-sized marshmallows instead of miniature ones?
A: Yes, but you’ll need to chop them into smaller pieces before adding them to the chocolate mixture. Miniature marshmallows are easier to work with, but regular-sized ones will work in a pinch.
Q: What if my chocolate seizes up when melting?
A: This usually happens when moisture gets into the chocolate. Try adding a teaspoon of vegetable oil or shortening to help smooth it out. Avoid getting any water near the melting chocolate.
Q: How long do these pebbles last?
A: When stored in an airtight container in the refrigerator, they can last up to a week.
Q: Can I freeze these?
A: Yes, you can freeze them for up to a month. Be sure to store them in an airtight container to prevent freezer burn.
Q: What can I use instead of waxed paper?
A: Parchment paper is a good alternative to waxed paper.
Final Thoughts
These Chocolate Peanut Butter Pebbles are more than just a recipe; they’re a connection to simpler times, a reminder of the joy of homemade treats, and a delicious way to share love with family and friends. I encourage you to give this recipe a try, experiment with your own variations, and create your own sweet memories. Don’t be afraid to get creative and have fun! And most importantly, savor every bite of these delightful little pebbles. They’re a perfect reminder that the simplest things in life are often the sweetest. Happy baking!