
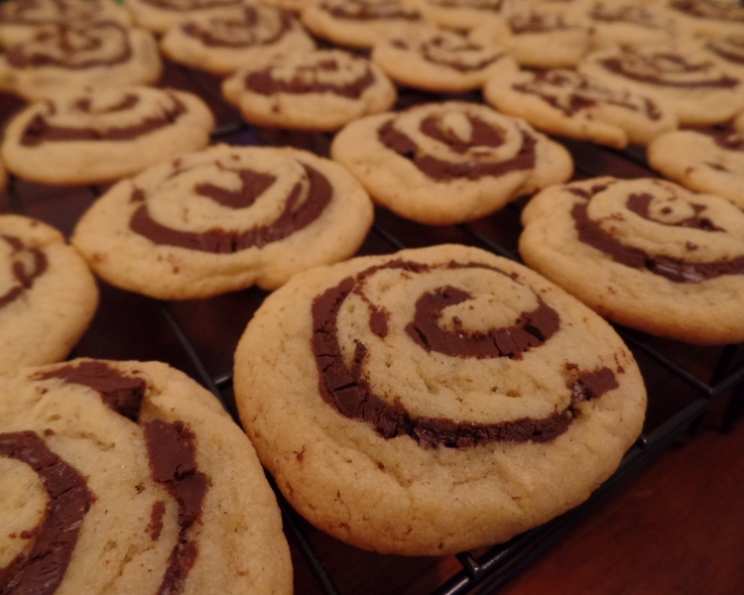
Chocolate Pinwheels: A Swirl of Nostalgia
I remember standing on a stool next to my grandmother, her flour-dusted hands guiding mine as we rolled out dough. The scent of vanilla and melting chocolate filled her cozy kitchen, a haven of warmth and delicious aromas. Our mission that day was chocolate pinwheels, a treat that always felt like a little bit of magic. Each swirl held the promise of sweet chocolate and buttery dough, a simple pleasure that still brings me back to those cherished moments with her.
Recipe Overview
- Prep Time: 1 hour (plus chilling time)
- Cook Time: 7-10 minutes
- Total Time: 3 hours
- Yields: 9 dozen cookies
- Serves: 50
- Dietary Type: Vegetarian
Ingredients
- 10 tablespoons butter, divided
- 1 cup sugar
- ¼ cup brown sugar, packed
- 1 egg
- 1 ¾ teaspoons vanilla extract, divided
- 2 cups all-purpose flour
- 1 teaspoon baking powder
- ¼ teaspoon salt, divided
- 2 cups semi-sweet chocolate chips
Equipment Needed
- Mixing bowls
- Electric mixer
- Wax paper
- Rolling pin
- Measuring cups and spoons
- Microwave-safe bowl or double boiler
- Parchment paper
- Baking sheets
Instructions
- Begin by softening ½ cup (or 4 tablespoons) of the butter. It should be pliable but not melted.
- In a large mixing bowl, cream together the softened butter, sugar, and packed brown sugar using an electric mixer until light and fluffy. This step is crucial for incorporating air and creating a tender cookie.
- Add the egg and 1 ½ teaspoons of vanilla extract to the creamed mixture. Beat until everything is well combined and the mixture is light and airy.
- In a separate bowl, whisk together the flour, baking powder, and ⅛ teaspoon of the salt. This ensures the baking powder is evenly distributed throughout the flour.
- Gradually add the dry ingredients to the wet ingredients, mixing well until a dough forms. Be careful not to overmix, as this can result in tough cookies.
- Divide the dough in half. Place each half between two sheets of wax paper.
- Using a rolling pin, roll each half of the dough out into a 12-inch by 10-inch rectangle. Aim for an even thickness across the entire rectangle.
- Chill the rolled-out dough (still between the wax paper) until it is almost firm. This usually takes about 30 minutes in the refrigerator. Chilling the dough makes it easier to work with and prevents the pinwheels from spreading too much during baking.
- While the dough is chilling, prepare the chocolate filling. Melt the chocolate chips and the remaining 2 tablespoons of butter in a microwave-safe bowl in 30-second intervals, stirring in between, or in a double boiler over simmering water. Be careful not to overheat the chocolate.
- Once the chocolate is melted and smooth, add the remaining ¼ teaspoon of vanilla extract and ¼ teaspoon of salt. Mix well to combine. The salt helps to balance the sweetness of the chocolate.
- Remove one rectangle of chilled dough from the refrigerator. Spread half of the melted chocolate mixture evenly over the surface of the dough, leaving a small border along the edges.
- Starting from one of the long edges, roll the rectangle of dough up tightly into a jelly roll.
- Wrap the rolled-up dough in wax paper. Repeat steps 11 and 12 with the remaining dough and chocolate mixture.
- Chill both rolls of dough in the refrigerator until firm, about 2 hours. This step is crucial for clean slicing.
- Preheat your oven to 350°F (175°C). Line baking sheets with parchment paper.
- Remove one roll of chilled dough from the refrigerator. Using a sharp knife, cut the roll into ⅛-inch slices. The thinner the slices, the more delicate the pinwheels will be.
- Place the sliced pinwheels on the prepared baking sheets, leaving a little space between each cookie.
- Bake at 350°F (175°C) until the edges are lightly browned, about 7-10 minutes. Keep a close eye on them, as baking times can vary depending on your oven.
- Remove the baking sheets from the oven and let the pinwheels cool on the sheets for a few minutes before transferring them to a wire rack to cool completely.
Expert Tips & Tricks
- Temperature is key: Ensure your butter for the dough is softened but not melted, and that your chocolate is melted smoothly without burning.
- Chill time is crucial: Don’t rush the chilling process. Firm dough is much easier to roll and slice cleanly.
- Even slices: For uniform cookies, use a sharp, thin knife and a gentle sawing motion to slice the chilled dough.
- Prevent sticking: If the dough is sticking to the wax paper, try dusting the paper with a little flour or confectioners’ sugar.
- Don’t overbake: These cookies brown quickly. Keep a close watch on them to prevent them from becoming dry or burnt.
Serving & Storage Suggestions
These chocolate pinwheels are perfect served with a glass of cold milk, a cup of hot coffee, or a scoop of vanilla ice cream. They also make a delightful addition to a cookie platter or a homemade gift.
To store, keep the cooled cookies in an airtight container at room temperature for up to 3 days. For longer storage, you can freeze them in a freezer-safe container for up to 2 months. Thaw them at room temperature before serving. You can also freeze the unbaked dough rolls for up to 2 months. When ready to bake, thaw the dough in the refrigerator overnight and slice and bake as directed.
Nutritional Information
| Nutrient | Amount per Serving | % Daily Value |
|---|---|---|
| Calories | 88.2 kcal | N/A |
| Calories from Fat | 40 g | 46% |
| Total Fat | 4.5 g | 6% |
| Saturated Fat | 2.7 g | 13% |
| Cholesterol | 9.8 mg | 3% |
| Sodium | 41.5 mg | 1% |
| Total Carbohydrate | 12.2 g | 4% |
| Dietary Fiber | 0.5 g | 2% |
| Sugars | 7.7 g | 30% |
| Protein | 0.9 g | 1% |
Note: Nutritional information is an estimate and may vary based on specific ingredients and portion sizes.
Variations & Substitutions
- Mint Chocolate Pinwheels: Add a few drops of peppermint extract to the chocolate filling for a refreshing twist.
- Nutty Pinwheels: Sprinkle chopped nuts (such as pecans or walnuts) over the chocolate filling before rolling up the dough.
- Spice it up: Add a pinch of cinnamon or nutmeg to the dough for a warm, comforting flavor.
- Gluten-Free: Substitute a gluten-free all-purpose flour blend for the regular flour. Be sure to choose a blend that contains xanthan gum for best results.
- Dairy-Free: Use a dairy-free butter substitute for the butter in both the dough and the filling. Also, ensure your chocolate chips are dairy-free.
FAQs (Frequently Asked Questions)
Q: Can I make the dough ahead of time?
A: Absolutely! In fact, it’s recommended. The dough needs to be chilled for at least 2 hours, but you can make it up to 2 days in advance and store it in the refrigerator.
Q: Why are my pinwheels spreading too much during baking?
A: This is usually due to the dough not being chilled enough or the oven temperature being too low. Make sure to chill the dough thoroughly and preheat your oven properly.
Q: Can I use a different type of chocolate?
A: Yes, you can! Dark chocolate, milk chocolate, or even white chocolate would work well in this recipe. Adjust the amount of sugar in the dough accordingly, as dark chocolate is less sweet than milk chocolate.
Q: How do I prevent the chocolate from cracking when slicing the rolls?
A: Make sure the chocolate filling is not too thick or too hard. Also, use a sharp knife and a gentle sawing motion when slicing.
Q: What if I don’t have wax paper?
A: Parchment paper works just as well as wax paper for rolling and chilling the dough. You can also use plastic wrap.
Final Thoughts
These chocolate pinwheels are more than just a cookie; they are a nostalgic reminder of simpler times and cherished memories. Whether you’re baking them for a special occasion or just a cozy afternoon treat, I hope this recipe brings you as much joy as it has brought me. Don’t be afraid to experiment with different flavors and variations to create your own signature pinwheel. Happy baking, and please share your creations and feedback with me!