
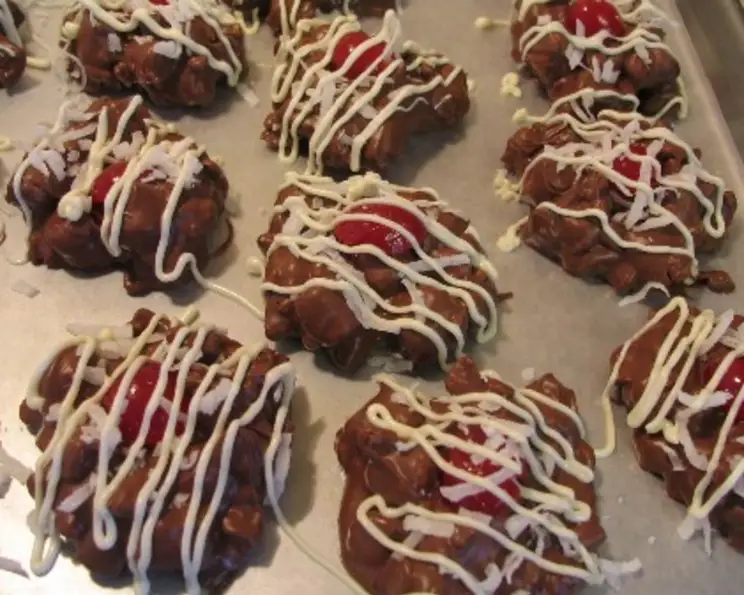
Chocolate Pizza: A Slice of Sweet Indulgence
I still remember the first time I saw a chocolate pizza. I was a wide-eyed kid at a local fair, and the sheer novelty of it stopped me in my tracks. Forget savory toppings – this “pizza” was a decadent canvas of melted chocolate, studded with colorful candies and crunchy nuts. It was love at first sight, and a sugar rush I’ll never forget. Today, I’ve elevated that childhood memory into a gourmet treat that’s perfect for parties, holidays, or just a fun weekend project with the family.
Recipe Overview
- Prep Time: 15 minutes
- Cook Time: 3 minutes
- Total Time: 2 hours 18 minutes (including chilling)
- Servings: 16-20
- Yield: 1 (13-inch) pizza
- Dietary Type: Vegetarian (can be adapted to Gluten-Free and Vegan)
Ingredients
- 3 cups vanilla chips, divided (2 1/2 cups and 1/2 cup)
- 2 cups semi-sweet chocolate chips (12 ounces)
- 2 cups miniature marshmallows
- 1 cup Rice Krispies
- 1 cup chopped walnuts
- 1/2 cup halved maraschino cherries, patted dry
- 1/4 cup flaked coconut
- 1 teaspoon vegetable oil
Equipment Needed
- Microwave-safe bowls
- 13-inch pizza pan
- Nonstick cooking spray
- Spatula or spoon
Instructions
- Begin by preparing your chocolate base. In a microwave-safe bowl, combine 2 1/2 cups of the vanilla chips with all 2 cups of the semi-sweet chocolate chips.
- Microwave the mixture on high power for 2 minutes. After 2 minutes, carefully remove the bowl (it will be hot!) and stir the chocolate. It likely won’t be fully melted at this point.
- Continue to microwave in shorter bursts of 1 to 2 minutes, stirring after each interval, until the chocolate is completely smooth and melted. Be cautious not to overheat the chocolate, as it can seize up.
- Immediately add the 2 cups of miniature marshmallows, 1 cup of Rice Krispies, and 1 cup of chopped walnuts to the melted chocolate mixture. Mix everything together thoroughly until the marshmallows, cereal, and walnuts are evenly coated in the chocolate. Work quickly, as the chocolate will begin to set as it cools.
- Lightly coat a 13-inch pizza pan with nonstick cooking spray. This will prevent the chocolate pizza from sticking to the pan and make it easier to remove once it’s set.
- Spread the chocolate mixture evenly onto the prepared pizza pan, using a spatula or spoon to create a smooth and uniform layer. Make sure to press down gently to compact the mixture.
- Now comes the fun part: adding the toppings! Arrange the 1/2 cup of halved maraschino cherries, which have been patted dry, on top of the chocolate base. The cherries add a pop of color and a burst of sweetness.
- Sprinkle the 1/4 cup of flaked coconut evenly over the entire pizza. The coconut adds a subtle tropical flavor and a nice textural contrast.
- In a separate microwave-safe bowl, place the remaining 1/2 cup of vanilla chips. Microwave on high for 1 minute, or until melted.
- Add 1 teaspoon of vegetable oil to the melted vanilla chips and stir until smooth and glossy. The vegetable oil helps to thin the melted vanilla and create a smooth drizzle.
- Drizzle the melted vanilla over the entire chocolate pizza, creating a decorative pattern. You can use a spoon or a piping bag to control the drizzle.
- Chill the chocolate pizza in the refrigerator until it is firm and completely set. This will take approximately 2 hours, or longer depending on the temperature of your refrigerator.
- Once the chocolate pizza is firm, remove it from the refrigerator and serve at room temperature. This allows the chocolate to soften slightly, making it easier to slice and eat.
Expert Tips & Tricks
- Preventing Seizing: To prevent your chocolate from seizing while melting, make sure your bowl and utensils are completely dry. Even a tiny drop of water can cause the chocolate to become grainy.
- Maraschino Cherry Prep: Be sure to pat the maraschino cherries thoroughly dry before adding them to the pizza. Excess moisture can prevent the chocolate from setting properly.
- Decorative Drizzles: For a more professional-looking drizzle, transfer the melted vanilla to a piping bag or a zip-top bag with a small corner snipped off. This will give you more control over the drizzle and allow you to create intricate designs.
- Nut Variety: Feel free to experiment with different types of nuts. Pecans, almonds, or even salted peanuts would be delicious additions to this chocolate pizza.
- Melting Chocolate Without a Microwave: If you prefer not to use a microwave, you can melt the chocolate in a double boiler or a heatproof bowl set over a simmering pot of water. Make sure the bottom of the bowl doesn’t touch the water.
Serving & Storage Suggestions
Serve the chocolate pizza sliced into wedges, just like a regular pizza. This dessert is best served at room temperature, which allows the chocolate to soften slightly. You can also add a scoop of vanilla ice cream on the side for an extra-indulgent treat.
To store leftover chocolate pizza, wrap it tightly in plastic wrap or place it in an airtight container. It will keep at room temperature for up to 3 days, in the refrigerator for up to a week, or in the freezer for up to 2 months. If frozen, thaw it in the refrigerator before serving.
Nutritional Information
| Nutrient | Amount per Serving | % Daily Value |
|---|---|---|
| Calories | 354.8 kcal | N/A |
| Calories from Fat | 197 g | 56% |
| Total Fat | 22 g | 33% |
| Saturated Fat | 10.7 g | 53% |
| Cholesterol | 4.5 mg | 1% |
| Sodium | 55.7 mg | 2% |
| Total Carbohydrate | 40.3 g | 13% |
| Dietary Fiber | 1.8 g | 7% |
| Sugars | 34.7 g | N/A |
| Protein | 4.1 g | 8% |
Note: Nutritional information is an estimate and can vary based on specific ingredients and serving sizes.
Variations & Substitutions
- Gluten-Free: Substitute the Rice Krispies with a gluten-free crispy rice cereal. Ensure all other ingredients are also certified gluten-free.
- Vegan: Use vegan chocolate chips, vegan vanilla chips, and vegan marshmallows. Many brands now offer excellent dairy-free alternatives.
- Festive Flavors: For a holiday twist, add crushed candy canes for a peppermint flavor or chopped dried cranberries for a festive touch.
- Nut-Free: Omit the walnuts or substitute them with sunflower seeds or pumpkin seeds for a nut-free version.
- White Chocolate Lover’s Dream: Use all white chocolate chips as the base and decorate with freeze-dried raspberries and pistachios.
FAQs (Frequently Asked Questions)
Q: Can I use dark chocolate instead of semi-sweet chocolate?
A: Yes, absolutely! Dark chocolate will give the pizza a richer, more intense chocolate flavor. Adjust the amount of vanilla chips to balance the bitterness if needed.
Q: Can I make this chocolate pizza ahead of time?
A: Definitely! The chocolate pizza can be made up to 3 days in advance and stored in the refrigerator.
Q: What is the best way to slice the chocolate pizza without it cracking?
A: Use a warm knife to slice the pizza. Run the knife under hot water, dry it, and then make your cuts. Repeat as needed.
Q: Can I use other types of candy for toppings?
A: Yes, get creative! M&Ms, chopped peanut butter cups, sprinkles, or any of your favorite candies would be great additions.
Q: My chocolate seized up while melting. Can I save it?
A: Sometimes you can save seized chocolate by adding a teaspoon of vegetable oil or shortening and stirring vigorously. If that doesn’t work, unfortunately, you’ll need to start over.
Final Thoughts
This Chocolate Pizza is more than just a dessert; it’s an experience. From the moment you start melting the chocolate to the satisfying crunch of the first bite, it’s a delightful journey for the senses. So gather your ingredients, preheat your… well, get your microwave ready, and prepare to create a dessert that’s sure to impress. Don’t be afraid to get creative with your toppings and make it your own! I would love to hear about your creations and any fun variations you come up with. Enjoy!