
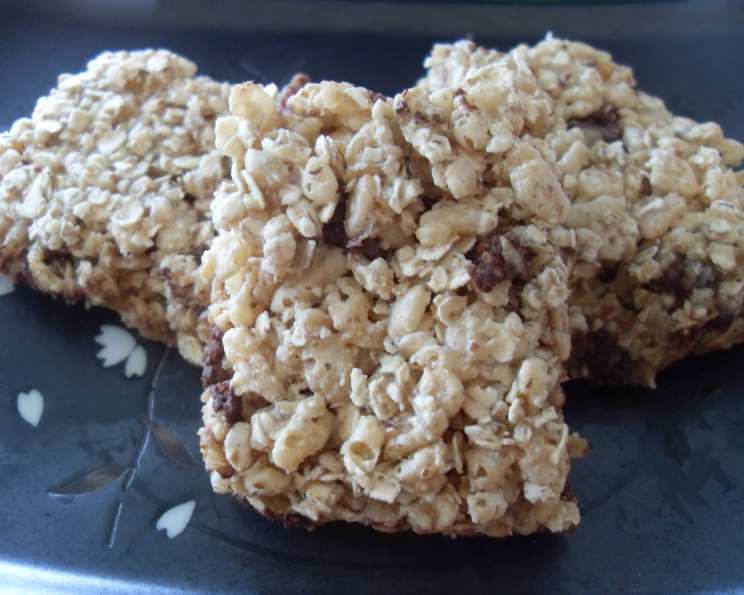
Chocolate Rice Bubble Bars: A Nostalgic Treat
I have vivid memories of my grandmother, a woman whose kitchen was a haven of comforting aromas and endless treats, making these Chocolate Rice Bubble Bars. Her gnarled hands, dusted with flour and cocoa, would carefully mix the ingredients, a slight smile playing on her lips. For me, these bars are more than just a simple snack; they’re a taste of childhood, a warm embrace of nostalgia, and a testament to the power of simple ingredients transformed into something extraordinary. Every bite takes me back to her sunny kitchen, filled with laughter and the sweet scent of chocolate.
Recipe Overview
- Prep Time: 10 minutes
- Cook Time: 40 minutes
- Total Time: 50 minutes
- Yields: 15 bars
- Serves: 15
- Dietary Type: Not specified
Ingredients
- ½ cup chocolate chips
- ½ cup chopped walnuts (optional)
- 1 (400 g) can condensed milk
- 3 cups rice bubbles
- 1 ½ cups oats
Equipment Needed
- Baking tray
- Lining paper (parchment paper or baking paper)
- Mixing bowl
- Spatula or spoon
Instructions
-
Preheat your oven to 180°C (350°F). Ensure the oven rack is positioned in the center.
-
In a large mixing bowl, combine the chocolate chips, chopped walnuts (if using), condensed milk, rice bubbles, and oats.
-
Thoroughly mix all the ingredients together until everything is evenly coated with the condensed milk and chocolate. It’s important to ensure the dry ingredients are well-distributed to prevent pockets of plain oats or rice bubbles.
-
Line a baking tray with parchment paper or baking paper. This will prevent the bars from sticking and make it easier to remove them after baking.
-
Transfer the mixture into the lined baking tray.
-
Use a spatula or your hands (slightly dampened to prevent sticking) to spread the mixture evenly across the tray. Gently press down to create a firm, even layer.
-
Place the baking tray in the preheated oven and bake for 5 minutes.
-
After 5 minutes, remove the baking tray from the oven and, using a sharp knife, mark the outline of the bars. This will make it easier to cut them into individual portions after the final baking.
-
Return the baking tray to the oven and continue to bake for 35 minutes, or until the mixture is crispy and lightly golden brown. The baking time may vary depending on your oven, so keep a close eye on them.
-
Once baked, remove the baking tray from the oven and allow the bars to cool completely in the tray before cutting them along the marked lines. Cooling them completely will allow the bars to firm up, making them easier to handle and cut neatly.
-
After cooling, cut the large baked rectangle into individual bars.
Expert Tips & Tricks
- Toast the Oats: For a deeper, nuttier flavor, lightly toast the oats in a dry pan over medium heat for a few minutes before adding them to the mixture. Be sure to stir frequently to prevent burning.
- Melt the Chocolate Chips: If you prefer a more intensely chocolatey flavor and a smoother texture, melt the chocolate chips with a tablespoon of butter before mixing them with the other ingredients. Be careful not to overheat the chocolate, as it can seize up.
- Use Different Nuts: Feel free to experiment with different types of nuts, such as almonds, pecans, or macadamia nuts. Roughly chop them for a more rustic texture.
- Spice it Up: Add a pinch of cinnamon, nutmeg, or even a dash of chili powder for a unique flavor twist.
- Even Baking: Rotate the baking tray halfway through the baking time to ensure even browning.
- Prevent Sticking: Ensure your baking tray is thoroughly lined with parchment paper to prevent the bars from sticking. Lightly greasing the parchment paper can also help.
- Adjust Sweetness: If you prefer less sweet bars, consider reducing the amount of condensed milk slightly.
Serving & Storage Suggestions
These Chocolate Rice Bubble Bars can be served hot or cold, and they are delicious either way. For a warm, gooey treat, serve them straight from the oven. Alternatively, let them cool completely for a chewier texture.
Store the cooled bars in an airtight container at room temperature for up to 3 days. For longer storage, you can refrigerate them for up to 1 week. You can also freeze the bars for up to 2 months. To freeze, wrap them individually in plastic wrap and then place them in a freezer-safe bag or container.
To reheat frozen bars, thaw them in the refrigerator overnight or at room temperature for a few hours. You can also warm them briefly in the microwave.
Nutritional Information
| Nutrient | Amount per Serving | % Daily Value |
|---|---|---|
| Calories | 193.5 kcal | N/A |
| Calories from Fat | 46 g | 24% |
| Total Fat | 5.1 g | 7% |
| Saturated Fat | 2.7 g | 13% |
| Cholesterol | 9.1 mg | 3% |
| Sodium | 85 mg | 3% |
| Total Carbohydrate | 32.9 g | 10% |
| Dietary Fiber | 2 g | 8% |
| Sugars | 18 g | 72% |
| Protein | 5.3 g | 10% |
Note: Nutritional information is an estimate and may vary based on specific ingredients and portion sizes.
Variations & Substitutions
- Gluten-Free: Use gluten-free oats to make these bars gluten-free. Ensure the rice bubbles are also certified gluten-free, as some brands may contain traces of gluten.
- Dairy-Free: While the original recipe calls for condensed milk, consider substituting it with a homemade vegan condensed milk using coconut milk. You’ll need to reduce coconut milk until thickened and then add sugar to taste.
- Nut-Free: Omit the walnuts entirely or substitute them with sunflower seeds or pumpkin seeds.
- Extra Chocolatey: Add a drizzle of melted chocolate on top of the cooled bars for an extra dose of chocolate indulgence.
- Fruity Twist: Incorporate dried cranberries, raisins, or chopped dried apricots into the mixture for a fruity variation.
FAQs (Frequently Asked Questions)
Q: Can I use a different type of cereal instead of rice bubbles?
A: Yes, you can substitute rice bubbles with other puffed cereals like cornflakes or even a mix of different cereals. Keep in mind that the texture and flavor will vary depending on the cereal you choose.
Q: My bars are too crumbly. What did I do wrong?
A: This usually happens if there is not enough condensed milk to bind the ingredients together. Make sure you are using the full can of condensed milk as specified in the recipe.
Q: How do I prevent the chocolate chips from burning in the oven?
A: Make sure the chocolate chips are well-distributed throughout the mixture and are not directly exposed on the surface. Also, keep an eye on the bars while baking and reduce the baking time if necessary.
Q: Can I make these bars ahead of time?
A: Absolutely! These bars are great for making ahead of time. They can be stored at room temperature for a few days or refrigerated for up to a week.
Q: Are these bars suitable for freezing?
A: Yes, they freeze very well. Wrap them individually in plastic wrap and store them in a freezer-safe container for up to two months.
Final Thoughts
These Chocolate Rice Bubble Bars are a delightful treat that’s easy to make and satisfying to eat. Whether you’re looking for a quick snack, a lunchbox addition, or a nostalgic reminder of childhood, this recipe is sure to please. So gather your ingredients, preheat your oven, and embark on a culinary journey that will fill your kitchen with warmth and your heart with joy. I encourage you to try this recipe and share your own variations and experiences. Happy baking!