
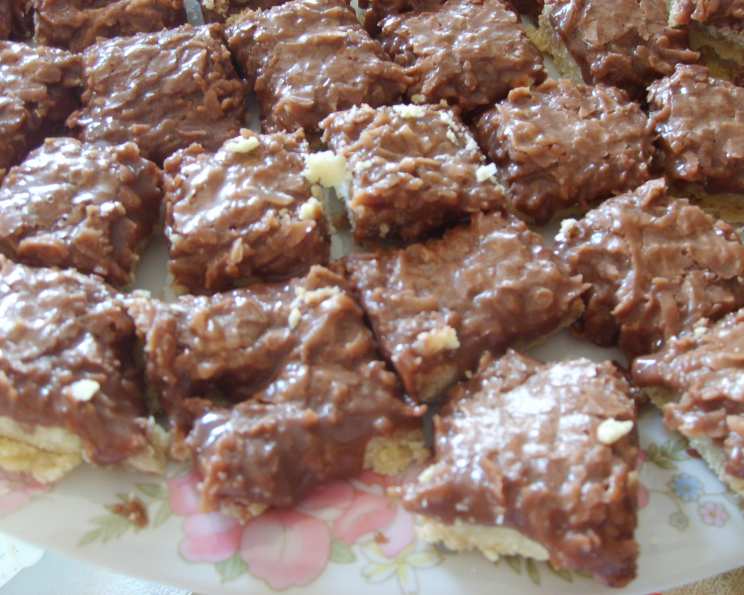
Chocolate Rough Slice: A Taste of Nostalgia
The scent of melting butter, cocoa, and condensed milk instantly transports me back to my grandmother’s kitchen. Her “rough slice,” as she affectionately called it, wasn’t about pristine edges or flawless ganache. It was about simple, honest ingredients transformed into a deeply satisfying treat. I remember standing on a wobbly stool, eager to help press the buttery base into the tin, my little hands leaving imperfect imprints that only added to its charm. This recipe isn’t just a dessert; it’s a warm hug of childhood memories.
Recipe Overview
- Prep Time: 15 minutes
- Cook Time: 20-25 minutes
- Total Time: 35-40 minutes
- Servings: Approximately 12 slices
- Yield: One 20x30cm slice (or a larger slice if doubled)
- Dietary Type: Not specified (can be modified to be gluten-free)
Ingredients
For the Base:
- 125g butter, melted
- ⅓ cup sugar
- ¼ cup coconut
- 1 cup self-raising flour
- 1 pinch salt
For the Topping:
- 1 tablespoon butter
- 1 tablespoon cocoa
- ½ (395g) can condensed milk
- 1 cup icing sugar
- 1 cup coconut
- ½ teaspoon vanilla
Equipment Needed
- 20x30cm slice tin (or a 9×13 inch tin if doubling the recipe)
- Baking paper
- Mixing bowl
- Saucepan
- Measuring cups and spoons
Instructions
- Begin by preparing your slice tin. Line the tin with baking paper, ensuring the paper overhangs the two longer sides. This will make it much easier to remove the slice later.
- Preheat your oven to 350 degrees Fahrenheit (180 degrees Celsius). Accurate oven temperature is essential for a perfectly baked base.
- Now, it’s time to make the base. In a mixing bowl, combine the melted butter, sugar, coconut, self-raising flour, and salt.
- Mix all the base ingredients together until they are well combined and form a cohesive dough. Don’t overmix, just ensure everything is evenly incorporated.
- Press the dough mixture firmly and evenly into the prepared slice tin. Use your fingers or the back of a spoon to create a smooth, consistent layer.
- Bake the base in the preheated oven for 20-25 minutes, or until it turns a light golden brown. Keep a close eye on it to prevent burning.
- Remove the base from the oven and let it cool slightly while you prepare the topping.
- While the base is baking (or cooling), prepare the topping. In a saucepan, combine the butter, cocoa, and condensed milk.
- Melt these ingredients together over a low heat, stirring constantly to prevent scorching. Once melted and smooth, remove the saucepan from the heat.
- Stir in the icing sugar, coconut, and vanilla until everything is well combined and the mixture is smooth and glossy.
- Once the base has cooled slightly, spread the topping evenly over the base.
- Let the topping set completely. This can take a few hours at room temperature, or you can speed up the process by placing the slice in the refrigerator.
- Once the topping has set, use the overhanging baking paper to lift the slice from the tin.
- Cut the slice into squares or rectangles using a sharp knife. For clean cuts, you can dip the knife in hot water between slices.
Expert Tips & Tricks
- For a richer chocolate flavor, use dark cocoa powder in the topping.
- If you don’t have self-raising flour, you can make your own by adding 1 ½ teaspoons of baking powder and ¼ teaspoon of salt to 1 cup of all-purpose flour.
- To prevent the topping from becoming too thick, be sure to melt the ingredients over low heat and stir constantly.
- If the topping is too thick, add a tablespoon of milk or cream to thin it out.
- For a festive touch, sprinkle some extra coconut or chocolate shavings over the topping before it sets.
- Make-ahead tip: The base can be baked a day in advance and stored in an airtight container at room temperature.
Serving & Storage Suggestions
Serve the Chocolate Rough Slice at room temperature for the best texture. It’s delicious on its own, but also pairs well with a scoop of vanilla ice cream or a dollop of whipped cream.
Store any leftover slice in an airtight container at room temperature for up to 3 days, or in the refrigerator for up to a week. You can also freeze it for up to 2 months. To freeze, wrap the slice tightly in plastic wrap and then in foil. Thaw in the refrigerator before serving.
Nutritional Information
| Nutrient | Amount per Serving | % Daily Value* |
|---|---|---|
| Calories | 353 kcal | 18% |
| Total Fat | 20 g | 30% |
| Saturated Fat | 14.3 g | 71% |
| Cholesterol | 36.5 mg | 12% |
| Sodium | 124.7 mg | 5% |
| Total Carbohydrate | 41.7 g | 13% |
| Dietary Fiber | 2.2 g | 8% |
| Sugars | 30 g | 120% |
| Protein | 3.8 g | 7% |
*Percent Daily Values are based on a 2,000 calorie diet. Your daily values may be higher or lower depending on your calorie needs. Note: These are estimated values and can vary based on specific ingredients used.
Variations & Substitutions
- Gluten-Free: Substitute the self-raising flour with a gluten-free flour blend. You may need to add a little xanthan gum to help bind the ingredients.
- Dairy-Free: Replace the butter in both the base and topping with a dairy-free butter alternative. Use dairy-free condensed milk, which is now available in many supermarkets or online.
- Nutty: Add chopped nuts (such as walnuts, pecans, or almonds) to the base or topping for added flavor and texture.
- Citrusy: Add the zest of an orange or lemon to the topping for a bright, refreshing twist.
- Spiced: Add a pinch of cinnamon or nutmeg to the base for a warm, comforting flavor.
FAQs (Frequently Asked Questions)
Q: Can I use regular flour instead of self-raising flour?
A: If you don’t have self-raising flour, you can use all-purpose flour and add baking powder (1 ½ teaspoons per cup of flour) and a pinch of salt to help the base rise.
Q: How do I prevent the topping from burning in the saucepan?
A: Be sure to melt the topping ingredients over low heat and stir constantly. This will prevent the mixture from sticking and burning.
Q: Can I freeze the Chocolate Rough Slice?
A: Yes, you can freeze the slice for up to 2 months. Wrap it tightly in plastic wrap and then in foil to prevent freezer burn.
Q: The topping is too thick, what can I do?
A: If the topping becomes too thick, add a tablespoon of milk or cream to thin it out. Stir well until it reaches the desired consistency.
Q: How do I get clean cuts when slicing?
A: To get clean cuts, use a sharp knife and dip it in hot water between slices. This will help prevent the topping from sticking to the knife.
Final Thoughts
This Chocolate Rough Slice is more than just a recipe; it’s a taste of home, a comforting treat that evokes fond memories. I encourage you to try it, to experiment with different variations, and to share it with loved ones. Whether you’re a seasoned baker or a novice in the kitchen, this recipe is simple enough for anyone to master. Bake up a batch today and let the warm, chocolatey aroma fill your home. And don’t hesitate to share your creations and feedback!