
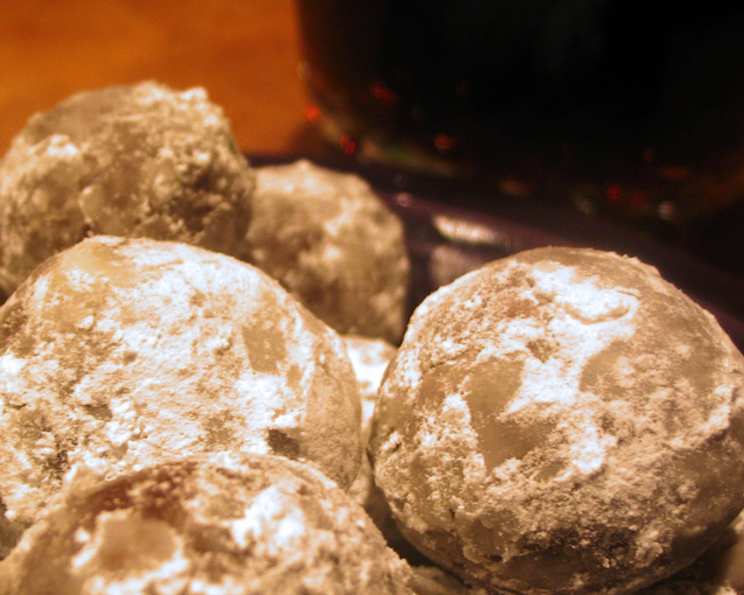
No-Bake Chocolate Rum Balls: A Taste of Nostalgia
The first time I tasted a chocolate rum ball, I was a curious child sneaking a treat from my grandmother’s dessert platter during the holidays. The intense chocolate flavor, the subtle warmth of the rum, and the satisfyingly fudgy texture were unlike anything I’d ever experienced. It was a grown-up indulgence cleverly disguised as a perfectly round, bite-sized sphere. From that moment on, chocolate rum balls became synonymous with festive cheer and the comforting aroma of my grandmother’s kitchen. Now, I’m excited to share this classic recipe, a no-bake wonder that brings those cherished memories to life with every bite.
Recipe Overview
- Prep Time: 15 minutes
- Total Time: 15 minutes (plus 2-3 days resting time)
- Yields: 48 balls
- Dietary Type: Not Gluten-Free
Ingredients
- 1 (12 ounce) package vanilla wafers, crushed
- 1 1/2 cups finely chopped nuts
- 3/4 cup icing sugar (confectioners’)
- 1/4 cup baking cocoa
- 1/2 cup light rum
- 3 tablespoons light corn syrup
- Additional icing sugar for rolling
Equipment Needed
- Large mixing bowl
- Measuring cups and spoons
- Food processor or rolling pin (for crushing wafers)
- Airtight container
Instructions
-
Crush the vanilla wafers: In a food processor, pulse the vanilla wafers until they are finely crushed. Alternatively, place the wafers in a resealable bag and crush them with a rolling pin.
-
Combine dry ingredients: In a large mixing bowl, combine the crushed vanilla wafers, finely chopped nuts, 3/4 cup icing sugar, and the baking cocoa. Ensure all ingredients are evenly distributed.
-
Add wet ingredients: Pour in the light rum and light corn syrup into the bowl with the dry ingredients.
-
Mix thoroughly: Use your hands or a sturdy spoon to thoroughly mix all the ingredients until a cohesive dough forms. It should be moist enough to hold its shape when pressed together. If the mixture seems too dry, add a teaspoon of rum at a time until the desired consistency is achieved.
-
Shape the dough: Take a small amount of the dough (about a tablespoon) and roll it between your palms to form a 1-inch ball. Repeat this process until all the dough is used.
-
Coat with icing sugar: Pour some additional icing sugar into a shallow dish. Roll each rum ball in the icing sugar, ensuring it is completely coated. This will give the rum balls a sweet and visually appealing finish.
-
Storage and Flavor Development: Place the coated rum balls in an airtight container. Store them in a cool, dark place (but not the refrigerator) for at least 2-3 days. This resting period is crucial for the flavors to meld together and for the rum to fully infuse the other ingredients.
-
Re-roll (Optional): Before serving, you may want to roll the rum balls in fresh icing sugar again to give them an extra dusting of sweetness and a polished look. This is especially nice if the initial coating has become slightly absorbed during the resting period.
Expert Tips & Tricks
- Nut Selection: Experiment with different types of nuts to find your favorite flavor combination. Walnuts, pecans, almonds, or even a mix can add unique textures and tastes. Toasting the nuts lightly before chopping them can enhance their flavor.
- Rum Quality Matters: Use a good quality light rum for the best flavor. Avoid overly cheap rums, as they can have a harsh taste.
- Customize the Flavor: For a deeper chocolate flavor, try adding a tablespoon of instant espresso powder to the dry ingredients.
- Making Ahead: These rum balls are perfect for making ahead of time. They actually improve with age as the flavors develop. You can easily make them a week or even two in advance.
- Troubleshooting Dry Dough: If your dough is too dry and crumbly, add a teaspoon of rum at a time until it comes together. Be careful not to add too much, or the rum balls will be too wet.
- Troubleshooting Wet Dough: If your dough is too wet and sticky, add a tablespoon of crushed vanilla wafers or icing sugar at a time until it reaches the right consistency.
Serving & Storage Suggestions
Serve chocolate rum balls as a festive treat during the holidays, at parties, or as a sweet ending to a meal. They pair wonderfully with coffee, tea, or a glass of dessert wine. To elevate the presentation, arrange the rum balls on a decorative platter or in small paper cups.
Store the rum balls in an airtight container at room temperature for up to 2 weeks. While refrigeration isn’t necessary, it can extend their shelf life slightly. However, be aware that refrigerating them may slightly alter their texture.
Freezing is also an option for longer storage. Place the rum balls in a single layer on a baking sheet and freeze them until solid. Then, transfer them to an airtight container or freezer bag. They can be frozen for up to 2 months. Thaw them at room temperature before serving.
Nutritional Information
Note: Nutritional information is an estimate and may vary based on specific ingredients used.
| Nutrient | Amount per Serving | % Daily Value |
|---|---|---|
| Calories | 105 kcal | 5% |
| Total Fat | 5g | 6% |
| Saturated Fat | 1g | 5% |
| Cholesterol | 0mg | 0% |
| Sodium | 30mg | 1% |
| Total Carbohydrate | 12g | 4% |
| Dietary Fiber | 0.5g | 2% |
| Sugars | 7g | N/A |
| Protein | 0.7g | 1% |
Variations & Substitutions
- Booze-Free Option: Replace the rum with rum extract mixed with water or apple juice for a non-alcoholic version. Start with a small amount of extract (1-2 teaspoons) and add more to taste.
- Bourbon Balls: Substitute the light rum with bourbon for a richer, more complex flavor.
- Coffee Liqueur Variation: Use coffee liqueur (such as Kahlua) instead of rum for a delightful coffee-chocolate twist.
- Gluten-Free Adaptation: Replace the vanilla wafers with gluten-free vanilla cookies or wafers.
- Chocolate Coating: For an even more decadent treat, dip the finished rum balls in melted dark chocolate and sprinkle with chopped nuts or sprinkles.
- Spice it up: Add a pinch of cinnamon, nutmeg, or cayenne pepper to the dry ingredients for a warm and spicy flavor.
FAQs (Frequently Asked Questions)
Q: Why do the rum balls need to sit for 2-3 days?
A: This resting period allows the flavors to fully meld together, particularly the rum, resulting in a richer and more complex taste.
Q: Can I use a different type of alcohol instead of rum?
A: Yes, you can substitute with bourbon, whiskey, brandy, or coffee liqueur depending on your preference.
Q: What if my rum ball mixture is too dry?
A: Add a teaspoon of rum or corn syrup at a time until the mixture comes together.
Q: Can I freeze rum balls?
A: Yes, freeze them in a single layer on a baking sheet before transferring to an airtight container for up to 2 months.
Q: Can I make these without nuts?
A: Absolutely. Simply omit the nuts or substitute with shredded coconut, or finely chopped dried fruit.
Final Thoughts
These no-bake chocolate rum balls are more than just a simple treat; they’re a delightful indulgence that evokes memories and brings joy. Whether you’re making them for a holiday celebration, a party, or simply to satisfy a sweet craving, I encourage you to try this classic recipe. Don’t be afraid to experiment with variations and make them your own. And most importantly, remember to share them with loved ones and spread the joy! I would love to hear your feedback and see your delicious creations. Cheers to many happy memories and unforgettable flavors!