
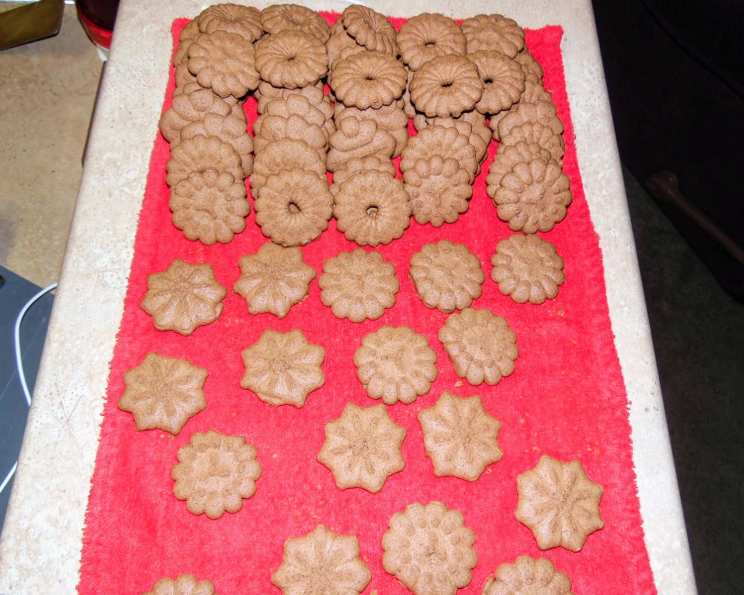
Chocolate Shortbread Press Cookies: A Nostalgic Treat
My cookie press was a gift, nestled amongst the usual wedding presents, a gleaming promise of effortless holiday baking. I remember its first triumphant batch of spritz cookies, a swirl of buttery vanilla against a snowy plate. But it wasn’t until I stumbled upon this recipe for chocolate shortbread press cookies that my little metal friend truly found its purpose. The deep, rich flavor and delicate, melt-in-your-mouth texture transformed the humble spritz into something genuinely special, a sophisticated treat that still evokes the warmth of those early married Christmases.
Recipe Overview
- Prep Time: 20 minutes
- Cook Time: 8-10 minutes
- Total Time: Approximately 30 minutes (plus chilling time)
- Yields: Approximately 72 cookies (6 dozen)
- Dietary Type: Not specified (contains dairy and eggs)
Ingredients
- 1 1⁄2 cups unsalted butter, at room temperature
- 1 cup sugar
- 1⁄2 teaspoon salt
- 1 tablespoon vanilla extract
- 2 large eggs, at room temperature
- 3 1⁄2 cups all-purpose flour
- 1⁄2 cup unsweetened cocoa powder
Equipment Needed
- Large mixing bowl
- Electric mixer (stand or hand mixer)
- Cookie press with desired discs
- Un-greased baking sheets
- Measuring cups and spoons
- Cooling rack
Instructions
-
Begin by preheating your oven to 375°F (190°C). Ensure the oven rack is positioned in the center for even baking.
-
In a large mixing bowl, cream together the softened butter, sugar, and salt. Using an electric mixer, beat the mixture on medium speed until it becomes light and fluffy. This usually takes about 3-5 minutes. Make sure to scrape down the sides of the bowl occasionally to ensure everything is evenly incorporated.
-
Add the vanilla extract and eggs to the creamed butter mixture, one at a time. Beat well after each addition until fully combined. The mixture should be smooth and emulsified.
-
In a separate bowl, whisk together the all-purpose flour and unsweetened cocoa powder. This ensures even distribution of the cocoa throughout the dough, preventing any bitter pockets.
-
Gradually add the flour and cocoa mixture to the wet ingredients, beating on low speed until just incorporated. Be careful not to overmix the dough, as this can develop the gluten in the flour and result in tough cookies. The dough should be smooth and slightly firm.
-
Load the dough into your cookie press, fitted with your chosen disc. Follow the manufacturer’s instructions for your specific cookie press model.
-
Press the dough out onto an un-greased baking sheet, spacing the cookies about 1 inch apart. Some cookie presses require you to press directly onto the baking sheet, while others dispense the dough onto a surface and then you transfer it. Experiment a little to find the technique that works best for your press.
-
Bake for 8 to 10 minutes, or until the edges of the cookies are lightly golden brown. Rotate the baking sheet halfway through the baking time to ensure even browning. Keep a close eye on them, as chocolate cookies can be tricky to judge doneness – you don’t want them to burn!
-
Remove the baking sheet from the oven and let the cookies cool on the baking sheet for a few minutes before transferring them to a wire rack to cool completely. This prevents them from breaking while they are still warm and delicate.
Expert Tips & Tricks
- Room Temperature Matters: Ensure both your butter and eggs are at room temperature. This helps create a smooth and even emulsion, resulting in a tender cookie. If you forgot to take the butter out in advance, you can gently soften it by microwaving it in short bursts (5-10 seconds) or placing it in a resealable bag and submerging it in warm water.
- Chilling the Dough (Optional): If you find the dough is too soft to work with, wrap it tightly in plastic wrap and chill it in the refrigerator for 30 minutes to an hour. This will firm it up and make it easier to press. However, be aware that chilling can sometimes make the dough a bit crumbly, so you may need to knead it slightly to bring it back together before loading it into the cookie press.
- Perfecting the Press: Experiment with different discs to create a variety of shapes. If the dough is sticking to the disc, try dusting it lightly with flour. Also, apply even pressure when pressing to ensure uniform cookies.
- Even Baking: To ensure consistent baking, use an oven thermometer to verify your oven temperature is accurate. If your oven tends to run hot or cold, adjust the baking time accordingly.
- Salvaging Crumbly Dough: If your dough is too dry and crumbly, try adding a teaspoon or two of milk or cream to bring it back together.
- Elevate the Flavor: For a deeper, richer chocolate flavor, try using Dutch-processed cocoa powder. You can also add a pinch of espresso powder to the dough.
Serving & Storage Suggestions
These chocolate shortbread press cookies are delightful served on their own with a cup of coffee or tea. They also make a beautiful addition to a cookie platter or gift basket.
- Storage: Store the cooled cookies in an airtight container at room temperature for up to a week.
- Freezing: For longer storage, you can freeze the cookies in a freezer-safe container for up to 2 months. Thaw completely before serving. You can also freeze the unbaked dough, tightly wrapped, for up to 3 months. Thaw in the refrigerator before using.
- Serving Suggestions: Dust the cookies with powdered sugar for an elegant presentation, or dip them in melted chocolate and sprinkle with chopped nuts. They also pair well with ice cream or whipped cream.
Nutritional Information
| Nutrient | Amount per Serving (Approximate) | % Daily Value (Approximate) |
|---|---|---|
| Calories | 71 kcal | 4% |
| Total Fat | 4.1g | 6% |
| Saturated Fat | 2.5g | 12% |
| Cholesterol | 15.3mg | 5% |
| Sodium | 18.9mg | 1% |
| Total Carbohydrate | 7.8g | 3% |
| Dietary Fiber | 0.4g | 2% |
| Sugars | 2.8g | N/A |
| Protein | 1g | 2% |
Note: Nutritional information is an estimate and can vary based on specific ingredients and serving sizes.
Variations & Substitutions
- Gluten-Free: Substitute the all-purpose flour with a gluten-free all-purpose flour blend. You may need to add a binding agent, such as xanthan gum, to help hold the dough together.
- Dairy-Free: Replace the butter with a plant-based butter alternative. Ensure the alternative has a high fat content for the best results.
- Flavor Variations: Add other spices to the dough, such as cinnamon, cardamom, or nutmeg, for a different flavor profile. You could also add chocolate chips, chopped nuts, or dried fruit.
- Extracts: Experiment with different extracts, such as almond, peppermint, or orange, to customize the flavor of the cookies.
FAQs (Frequently Asked Questions)
Q: Why are my cookies spreading too much during baking?
A: This can happen if the butter is too soft or if the oven temperature is too low. Make sure your butter is softened but not melted, and verify that your oven is properly preheated.
Q: My cookie dough is too dry and crumbly. What can I do?
A: Add a teaspoon or two of milk or cream to the dough and mix until it comes together. Avoid adding too much liquid, as this can make the cookies tough.
Q: Can I use a different type of sugar?
A: While granulated sugar is recommended for this recipe, you can experiment with other types of sugar, such as caster sugar or powdered sugar. However, this may affect the texture of the cookies.
Q: How do I prevent the cookies from sticking to the baking sheet?
A: Ensure that you are using an un-greased baking sheet. Too much grease can cause the cookies to spread and stick. If you are still having trouble, try using parchment paper or a silicone baking mat.
Q: Can I make the dough ahead of time?
A: Yes, you can make the dough ahead of time and store it in the refrigerator for up to 2 days. Wrap it tightly in plastic wrap to prevent it from drying out. Let it come to room temperature slightly before using.
Final Thoughts
These chocolate shortbread press cookies are more than just a recipe; they’re a connection to cherished memories and a celebration of simple pleasures. Don’t be afraid to experiment with different shapes and flavors to create your own signature version. I encourage you to try this recipe and share the joy of baking with your loved ones. These cookies are a testament to the fact that sometimes, the most delicious treats are also the most straightforward. So, preheat your oven, gather your ingredients, and let the sweet aroma of chocolate fill your kitchen!