
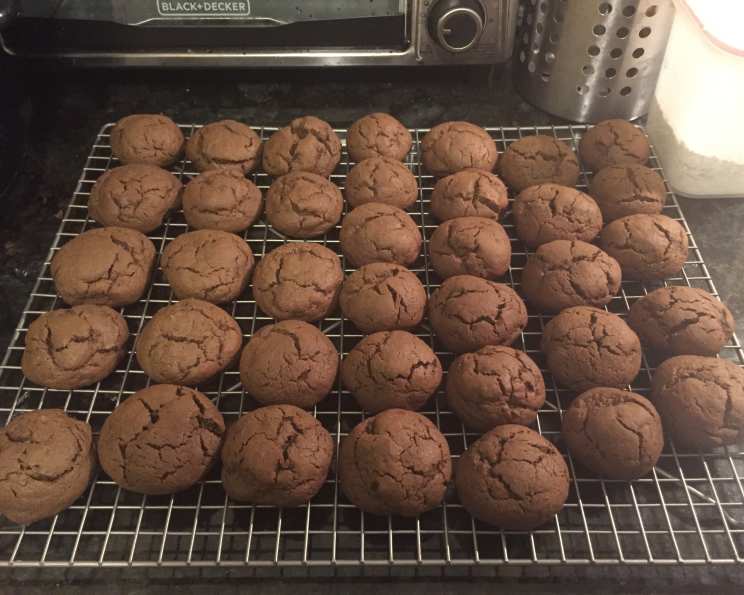
Decadent Chocolate Sugar Cookies: A Baker’s Delight
The memory is etched in my mind: a frosty December evening, the scent of pine needles battling with the rich aroma of baking chocolate. My grandmother, a woman whose hugs could thaw glaciers, would always make these chocolate sugar cookies for our annual holiday gathering. We cousins, fueled by sugar and festive spirit, would inevitably end up with chocolate-covered faces and powdered sugar dusting our hair, a small price to pay for the pure joy of those cookies. These aren’t just cookies; they’re edible time capsules, transporting me back to laughter, warmth, and the unconditional love of family.
Recipe Overview
- Prep Time: 20 minutes
- Cook Time: 9-10 minutes
- Total Time: 1 hour 30 minutes (includes chilling time)
- Servings: Approximately 35 cookies
- Yield: About 3 dozen cookies
- Dietary Type: Not specified (contains dairy and eggs)
Ingredients
- 1 cup butter, softened
- 1 1/2 cups brown sugar
- 2 eggs
- 1 teaspoon vanilla extract
- 3/4 cup cocoa powder
- 2 cups all-purpose flour
- 1 teaspoon baking soda
- 1 teaspoon salt
- 1/2 cup granulated sugar, for rolling
Equipment Needed
- Mixer (stand or hand mixer)
- Measuring cups and spoons
- Cookie scoop (optional, but recommended for uniform cookies)
- Baking sheets
- Parchment paper (optional, for lining baking sheets)
- Cooling rack
- Airtight container, for storage
Instructions
-
Begin by creaming together the softened butter and brown sugar in a mixing bowl. Use a mixer (either a stand mixer or a hand mixer will do) to combine them until the mixture is light and fluffy. This process typically takes about 5 minutes. Ensuring the butter is properly softened is crucial for achieving the right consistency.
-
Next, add the eggs, one at a time, to the butter and sugar mixture. Make sure to mix well after each addition, incorporating each egg fully before adding the next. Follow this by adding the vanilla extract and mixing until evenly distributed.
-
In a separate bowl, whisk together the dry ingredients: cocoa powder, all-purpose flour, baking soda, and salt. This ensures even distribution of the leavening agent (baking soda) and prevents clumps of cocoa powder in the final cookies.
-
Gradually add the dry ingredients to the wet ingredients, mixing on low speed until just combined. Be careful not to overmix, as this can result in tough cookies. Stop mixing as soon as the flour is incorporated. The dough will be quite thick.
-
Cover the bowl with plastic wrap and refrigerate the dough for one hour. This chilling period is essential for two reasons: it allows the butter to solidify, preventing the cookies from spreading too thin during baking, and it allows the flavors to meld together, enhancing the overall taste.
-
Preheat your oven to 350 degrees Fahrenheit (175 degrees Celsius). While the oven is preheating, prepare your baking sheets by either lightly greasing them or lining them with parchment paper. Parchment paper makes for easy cleanup and helps prevent the cookies from sticking.
-
Once the dough has chilled, use a cookie scoop (or a spoon, if you don’t have a scoop) to portion out the dough. Aim for consistent sizes to ensure even baking. Roll each ball of dough in the granulated sugar, coating it completely. The sugar coating not only adds sweetness and a delightful crunch but also contributes to the cookie’s attractive appearance.
-
Place the sugar-coated dough balls onto the prepared baking sheets, spacing them approximately 2 inches apart. This spacing allows for spreading during baking and prevents the cookies from sticking together.
-
Bake in the preheated oven for 9-10 minutes. Keep a close eye on the cookies, as baking times can vary depending on your oven. The cookies are done when the edges are set, and the centers are still slightly soft.
-
Remove the baking sheets from the oven and let the cookies cool on the baking sheets for about 10 minutes before transferring them to a wire rack to cool completely. This allows the cookies to firm up slightly and prevents them from breaking when moved.
-
Once the cookies are completely cool, store them in an airtight container at room temperature. This will help maintain their freshness and prevent them from drying out.
Expert Tips & Tricks
- Soft Butter is Key: Ensure your butter is softened to room temperature but not melted. Properly softened butter will cream beautifully with the sugar, creating a light and airy base for your cookies.
- Don’t Overmix: Overmixing the dough after adding the flour can develop the gluten, resulting in tough cookies. Mix only until the flour is just incorporated.
- Chilling is Crucial: Resist the urge to skip the chilling step. Chilling the dough prevents excessive spreading and enhances the flavor.
- Uniform Cookies: Use a cookie scoop for consistent sizing, ensuring even baking.
- Baking Time: Every oven is different! Start checking the cookies at 9 minutes and adjust the baking time as needed. Look for set edges and slightly soft centers.
- Cocoa Powder: Use a high-quality cocoa powder for the best flavor. Dutch-processed cocoa powder will give a deeper, richer chocolate flavor.
- For a Chewier Cookie: Underbake slightly. The cookies will continue to set as they cool.
- Make-Ahead Dough: The dough can be made ahead of time and stored in the refrigerator for up to 3 days. Let it soften slightly before scooping and baking.
Serving & Storage Suggestions
These chocolate sugar cookies are delightful served on their own with a glass of cold milk, a cup of hot coffee, or a scoop of vanilla ice cream. They are also a fantastic addition to any dessert platter or holiday cookie exchange.
To store, place the cooled cookies in an airtight container at room temperature. They will stay fresh for up to 5 days. For longer storage, you can freeze the baked cookies for up to 2 months. To freeze, arrange the cookies in a single layer on a baking sheet and freeze until solid. Then, transfer them to a freezer-safe bag or container. Thaw at room temperature before serving. You can also freeze the unbaked dough; thaw completely in the refrigerator before scooping and baking.
Nutritional Information
Note: Nutritional information is an estimate and may vary based on specific ingredients and portion sizes.
| Nutrient | Amount per Serving | % Daily Value |
|---|---|---|
| Calories | 128 kcal | N/A |
| Fat | 5.8 g | 9% |
| Saturated Fat | 3.6 g | 17% |
| Cholesterol | 24.6 mg | 8% |
| Sodium | 156 mg | 6% |
| Carbohydrates | 18.7 g | 6% |
| Fiber | 0.8 g | 3% |
| Sugars | 12.1 g | N/A |
| Protein | 1.5 g | 3% |
Variations & Substitutions
- Peppermint Chocolate Cookies: Add 1/2 teaspoon of peppermint extract to the dough and crush candy canes to sprinkle on top before baking.
- Espresso Chocolate Cookies: Add 1 teaspoon of instant espresso powder to the dry ingredients for a mocha flavor.
- Spicy Chocolate Cookies: Add 1/4 teaspoon of cayenne pepper to the dry ingredients for a kick.
- Gluten-Free: Substitute the all-purpose flour with a gluten-free all-purpose flour blend. Be sure to choose a blend that contains xanthan gum for best results.
- Vegan: Replace the butter with a vegan butter substitute and the eggs with flax eggs (1 tablespoon of ground flaxseed mixed with 3 tablespoons of water per egg, let sit for 5 minutes to thicken).
FAQs (Frequently Asked Questions)
Q: Why are my cookies spreading too thin?
A: The most common reason for cookies spreading too thin is that the butter was too soft. Make sure the butter is softened but not melted. Also, chilling the dough is crucial to prevent excessive spreading.
Q: Can I use Dutch-processed cocoa powder?
A: Yes, Dutch-processed cocoa powder will give the cookies a richer, darker chocolate flavor.
Q: How do I know when the cookies are done?
A: The cookies are done when the edges are set, and the centers are still slightly soft. They will continue to firm up as they cool.
Q: Can I freeze the cookie dough?
A: Absolutely! The cookie dough can be frozen for up to 2 months. Thaw completely in the refrigerator before scooping and baking.
Q: My cookies are too dry. What did I do wrong?
A: Overbaking is the most likely cause of dry cookies. Be sure to watch the cookies closely and remove them from the oven when the edges are set, and the centers are still slightly soft.
Final Thoughts
Now, go forth and bake these delectable chocolate sugar cookies! Let the rich, comforting aroma fill your kitchen and bring joy to your loved ones. Don’t be afraid to experiment with variations and make them your own. Share your creations, and don’t hesitate to let me know what you think! These cookies are perfect with a steaming mug of hot chocolate or a scoop of vanilla ice cream. Happy baking!