
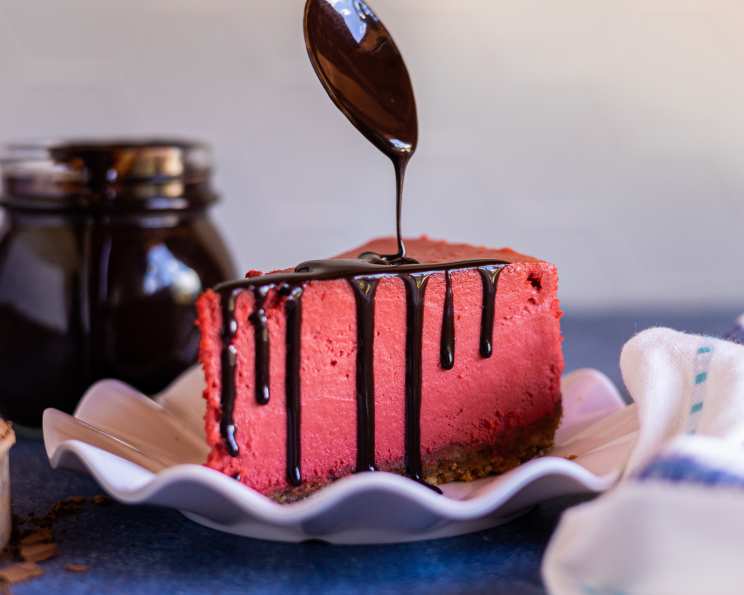
The Ultimate Homemade Chocolate Syrup: A Culinary Classic
The scent of chocolate syrup always transports me back to childhood summers. I remember standing on a stool in my grandmother’s kitchen, watching her drizzle the rich, dark liquid over scoops of vanilla ice cream. The way the cold ice cream hardened the syrup into a delightful, slightly chewy shell was pure magic. It was a simple pleasure, but one that created lasting memories, and it’s a pleasure I love recreating with my own family. This recipe captures that same nostalgic taste, only it’s even better because it’s made with love – and without any mysterious additives.
Recipe Overview
- Prep Time: 2 minutes
- Cook Time: 5 minutes
- Total Time: 7 minutes
- Yields: 2 cups
- Serves: 32
- Dietary Type: Vegetarian, Gluten-Free
Ingredients
- 1 cup cocoa powder
- 1 1/2 cups sugar
- 1 dash salt
- 1 1/2 cups water
- 1 teaspoon vanilla extract
Equipment Needed
- Medium saucepan
- Whisk
- Storage container (jar or airtight container)
Instructions
- In a medium saucepan, stir together the cocoa powder, sugar, salt, and water. Make sure to fully incorporate the cocoa powder to avoid any lumps.
- Place the saucepan over medium heat.
- Boil the mixture for 2-5 minutes, stirring rapidly and constantly, until the sauce begins to thicken. The exact cooking time will depend on the heat of your stove, so keep a close watch. You’re looking for a consistency that coats the back of a spoon.
- Remove the saucepan from the heat and stir in the vanilla extract.
- Let the syrup cool slightly before transferring it to a clean storage container.
- Store the finished chocolate syrup in the fridge.
Expert Tips & Tricks
- For an even richer flavor: Use high-quality Dutch-processed cocoa powder. Its smoother, less acidic taste makes a significant difference.
- Prevent scorching: Stir the mixture constantly, especially during the boiling process. Scorched syrup will have a burnt taste.
- Consistency is key: The syrup will thicken more as it cools. Don’t overcook it to the point where it becomes too thick while hot.
- Flavor boost: A pinch of espresso powder added with the cocoa powder will enhance the chocolate flavor.
- Troubleshooting: If your syrup is too thick after cooling, simply add a tablespoon or two of water and stir until you reach your desired consistency.
Serving & Storage Suggestions
This homemade chocolate syrup is incredibly versatile. Of course, it’s fantastic drizzled over ice cream, but it also elevates pancakes, waffles, brownies, and even coffee drinks. Get creative!
- Serving suggestions: Warm the syrup slightly for a more luxurious drizzle. For a truly decadent treat, pair it with homemade whipped cream.
- Storage: Store the chocolate syrup in an airtight container in the refrigerator. It will keep for up to 2 weeks.
- Freezing: While not ideal (the texture can change slightly), you can freeze chocolate syrup for longer storage (up to 2 months). Thaw it in the refrigerator overnight before using.
Nutritional Information
(Estimated per 1 Tablespoon Serving)
| Nutrient | Amount per Serving | % Daily Value |
|---|---|---|
| Calories | 42.8 kcal | N/A |
| Calories from Fat | 3 g | N/A |
| Total Fat | 0.4 g | 0% |
| Saturated Fat | 0.2 g | 1% |
| Cholesterol | 0 mg | 0% |
| Sodium | 5.8 mg | 0% |
| Total Carbohydrate | 10.9 g | 3% |
| Dietary Fiber | 0.9 g | 3% |
| Sugars | 9.4 g | 37% |
| Protein | 0.5 g | 1% |
Variations & Substitutions
- Dairy-Free/Vegan: This recipe is naturally dairy-free and vegan. Just ensure your vanilla extract is also vegan-friendly.
- Spicy Chocolate Syrup: Add a pinch of cayenne pepper to the mixture while cooking for a subtle kick.
- Mint Chocolate Syrup: Infuse the syrup with fresh mint leaves while it cools. Remove the mint before storing.
- Maple Chocolate Syrup: Substitute half of the sugar with maple syrup for a richer, more complex flavor.
- Thickening Agent: If you want a thicker syrup quickly, whisk in a teaspoon of cornstarch mixed with a tablespoon of cold water right before boiling.
FAQs (Frequently Asked Questions)
Q: Can I use a different type of sugar?
A: While granulated sugar is recommended for the best texture and flavor, you can experiment with brown sugar or coconut sugar. Keep in mind that these sugars will alter the syrup’s color and flavor slightly.
Q: Why is my syrup grainy?
A: Graininess can be caused by undissolved sugar. Ensure that the sugar is fully dissolved during the cooking process by stirring constantly.
Q: How do I know when the syrup is thick enough?
A: The syrup will thicken as it cools. It should coat the back of a spoon and have a smooth, pourable consistency.
Q: Can I double or triple the recipe?
A: Yes, you can easily scale the recipe up or down depending on your needs. Just maintain the ingredient ratios.
Q: What if my syrup is too thin?
A: Continue to simmer the syrup for a few more minutes, stirring constantly, until it reaches your desired consistency. Be careful not to overcook it.
Final Thoughts
This homemade chocolate syrup is a simple recipe that delivers exceptional flavor. It’s a delicious way to add a touch of indulgence to your favorite desserts and drinks. Once you try it, you’ll never go back to store-bought versions. So, gather your ingredients, follow the easy steps, and prepare to enjoy a taste of pure chocolate bliss. Don’t forget to share your creations and feedback! I’d love to hear how you’re using your homemade syrup and any variations you’ve tried. Consider pairing it with a scoop of homemade ice cream or a warm chocolate brownie for the ultimate dessert experience. Happy drizzling!