
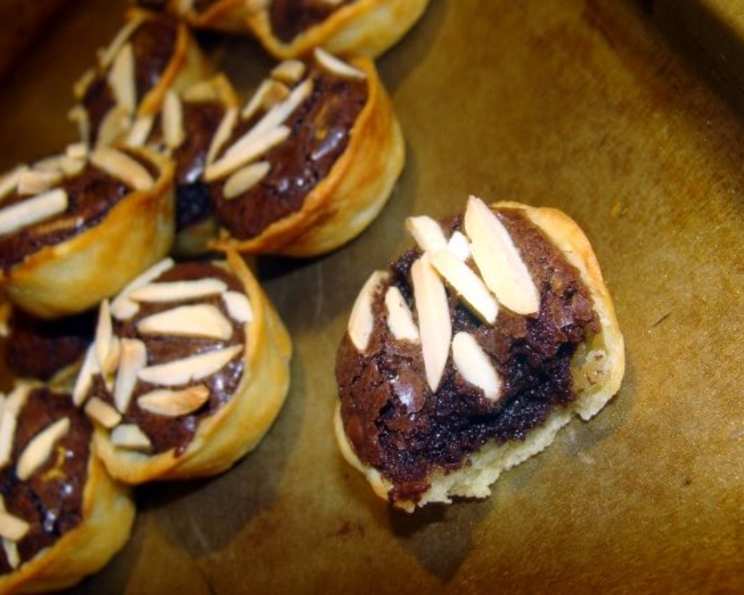
Decadent Chocolate Tarts: A Sweet Holiday Tradition
My grandmother, a woman whose love language was undeniably baking, always had a secret weapon during the holidays: these exquisite chocolate tarts. I remember, as a child, eagerly anticipating the arrival of the cookie trays laden with sugary masterpieces, but my eyes always zeroed in on these miniature marvels. Each bite was an explosion of rich, dark chocolate balanced perfectly by the delicate, melt-in-your-mouth pastry. The aroma alone could transport me to a cozy, snow-dusted wonderland. Even now, the scent of these tarts baking fills my kitchen with warmth and nostalgia.
Recipe Overview
- Prep Time: 20 minutes
- Cook Time: 20-25 minutes
- Total Time: 45 minutes
- Servings: 24-36 mini-muffins
- Yield: 24-36 mini tarts
- Dietary Type: Not specified
Ingredients
For the Crust:
- ¼ lb (4 ounces) Butter
- 3 ounces Cream Cheese
- 1 cup Flour
For the Filling:
- 1 cup Semi-sweet Chocolate Chips
- 1 tablespoon Milk
- ⅓ cup Sugar
- 1 tablespoon Butter
- 1 teaspoon Vanilla
- 1 Well-beaten Egg
- Walnut halves or Pecans, for topping
Equipment Needed
- Mixer (stand or hand mixer)
- Mini-muffin tin
- Double boiler or heat-safe bowl and saucepan
- Measuring cups and spoons
- Mixing bowls
Instructions
- Preheat your oven to 350°F (175°C). Make sure your oven rack is in the center position for even baking.
- Prepare the crust: In a mixing bowl, combine the butter, cream cheese, and flour. Mix until a soft dough forms. Be careful not to overmix; you want the dough to be tender and flaky.
- Shape the crust: Roll the dough into small balls, about 1 inch in diameter. These will form the individual tart shells.
- Prepare the muffin tin: Gently press each dough ball into an ungreased mini-muffin tin, covering the bottom and sides of each cavity. Ensure the crust is evenly distributed to prevent thin or thick spots. Set aside.
- Melt the chocolate: Place the chocolate chips into a double boiler or a heat-safe bowl set over a simmering pot of water. Ensure the bottom of the bowl doesn’t touch the water.
- Create the filling: As the chocolate melts, add the milk, sugar, butter, and vanilla to the melted chocolate. Stir constantly until the mixture is smooth and glossy.
- Incorporate the egg: Remove the chocolate mixture from the heat and allow it to cool slightly for a minute or two. This is crucial to prevent the egg from scrambling. Gradually blend in the well-beaten egg, mixing until fully incorporated.
- Fill the tarts: Place about 1 tablespoon of the chocolate mixture into each prepared crust. Be careful not to overfill, as the filling will expand slightly during baking.
- Add the topping: Top each tart with a walnut half or pecan. Gently press the nut into the chocolate filling.
- Bake the tarts: Bake in the preheated oven for 20-25 minutes. The crust should be lightly golden, and the filling should be set but still slightly soft in the center. A toothpick inserted into the center of a tart will come out with moist crumbs attached.
- Cool and serve: Remove the mini-muffin tin from the oven and let the tarts cool in the pan for about 10 minutes. This allows them to firm up slightly, making them easier to remove. Carefully remove the tarts from the tin and place them on a wire rack to cool completely.
Expert Tips & Tricks
- Room Temperature Ingredients: Ensure the butter and cream cheese are at room temperature for the crust. This will make them easier to combine and create a smoother dough.
- Don’t Overmix the Crust: Overmixing the crust dough develops the gluten in the flour, resulting in a tough crust. Mix only until the ingredients are just combined.
- Preventing a Soggy Crust: Blind baking the crusts for a few minutes before adding the filling can help prevent a soggy bottom, especially if your oven tends to run cooler. Simply bake the crusts for 5 minutes before adding the filling.
- Adjusting Sweetness: If you prefer a less sweet tart, you can reduce the amount of sugar in the filling to ¼ cup. Alternatively, you can use bittersweet chocolate chips for a richer, less sweet flavor.
- Even Baking: Rotate the muffin tin halfway through the baking time to ensure even baking and browning.
Serving & Storage Suggestions
These chocolate tarts are best served at room temperature, allowing the flavors to fully develop. They make a delightful addition to any dessert platter, or can be enjoyed as a sweet treat with a cup of coffee or tea.
To store leftover tarts, place them in an airtight container at room temperature for up to 2 days, or in the refrigerator for up to 5 days. For longer storage, freeze the tarts in an airtight container for up to 1 month. Thaw them in the refrigerator overnight before serving. You can gently warm them in a low oven (around 200°F/95°C) for a few minutes to restore their warm, gooey texture.
Nutritional Information
| Nutrient | Amount per Serving | % Daily Value |
|---|---|---|
| Calories | 118 kcal | 6% |
| Total Fat | 7.9g | 10% |
| Saturated Fat | 4.8g | 24% |
| Cholesterol | 24mg | 8% |
| Sodium | 45mg | 2% |
| Total Carbohydrate | 11g | 4% |
| Dietary Fiber | 0.6g | 2% |
| Sugars | 7g | 14% |
| Protein | 1.4g | 3% |
Nutritional information is an estimate and may vary based on specific ingredients and portion sizes.
Variations & Substitutions
- Gluten-Free Crust: Substitute the all-purpose flour with a gluten-free blend for a gluten-free option. A blend designed for pastry works best.
- Dairy-Free Option: Use a vegan butter alternative and dairy-free cream cheese for the crust. Substitute the milk in the filling with almond or soy milk.
- Different Nuts: Experiment with different nuts for the topping, such as hazelnuts, macadamia nuts, or even chopped almonds.
- Flavor Infusions: Add a pinch of cinnamon or a dash of espresso powder to the chocolate filling for an extra layer of flavor.
- Liqueur Enhancement: A teaspoon of Kahlua or Frangelico added to the chocolate filling elevates the flavor profile beautifully.
FAQs (Frequently Asked Questions)
Q: Can I make the crust ahead of time?
A: Yes, you can make the crust dough ahead of time. Wrap it tightly in plastic wrap and store it in the refrigerator for up to 2 days. Allow it to soften slightly before rolling into balls.
Q: What if I don’t have a double boiler?
A: A heat-safe bowl set over a simmering pot of water works just as well. Just ensure the bottom of the bowl doesn’t touch the water.
Q: How can I tell if the tarts are done?
A: The crust should be lightly golden, and the filling should be set but still slightly soft in the center. A toothpick inserted into the center of a tart will come out with moist crumbs attached.
Q: Can I use a different type of chocolate?
A: Absolutely! Milk chocolate will result in a sweeter tart, while dark chocolate will provide a richer, more intense flavor.
Q: Why did my crust shrink during baking?
A: This can happen if the dough is overworked or if there’s too much gluten development. Ensure you don’t overmix the crust and let the dough rest in the refrigerator for at least 30 minutes before shaping.
Final Thoughts
These chocolate tarts are more than just a recipe; they’re a little piece of my family history, a sweet reminder of holidays past. I urge you to try them and create your own memories. Don’t hesitate to experiment with variations to make them your own, and I’d love to hear how they turn out for you. Pair them with a glass of port wine or a scoop of vanilla ice cream for an extra touch of indulgence. Happy baking!