
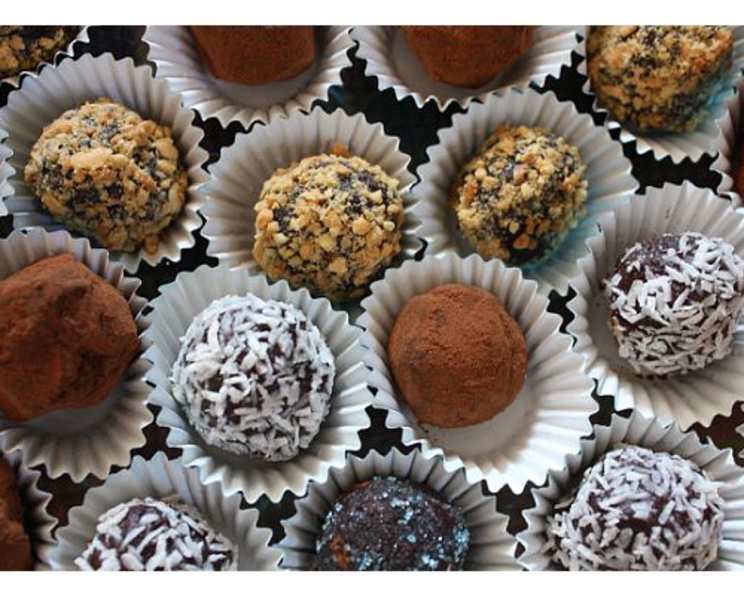
Decadent Vegan Chocolate Truffles: A Guilt-Free Indulgence
I remember the first time I attempted homemade truffles. It was Christmas Eve, and I envisioned a perfectly plated dessert to wow my family. Instead, I ended up with a sticky, chocolatey mess that stubbornly refused to form into elegant spheres. We all laughed, of course, and devoured the lopsided truffles anyway. While those early attempts relied heavily on cream and butter, these vegan chocolate truffles offer all the rich flavor and melt-in-your-mouth texture, without any dairy. They’re so good, you won’t believe they’re “good for you!”
Recipe Overview
- Prep Time: 15 minutes
- Chill Time: 1 hour
- Total Time: 1 hour 15 minutes
- Yields: 24 truffles
- Serves: 24
- Dietary Type: Vegan
Ingredients
- 1 (12 ounce) package chocolate chips (dark or semi-sweet)
- 1 cup nut butter (cashew, almond, or peanut)
- 1/4 cup non-dairy milk (I like Hemp milk)
- 1 teaspoon vanilla
- Optional coatings: cocoa powder, crushed nuts, shredded coconut
Equipment Needed
- Microwave-safe bowl
- Food processor or mixer
- Cookie sheet or plate
- Parchment paper (optional)
Instructions
- Begin by melting the chocolate chips and non-dairy milk in a microwave-safe bowl. Microwave in 30-second intervals, stirring in between each interval, until the chocolate is completely melted and smooth. Be careful not to overheat the chocolate, as it can seize and become grainy. If you prefer, you can melt the chocolate using a double boiler.
- In a food processor or mixer, combine the melted chocolate/milk mixture with the nut butter and vanilla. Process or mix until everything is thoroughly blended and the mixture is smooth and homogenous. The mixture should be thick and glossy.
- Transfer the chocolate mixture to a bowl, cover it with plastic wrap (pressing the plastic wrap directly onto the surface to prevent a skin from forming), and chill in the refrigerator for at least one hour. This chilling time is crucial, as it allows the mixture to firm up enough to be easily scooped and rolled into balls. If you’re short on time, you can chill it in the freezer for about 30 minutes, but be sure to monitor it closely to prevent it from becoming too hard.
- Once the chocolate mixture is firm, use a small spoon or melon baller to scoop out small portions of the mixture. Roll each portion between your palms to form small, round balls. Don’t worry if they’re not perfectly round; a rustic look is part of their charm.
- Prepare your chosen coatings in separate shallow bowls. You can use cocoa powder, crushed nuts, shredded coconut, or any other topping you like. Get creative and experiment with different flavors and textures.
- Roll each truffle in your chosen coating, ensuring that it’s evenly covered. Gently press the coating onto the surface of the truffle to help it adhere. Place the coated truffles on a cookie sheet or plate lined with parchment paper to prevent them from sticking.
- Serve immediately, or place the truffles back in the refrigerator if serving later. Chilling them again for about 15 minutes before serving will help them firm up even more.
Expert Tips & Tricks
- Chocolate Quality: The quality of your chocolate will significantly impact the flavor of your truffles. Use a high-quality dark or semi-sweet chocolate for the best results. I personally prefer a dark chocolate with at least 70% cocoa content.
- Nut Butter Variations: Don’t be afraid to experiment with different types of nut butter. Cashew butter provides a mild, creamy flavor, while almond butter offers a slightly more robust, nutty taste. Peanut butter will give your truffles a classic peanut butter cup flavor.
- Flavor Infusions: Infuse your truffles with additional flavor by adding a pinch of sea salt, a dash of espresso powder, or a few drops of peppermint extract to the chocolate mixture.
- Perfect Rolling: If the chocolate mixture is too sticky to roll easily, lightly dust your hands with cocoa powder or cornstarch.
- Make-Ahead Magic: These truffles can be made several days in advance. Store them in an airtight container in the refrigerator until ready to serve.
- Rescuing Seized Chocolate: If your chocolate seizes while melting, try adding a teaspoon of vegetable oil or shortening and stirring vigorously. This can sometimes help to bring the chocolate back to a smooth consistency.
Serving & Storage Suggestions
These vegan chocolate truffles are best served slightly chilled, as this allows the chocolate to maintain its shape and texture. Arrange them artfully on a platter or in a small box for a beautiful presentation. They make a wonderful homemade gift or a delightful addition to any dessert spread.
Store leftover truffles in an airtight container in the refrigerator for up to 1 week. You can also freeze them for up to 2 months. To freeze, place the truffles on a baking sheet lined with parchment paper and freeze until solid. Then, transfer them to a freezer-safe container. Allow the truffles to thaw in the refrigerator for a few hours before serving.
Nutritional Information
Please note that these values are estimates and can vary based on specific ingredients and portion sizes.
| Nutrient | Amount per Serving | % Daily Value |
|---|---|---|
| Calories | 210 kcal | 11% |
| Total Fat | 15g | 19% |
| Saturated Fat | 8g | 40% |
| Cholesterol | 0mg | 0% |
| Sodium | 5mg | 0% |
| Total Carbohydrate | 18g | 7% |
| Dietary Fiber | 2g | 7% |
| Sugars | 12g | — |
| Protein | 3g | 6% |
Variations & Substitutions
- Spice it up: Add a pinch of cayenne pepper to the chocolate mixture for a subtle kick.
- Citrus Zest: Incorporate orange or lemon zest for a bright, refreshing flavor.
- Coconut Dream: Use coconut flakes as the coating or substitute coconut milk for hemp milk.
- Different Nut Butters: Use sunflower seed butter for a nut-free option.
- Chocolate Coating: Instead of rolling in powder, dip the truffles in melted vegan chocolate and let it harden.
FAQs (Frequently Asked Questions)
Q: Can I use white chocolate chips instead of dark or semi-sweet?
A: Absolutely! Vegan white chocolate chips will create a sweeter and milder truffle. Be mindful of the sugar content when choosing your nut butter to balance the sweetness.
Q: My chocolate mixture is too soft to roll into balls. What should I do?
A: Simply chill the mixture for a longer period. The colder it is, the easier it will be to handle. You can even pop it into the freezer for a quicker firming, but watch carefully to prevent it from freezing solid.
Q: Can I use maple syrup or agave nectar instead of non-dairy milk?
A: While you can, it will significantly alter the texture and sweetness of the truffles. The non-dairy milk adds moisture without excessive sweetness. If you do substitute, use a very small amount and adjust the nut butter to compensate for the extra liquid.
Q: How long will the truffles last at room temperature?
A: Due to the chocolate and nut butter content, these truffles are best stored in the refrigerator. At room temperature, they will soften quickly, especially in warmer climates.
Q: Are these truffles suitable for people with nut allergies?
A: No, as the recipe includes nut butter. However, you can substitute sunflower seed butter for a nut-free alternative. Always check all ingredient labels to ensure they are safe for individuals with allergies.
Final Thoughts
These vegan chocolate truffles are proof that decadent treats can be both delicious and wholesome. The combination of rich chocolate, creamy nut butter, and a touch of vanilla creates a symphony of flavors that will satisfy any sweet craving. Whether you’re a seasoned vegan baker or simply looking for a healthier dessert option, I encourage you to give this recipe a try. Experiment with different coatings and flavor combinations to create your own signature truffle. And don’t forget to share your creations with friends and family – they’ll thank you for it! Enjoy!