
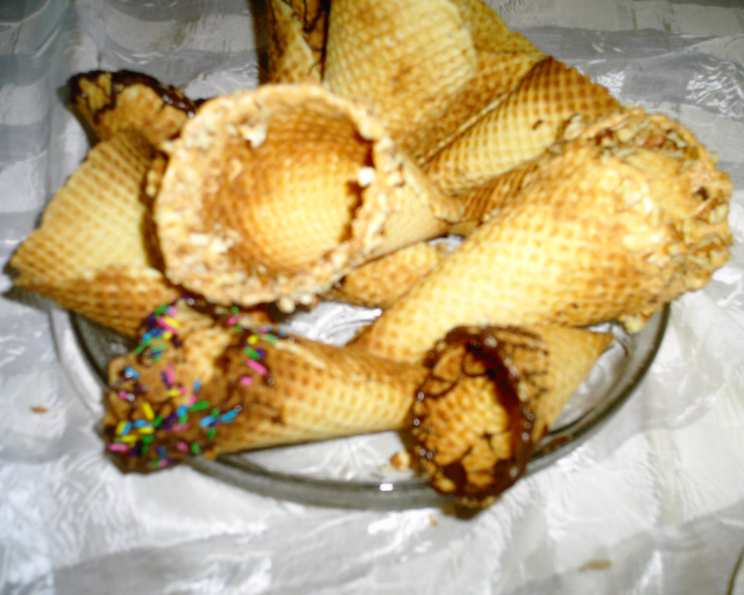
Chocolate Waffle Cones and Bowls: A Sweet Symphony
As a child, the sound of the ice cream truck was pure magic. But even more magical was the moment I saw my grandmother pull out her waffle cone maker. The aroma of vanilla and chocolate filled her kitchen, and soon enough, we were crafting our own crispy cones and bowls, eager to fill them with scoops of our favorite ice cream. Those homemade chocolate waffle cones were more than just a dessert; they were edible vessels of joy, crafted with love and shared laughter.
Recipe Overview
- Prep Time: 15 minutes
- Cook Time: 25 minutes
- Total Time: 40 minutes
- Servings: 10 cones/bowls
- Yield: 10 cones/bowls
- Dietary Type: Vegetarian
Ingredients
- 3 eggs
- ¾ cup granulated sugar
- ½ cup unsalted butter, melted and cooled
- 2 tablespoons pure vanilla extract
- 1 cup all-purpose flour
- 2 tablespoons sifted cocoa powder
- 1 teaspoon baking powder
Equipment Needed
- Waffle cone maker machine or pizzelle iron
- Mixing bowls
- Whisk
- Measuring cups and spoons
- Custard cups (for shaping bowls)
- Pizza cutter (optional, for squares)
- Cooling rack
Instructions
- In a mixing bowl, beat the eggs until light and frothy.
- Gradually add the granulated sugar to the eggs, beating well until the mixture is smooth and slightly thickened. This step is crucial for achieving the right texture.
- Pour in the melted and cooled unsalted butter and the pure vanilla extract. Mix until thoroughly combined. The butter should be cooled to prevent cooking the eggs.
- In a separate bowl, sift together the all-purpose flour, cocoa powder, and baking powder. Sifting ensures that there are no lumps and that the dry ingredients are evenly distributed.
- Gradually add the sifted dry ingredients to the wet ingredients, blending well until a sticky batter forms. It should be thick enough to drop easily from a spoon. Be careful not to overmix.
- Preheat your waffle cone maker or pizzelle iron according to the manufacturer’s instructions. A hot surface is essential for achieving crispy cones.
- Drop a heaping tablespoon of the batter onto the preheated waffle cone maker. The amount of batter needed will depend on the size of your machine, so you may need to experiment with the first couple of cones.
- Close the lid of the waffle cone maker and bake until the cone is your desired color. This typically takes 1-3 minutes, but keep a close eye on it to prevent burning. The color indicates how crisp the cones will be – the darker the color, the crisper they will be.
- Remove the waffle from the maker and immediately form it into a cone using a cone roller or by hand. Work quickly, as the waffle will harden as it cools.
- For bowls, place the warm waffle over the back of small inverted custard cups and gently press around to shape. Let cool for about 30 seconds, then remove and allow to cool completely.
- For squares, use a pizza cutter to trim the warm waffle into squares.
- To decorate your cones or bowls (optional):
- For cones, dip the crisp cooled cone into melted chocolate and roll into chopped nuts or sprinkles.
- For bowls, brush the inside bottom with melted chocolate and then sprinkle with nuts or sprinkles. Allow the chocolate to harden completely.
Expert Tips & Tricks
- Control the Sweetness: If you prefer a less sweet cone, reduce the amount of sugar by a tablespoon or two.
- Get Creative with Extracts: Experiment with different extracts, such as almond or peppermint, for unique flavor combinations.
- Add Texture: Incorporate finely chopped nuts, chocolate chips, or sprinkles directly into the batter for added texture and flavor.
- Avoid Sticking: Make sure your waffle cone maker is properly preheated and lightly greased to prevent the cones from sticking.
- Work Quickly: Time is of the essence when shaping the cones. Have your shaping tools ready and work efficiently while the waffle is still pliable.
- Prevent Soggy Cones: For the best ice cream experience, consider lining the inside of the cone with a thin layer of melted chocolate before filling it. This will act as a barrier and help prevent the cone from becoming soggy.
Serving & Storage Suggestions
Serve your homemade chocolate waffle cones or bowls immediately with your favorite ice cream, sorbet, or frozen yogurt. They can also be used as a base for sundaes or parfaits.
Store any leftover cones or bowls in an airtight container at room temperature. They will stay fresh for up to 3 days. To maintain their crispness, avoid storing them in the refrigerator, as moisture can make them soggy. Do not stack them directly on top of each other. To reheat, briefly warm in a preheated 350°F oven for 2-3 minutes to restore crispness.
Nutritional Information
| Nutrient | Amount per Serving | % Daily Value |
|---|---|---|
| Calories | 217 kcal | 11% |
| Total Fat | 11g | 17% |
| Saturated Fat | 6g | 30% |
| Cholesterol | 80mg | 27% |
| Sodium | 60mg | 3% |
| Total Carbohydrate | 26g | 9% |
| Dietary Fiber | 1g | 4% |
| Sugars | 15g | N/A |
| Protein | 4g | 8% |
Note: Nutritional information is an estimate and may vary depending on specific ingredients and portion sizes.
Variations & Substitutions
- Gluten-Free Cones: Substitute the all-purpose flour with a gluten-free blend. You may need to adjust the liquid slightly to achieve the correct batter consistency.
- Dairy-Free Cones: Replace the unsalted butter with a dairy-free butter alternative or coconut oil.
- Spice it Up: Add a pinch of cinnamon, nutmeg, or cayenne pepper to the batter for a warm and spicy twist.
- Citrus Zest: Grate some orange or lemon zest into the batter for a bright and refreshing flavor.
- Chocolate Chips: Fold mini chocolate chips into the batter for extra chocolatey goodness.
FAQs (Frequently Asked Questions)
Q: Can I make these cones ahead of time?
A: Yes, you can make the cones ahead of time and store them in an airtight container at room temperature for up to 3 days.
Q: My cones are not crispy enough. What am I doing wrong?
A: Ensure your waffle cone maker is hot enough and bake the cones until they reach your desired color. The darker the color, the crisper they will be.
Q: The batter is too thick. What should I do?
A: Add a tablespoon of milk or water at a time until the batter reaches the correct consistency. It should be thick enough to drop easily from a spoon.
Q: Can I use a regular waffle iron instead of a waffle cone maker?
A: While you can technically use a regular waffle iron, it will be difficult to shape the waffles into cones or bowls. A pizzelle iron is a better alternative.
Q: How do I prevent the cones from sticking to the waffle cone maker?
A: Ensure your waffle cone maker is properly preheated and lightly greased with cooking spray or oil.
Final Thoughts
There’s something undeniably special about creating your own treats from scratch. These chocolate waffle cones and bowls are more than just a dessert; they’re a canvas for your culinary creativity. So, gather your ingredients, dust off your waffle cone maker, and embark on a delicious adventure. Don’t be afraid to experiment with flavors and decorations to create your own signature cones. And most importantly, share your creations with loved ones and spread the joy of homemade goodness. I encourage you to try this recipe and let me know how it turns out!