
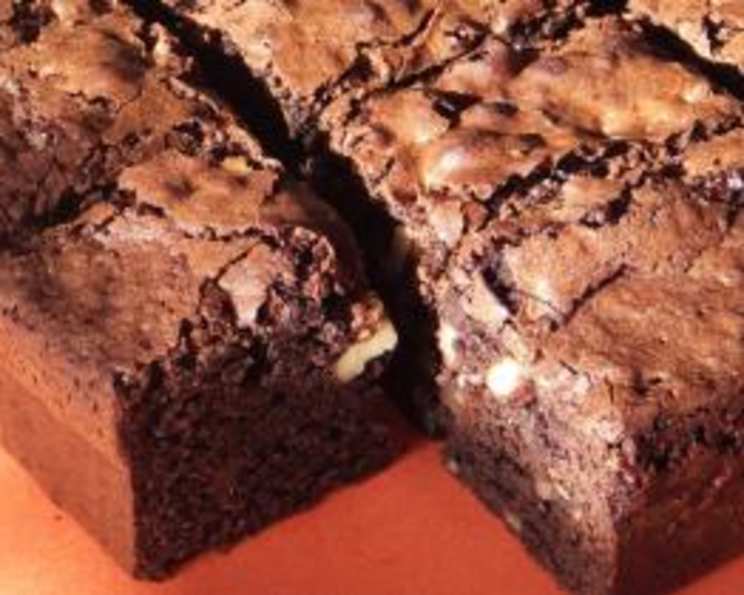
Chocolate Walnut Brownies: A Taste of Home
The scent of chocolate, butter, and toasted walnuts still has the power to transport me back to my grandmother’s cozy kitchen. She always seemed to have a batch of brownies cooling on the counter, their fudgy aroma permeating every corner of the house. These weren’t just any brownies; they were dense, intensely chocolatey, and studded with crunchy walnuts – a perfect balance of textures and flavors. Now, I’m thrilled to share my version of this classic, a recipe that captures the essence of those cherished childhood memories.
Recipe Overview
- Prep Time: 15 minutes
- Cook Time: 35-40 minutes
- Total Time: 50-55 minutes
- Yields: 12 brownies
- Serves: 2-4
- Dietary Type: Not specified
Ingredients
- 10 ml vegetable oil, for brushing
- 30 g flour, for sprinkling
- 55 g chocolate, broken into pieces
- 70 g butter
- 180 g caster sugar
- 70 g self raising flour
- 1 pinch salt
- 2 eggs
- ½ teaspoon vanilla extract
- 55 g walnuts
Equipment Needed
- Square cake tin
- Heatproof bowl
- Saucepan
- Wooden spoon
- Large mixing bowl
- Small mixing bowl
- Fork
- Chopping board
- Kitchen knife
- Palette knife
- Oven gloves
Instructions
-
Preheat your oven to the appropriate temperature (typically around 180°C/350°F, but consult your oven’s manual for accuracy). Brush a square cake tin with the vegetable oil to prevent sticking. Then, sprinkle the tin with the flour, ensuring all surfaces are lightly coated. Tap out any excess flour. Set the prepared tin aside.
-
Combine the chocolate pieces and butter in a heatproof bowl.
-
Pour a small amount of water into a saucepan and heat it gently over low heat until it simmers. Place the heatproof bowl containing the chocolate and butter over the simmering water, ensuring the bottom of the bowl doesn’t touch the water. This creates a gentle, indirect heat that will melt the ingredients without burning them.
-
Turn the heat down to medium-low. Using a wooden spoon, gently stir the chocolate and butter until they are completely melted and smooth. Remove the bowl from the saucepan and stir in the caster sugar. Continue stirring occasionally to help cool the mixture slightly. Set aside.
-
In a large mixing bowl, sieve together the self-raising flour and salt. This will ensure a light and airy texture in your brownies.
-
Crack the eggs into a small mixing bowl. Carefully remove any pieces of eggshell that may have fallen into the bowl.
-
Using a fork, lightly beat the eggs until the yolk and white are fully combined. Add the vanilla extract to the beaten eggs and set aside.
-
On a chopping board, roughly chop the walnuts using a kitchen knife. Aim for a mix of smaller and larger pieces for a satisfying crunch. Set aside.
-
Add the melted chocolate mixture, beaten eggs, and chopped walnuts to the large mixing bowl containing the flour mixture.
-
Using a wooden spoon, mix all the ingredients together until they are well combined and the batter is smooth. Be careful not to overmix, as this can result in tough brownies.
-
Spoon the brownie batter into the prepared cake tin. Use a palette knife or the back of a spoon to level the surface of the batter, ensuring an even bake.
-
Place the tin in the preheated oven and bake for 35-40 minutes, or until the brownies are well risen and a toothpick inserted into the center comes out with moist crumbs attached. Keep a close watch, as oven temperatures can vary.
-
Wearing oven gloves, carefully remove the tin from the oven. Let the brownies cool in the tin for about 5-10 minutes, or until they are almost cold. This allows them to firm up slightly and makes them easier to cut.
-
Using a kitchen knife, carefully cut the brownies into 12 bars.
-
Carefully remove the brownies from the baking tin using a palette knife or spatula. Serve and enjoy!
Expert Tips & Tricks
- For extra fudgy brownies: Slightly underbake them. The center should still be a little gooey.
- To prevent a cracked top: Avoid overbaking. Also, ensure even oven temperature.
- Enhance the walnut flavor: Toast the walnuts lightly in a dry pan before chopping. This brings out their nutty aroma.
- Substitute for a richer flavor: Use dark chocolate instead of milk chocolate.
- Evenly distribute walnuts: Gently fold them into the batter at the very end.
- Line your pan with parchment paper: This ensures easy brownie removal and clean edges.
- Adjust sugar for sweetness: Reduce the sugar if using dark chocolate, or increase it for a sweeter treat.
Serving & Storage Suggestions
Serve these delicious chocolate walnut brownies warm, straight from the oven, with a scoop of vanilla ice cream or a dusting of powdered sugar. They also pair perfectly with a cup of hot coffee or a glass of cold milk.
For storage, keep the brownies in an airtight container at room temperature for up to 3 days. To extend their shelf life, store them in the refrigerator for up to a week. For longer storage, you can freeze the brownies for up to 2 months. Wrap them individually in plastic wrap before placing them in a freezer-safe container. To reheat, thaw them at room temperature and warm them in a microwave or oven.
Nutritional Information
| Nutrient | Amount per Serving | % Daily Value |
|---|---|---|
| Calories | 103.525 kcal | N/A |
| Fat | 5.85 g | N/A |
| Saturated Fat | 2.558 g | N/A |
| Cholesterol | 21.733 mg | N/A |
| Sodium | 33.85 mg | N/A |
| Carbohydrates | 12.275 g | N/A |
| Fiber | 0.667 g | N/A |
| Sugars | 7.608 g | N/A |
| Protein | 1.7 g | N/A |
Note: These values are estimates based on the provided ingredient list and standard nutritional databases. Actual values may vary.
Variations & Substitutions
- Chocolate Chip Brownies: Replace the walnuts with an equal amount of chocolate chips (milk, dark, or white).
- Nut-Free Brownies: Omit the walnuts altogether for a classic chocolate brownie.
- Almond or Pecan Brownies: Substitute the walnuts with chopped almonds or pecans for a different nutty flavor.
- Espresso Brownies: Add a teaspoon of instant espresso powder to the chocolate mixture for a mocha-infused brownie.
- Salted Caramel Brownies: Drizzle salted caramel sauce over the baked brownies for a decadent treat.
FAQs (Frequently Asked Questions)
Q: Can I use unsalted butter instead of salted butter?
A: Yes, you can use unsalted butter. Just add an extra pinch of salt to the flour mixture to compensate.
Q: Can I use all-purpose flour instead of self-raising flour?
A: Self-raising flour is preferred for a lighter texture. If using all-purpose flour, add 1 teaspoon of baking powder to the flour mixture.
Q: How do I know when the brownies are done?
A: Insert a toothpick into the center of the brownies. If it comes out with moist crumbs attached, they are done. Avoid overbaking.
Q: Can I make the brownie batter ahead of time?
A: Yes, you can prepare the batter and store it in the refrigerator for up to 24 hours. Allow it to come to room temperature before baking.
Q: My brownies are too dry. What did I do wrong?
A: Overbaking is the most common cause of dry brownies. Be sure to check for doneness early and avoid baking for too long.
Final Thoughts
I hope this recipe brings as much joy to your kitchen as it has to mine. The aroma alone is enough to make anyone’s day a little brighter. Don’t be afraid to experiment with variations and make it your own. I encourage you to bake a batch of these Chocolate Walnut Brownies and share them with loved ones – a simple gesture that can create lasting memories. And please, feel free to share your feedback and photos; I’d love to hear about your brownie adventures!