
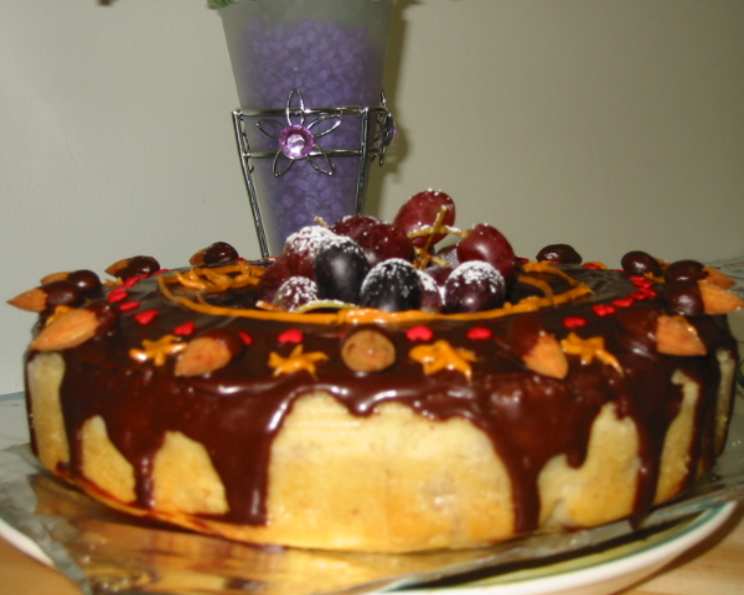
The Easiest, Most Decadent Chocolate Water Glaze
I’ll never forget the first time I saw a perfectly glazed cake. It was at a local bakery, a simple chocolate cake shimmering under the lights. The glaze was so flawless, so impossibly smooth, that it looked like liquid velvet. I knew I had to learn how to recreate that magic. Turns out, the secret to that captivating shine is surprisingly simple: chocolate and water, transformed into a glaze so rich, so decadent, that it elevates any cake to a masterpiece.
Recipe Overview
- Prep Time: 5 minutes
- Cook Time: 5 minutes
- Total Time: 10 minutes
- Yields: 2 1/2 cups
- Serves: 16
- Dietary Type: Vegetarian (depending on chocolate choice)
Ingredients
- 12 ounces semisweet chocolate or bittersweet chocolate, chopped (approximately 2 cups)
- 6 tablespoons very hot water, more if needed
Equipment Needed
- Double boiler or microwave-safe bowl
- Saucepan (for double boiler)
- Whisk
- Spatula (optional, for spreading)
Instructions
-
Melt the chocolate: You have two options for melting the chocolate: the double boiler method or the microwave method.
- Double Boiler Method: Fill a saucepan with about an inch or two of water and bring it to a simmer. Place a heatproof bowl on top of the saucepan, ensuring the bottom of the bowl doesn’t touch the water. Add the chopped chocolate to the bowl. Stir occasionally until the chocolate is completely melted and smooth.
- Microwave Method: Place the chopped chocolate in a microwave-safe bowl. Microwave on LOW or MEDIUM power for 30 seconds. Remove the bowl and stir the chocolate well. If it’s not completely melted, continue microwaving in 15-second intervals, stirring after each interval, until the chocolate is smooth.
-
Whisk in the water: Once the chocolate is completely melted and smooth, immediately add all 6 tablespoons of very hot water at once. It’s crucial to add all the water at once to prevent the chocolate from seizing.
-
Mix until smooth: Whisk vigorously until the mixture becomes satiny smooth. The glaze should have a consistency similar to softly whipped cream.
-
Adjust consistency (if needed): If you prefer a thinner glaze, whisk in an additional tablespoon or more of hot water until you reach your desired consistency. Add the water gradually to avoid making the glaze too thin.
-
Glaze the cake: Immediately pour the glaze over the cake. Tilt the cake to allow the glaze to flow evenly over the surface. Alternatively, use a spatula to gently spread the glaze, ensuring complete coverage.
-
Set the glaze: Allow the glaze to set at room temperature. If the weather is warm, refrigerate the cake briefly to help the glaze firm up.
-
Serve: Once the glaze is set, slice and serve your beautifully glazed cake.
Expert Tips & Tricks
- Chocolate Quality Matters: Use high-quality chocolate for the best flavor and shine. The better the chocolate, the better the glaze.
- Don’t Overheat the Chocolate: Overheated chocolate can become grainy and difficult to work with. If using the microwave method, be extra careful not to overheat.
- The Water Must Be Hot: Using hot water helps the chocolate and water emulsify properly, creating a smooth and glossy glaze.
- Preventing Seizing: Adding all the water at once is key to preventing the chocolate from seizing. If the chocolate does seize (becomes thick and grainy), try whisking in a little more hot water, a teaspoon at a time, until it smooths out. However, prevention is always better than cure.
- Experiment with Flavors: Add a teaspoon of vanilla extract, coffee extract, or a liqueur like Grand Marnier to the melted chocolate for a unique flavor twist.
- Make-Ahead Tip: The glaze can be made ahead of time and stored in an airtight container at room temperature for a few hours. Gently rewarm it in the microwave or over a double boiler before using, whisking until smooth.
- For a Thicker Glaze: Use less water. Start with 4 tablespoons and add more gradually until you reach your desired consistency.
Serving & Storage Suggestions
Serve the chocolate water glaze on cakes, cupcakes, brownies, or even cookies. The glaze adds a touch of elegance and richness to any dessert.
Store leftover glazed cake in an airtight container at room temperature for up to 2 days, or in the refrigerator for up to 5 days. Freezing glazed cakes is also possible; wrap the cake tightly in plastic wrap and then in foil before freezing. Thaw in the refrigerator overnight before serving. Note that the gloss of the glaze may diminish slightly in hot weather but returns at room temperature.
Nutritional Information
(Estimated values, will vary based on specific ingredients)
| Nutrient | Amount per Serving | % Daily Value |
|---|---|---|
| Calories | 107 kcal | 5% |
| Total Fat | 11g | 17% |
| Saturated Fat | 7g | 35% |
| Cholesterol | 0mg | 0% |
| Sodium | 5mg | 0% |
| Total Carbohydrate | 6g | 2% |
| Dietary Fiber | 3.5g | 14% |
| Sugars | 0g | 0% |
| Protein | 3g | 5% |
Variations & Substitutions
- Dairy-Free: Use dairy-free chocolate to make this glaze dairy-free. Many high-quality dark chocolates are naturally dairy-free.
- Vegan: Similar to the dairy-free option, ensure your chocolate is vegan.
- Different Types of Chocolate: Experiment with milk chocolate for a sweeter glaze or white chocolate for a completely different flavor profile. Adjust the amount of water accordingly, as different types of chocolate have varying cocoa butter content.
- Espresso Chocolate Glaze: Add a teaspoon of instant espresso powder to the melted chocolate for a mocha flavor.
- Peppermint Chocolate Glaze: Add a drop or two of peppermint extract for a festive twist.
- Orange Chocolate Glaze: Add a teaspoon of orange zest to the melted chocolate for a bright, citrusy flavor.
FAQs (Frequently Asked Questions)
Q: Can I use chocolate chips instead of chopped chocolate?
A: Yes, you can use chocolate chips, but chopped chocolate melts more evenly. If using chocolate chips, stir frequently while melting to prevent burning.
Q: What if my chocolate seizes?
A: If the chocolate seizes (becomes thick and grainy), try whisking in a small amount of hot water, about a teaspoon at a time, until it smooths out. However, adding the correct amount of water initially will prevent this issue.
Q: How do I prevent fingerprints on the glaze?
A: Avoid touching the glazed cake as much as possible. Use a sharp knife to cut clean slices and serve.
Q: Can I reuse leftover glaze?
A: Yes, you can store leftover glaze in an airtight container in the refrigerator. Gently reheat it in the microwave or over a double boiler before using.
Q: Why does the glaze lose its shine in warm weather?
A: The cocoa butter in the chocolate can soften in warm weather, causing the glaze to lose some of its shine. Refrigerating the cake can help restore the shine, but it will return at room temperature.
Final Thoughts
This chocolate water glaze is a game-changer. It’s simple, elegant, and unbelievably delicious. Don’t be intimidated by the simplicity of the ingredients; the result is a professional-looking glaze that will impress everyone. I encourage you to try it on your favorite cake, cupcakes, or brownies. And please, share your creations and feedback – I’d love to see what you come up with! For an extra special treat, pair this glaze with a rich coffee or a scoop of vanilla bean ice cream. Happy baking!