
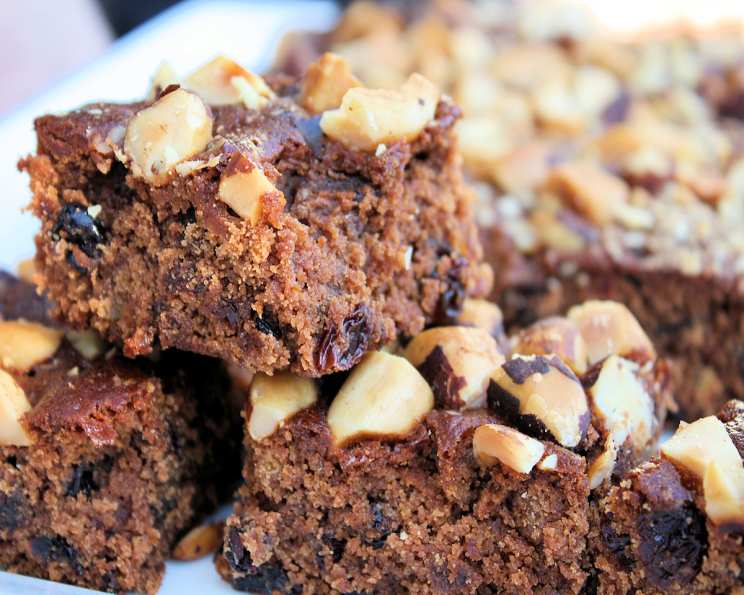
Christmas Slice: A Taste of Festive Tradition
The scent of Christmas baking always takes me back to my grandmother’s kitchen. Every year, she’d orchestrate a symphony of aromas: gingerbread, spiced cookies, and, of course, her legendary Christmas Slice. I remember standing on a stool, barely tall enough to see over the counter, mesmerized as she transformed simple ingredients into this incredibly rich and decadent treat. The slice was always dense and chewy, packed with fruit and nuts, and topped with just the right amount of chocolate – a truly unforgettable Christmas memory. This recipe attempts to recapture that magic, bringing the warmth and joy of the holiday season to every bite.
Recipe Overview
- Prep Time: 20 minutes
- Cook Time: 45-50 minutes
- Total Time: 1 hour 10 minutes
- Servings: 16
- Yield: 1 slice
- Dietary Type: Not specified, contains dairy and eggs
Ingredients
- 2 cups dried mixed fruit
- 410g fruit mince
- 125g butter (chopped)
- 1/2 cup dark brown sugar (firmly packed)
- 1 tablespoon orange zest (grated)
- 1/4 cup orange juice (freshly squeezed)
- 100g chocolate chips (dark)
- 2 eggs (lightly beaten)
- 1 cup plain flour
- 1/4 cup self-raising flour
- 1 cup brazil nuts (coarsely chopped)
Equipment Needed
- Large saucepan
- 30x20cm slice pan
- Baking paper
- Mixing bowls
- Sifter
- Oven
Instructions
- Begin by combining the dried fruit, fruit mince, butter, dark brown sugar, orange zest, and orange juice in a large saucepan. Place the saucepan over low heat.
- Gently stir the mixture until the sugar dissolves and the butter melts completely. Be patient and ensure the heat remains low to prevent scorching.
- Once melted, remove the saucepan from the heat and allow the mixture to cool completely. This step is crucial, as adding eggs to a hot mixture will cause them to cook prematurely.
- While the mixture cools, preheat your oven to 160°C (320°F) or 140°C (284°F) if using a fan-forced oven.
- Lightly grease a 30x20cm slice pan. Then, line the base with baking paper, extending the paper up the long sides of the pan to create handles for easy removal later.
- Once the fruit mixture has cooled, stir in the chocolate chips and the lightly beaten eggs. Ensure the eggs are well incorporated.
- Sift the plain flour and self-raising flour over the fruit mixture. This helps prevent lumps and ensures a lighter texture.
- Gently stir the flours into the mixture until just combined. Avoid overmixing, which can result in a tough slice.
- Spread the mixture evenly into the prepared slice pan. Use a spatula to ensure it reaches all corners.
- Sprinkle the coarsely chopped brazil nuts evenly over the top of the slice.
- Bake in the preheated oven for 45-50 minutes, or until a skewer inserted into the center comes out clean. If the top starts to brown too quickly, you can loosely cover the slice with foil during the last 15 minutes of baking.
- Once baked, remove the slice from the oven and allow it to cool completely in the pan.
- Once cooled, use the baking paper handles to lift the slice out of the pan. Place it on a cutting board and cut into pieces to serve.
Expert Tips & Tricks
- For an even richer flavor, soak the dried fruit in rum or brandy for a few hours (or even overnight) before starting the recipe. Be sure to drain the fruit well before adding it to the saucepan.
- The type of chocolate chips you use can significantly impact the final flavor. Experiment with different varieties, such as semi-sweet, milk chocolate, or even white chocolate.
- If you don’t have brazil nuts, you can substitute them with other nuts like walnuts, pecans, or almonds.
- To prevent the nuts from burning during baking, you can brush them with a little melted butter or oil before sprinkling them on top of the slice.
- If your oven tends to bake unevenly, rotate the slice pan halfway through the baking time to ensure even cooking.
Serving & Storage Suggestions
This Christmas Slice is best served at room temperature. It pairs perfectly with a cup of tea or coffee. You can also add a dollop of whipped cream or a scoop of vanilla ice cream for an extra touch of indulgence.
To store leftovers, wrap the slice tightly in plastic wrap or place it in an airtight container. It will keep at room temperature for up to 3 days, in the refrigerator for up to a week, or in the freezer for up to 3 months. To reheat, thaw frozen slices in the refrigerator overnight and warm them gently in a low oven or microwave before serving.
Nutritional Information
Please note that these values are approximate and may vary based on specific ingredients and portion sizes.
| Nutrient | Amount per Serving | % Daily Value* |
|---|---|---|
| Calories | 213 kcal | N/A |
| Calories from Fat | 129 kcal | N/A |
| Total Fat | 14.4 g | 22% |
| Saturated Fat | 6.6 g | 32% |
| Cholesterol | 40 mg | 13% |
| Sodium | 92.2 mg | 3% |
| Total Carbohydrate | 19.8 g | 6% |
| Dietary Fiber | 1.3 g | 5% |
| Sugars | 10.7 g | N/A |
| Protein | 3.4 g | 6% |
- Percent Daily Values are based on a 2000 calorie diet.
Variations & Substitutions
- Gluten-Free: Substitute the plain flour and self-raising flour with a gluten-free flour blend. You may also need to add a binding agent like xanthan gum to help hold the slice together.
- Dairy-Free: Replace the butter with a dairy-free margarine or coconut oil.
- Nut-Free: Omit the brazil nuts or substitute them with seeds like sunflower seeds or pumpkin seeds.
- Boozy Version: As mentioned earlier, soaking the dried fruit in rum or brandy adds a wonderful depth of flavor.
- Spiced Up: Add a teaspoon of ground cinnamon, nutmeg, or mixed spice to the fruit mixture for a warmer, more festive flavor.
FAQs (Frequently Asked Questions)
Q: Can I use different types of dried fruit?
A: Absolutely! Feel free to experiment with different combinations of dried fruit, such as cranberries, apricots, figs, or dates. Just be sure to keep the total quantity the same.
Q: Can I make this slice ahead of time?
A: Yes, this slice is perfect for making ahead of time! In fact, the flavors tend to meld together and improve over time. Store it in an airtight container in the refrigerator for up to a week.
Q: What if I don’t have orange zest or juice?
A: You can substitute lemon zest and juice if you prefer. The citrus adds brightness and balances the sweetness of the slice.
Q: How do I know when the slice is done?
A: The best way to check for doneness is to insert a skewer into the center of the slice. If the skewer comes out clean or with just a few moist crumbs attached, the slice is done.
Q: Can I add other ingredients to this slice?
A: Yes, feel free to get creative! You could add candied peel, chopped glace cherries, or even a layer of marzipan in the middle of the slice.
Final Thoughts
This Christmas Slice is more than just a recipe; it’s a tradition, a memory, and a taste of the holiday spirit. I encourage you to try this recipe and share it with your loved ones. The rich, fruity flavors and comforting texture are sure to bring joy to any gathering. Don’t be afraid to experiment with variations and make it your own. And most importantly, enjoy the process of baking and sharing this special treat. I’d love to hear your feedback and see your creations! Perhaps pair it with a glass of sherry or mulled wine for the ultimate festive experience. Happy baking!