
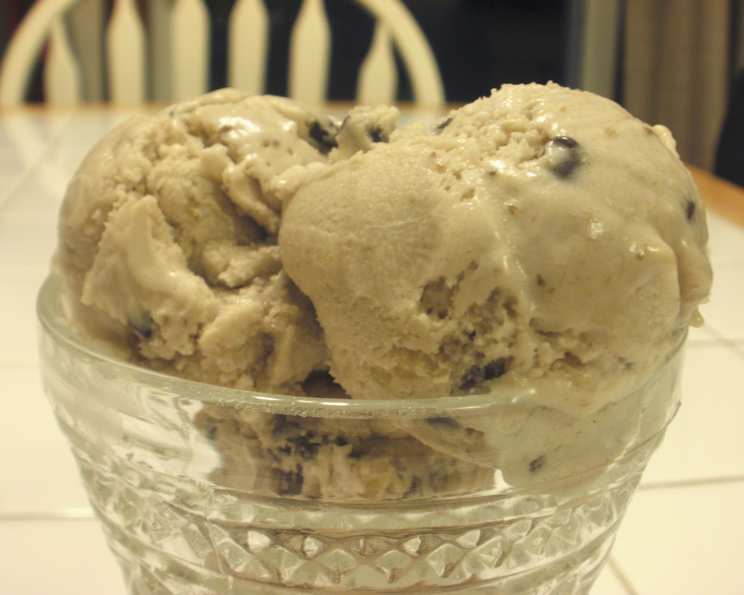
Chunky Banana Nut Chip Ice Cream: A Nostalgic Treat
Some of my earliest and fondest memories are tied to the sweet, comforting aroma of ripe bananas. My grandmother, a true Southern matriarch, always seemed to have a bunch ripening on her kitchen counter, destined for banana bread, pudding, or, my personal favorite, ice cream. She’d let me help mash the bananas, always sneaking a taste, and the anticipation of that first spoonful of homemade ice cream, swirled with nuts and chocolate, was almost unbearable. This Chunky Banana Nut Chip Ice Cream is an homage to those simpler times, a scoop of pure nostalgia in every bite.
Recipe Overview
- Prep Time: 15 minutes
- Cook Time: 6 minutes (for toasting nuts)
- Total Time: 40 minutes
- Yields: 1 quart
- Serves: 8
- Dietary Type: Vegetarian
Ingredients
- 4 bananas, broken into chunks
- 1 tablespoon lemon juice
- 1 teaspoon pure vanilla extract
- 1 cup granulated sugar
- 1 1/3 cups heavy cream, chilled
- 2/3 cup cold milk
- 1/2 cup chopped toasted walnuts
- 1/2 cup miniature semisweet chocolate chips
Equipment Needed
- Blender or Food Processor
- Cookie Sheet
- Ice Cream Maker
- Measuring Cups & Spoons
- Oven
Instructions
- Toast the Walnuts: Preheat your oven to 375 degrees F (190 degrees C). Spread the chopped walnuts on a cookie sheet in a single layer. Toast in the preheated oven for about 6 minutes, watching carefully to prevent burning. The nuts are done when they are fragrant and lightly golden. Remove from the oven and set aside to cool slightly.
- Prepare the Banana Base: In a blender or food processor, combine the bananas, lemon juice, vanilla extract, granulated sugar, chilled heavy cream, and cold milk.
- Blend Until Smooth: Puree the mixture until completely smooth. The consistency should be similar to a thick smoothie.
- Churn the Ice Cream: Transfer the banana mixture to the freezer canister of your ice cream maker. Freeze according to the manufacturer’s instructions. This typically takes about 20-25 minutes, but it can vary depending on your machine.
- Add the Mix-ins: When the ice cream begins to stiffen (usually in the last 5-10 minutes of churning), add the toasted walnuts and miniature semisweet chocolate chips. Allow the ice cream maker to continue churning until the nuts and chocolate are evenly distributed and the ice cream has reached your desired consistency.
- Harden (Optional): For a firmer ice cream, transfer the finished ice cream to an airtight container and freeze for an additional 1-2 hours to harden. This step is optional, but it will make the ice cream easier to scoop.
Expert Tips & Tricks
- Perfectly Ripe Bananas: Use very ripe bananas for the best flavor. The bananas should have brown spots all over the peel, but the flesh should still be firm, not mushy. For an even more intense banana flavor, use bananas with almost entirely black peels.
- Prevent Browning: The lemon juice helps prevent the bananas from browning and adds a subtle tang that complements the sweetness of the ice cream. Don’t skip it!
- Chill Everything: Make sure your cream and milk are well-chilled before starting the recipe. This will help the ice cream freeze faster and result in a smoother texture.
- Toast Those Nuts!: Toasting the walnuts enhances their flavor and adds a pleasant crunch to the ice cream. Don’t over-toast them, though, or they’ll become bitter.
- Mix-in Timing: Adding the nuts and chocolate chips too early can cause them to sink to the bottom of the canister. Wait until the ice cream is already starting to thicken before adding them.
- Adjust the Sweetness: If you prefer a less sweet ice cream, you can reduce the amount of sugar slightly. Taste the banana mixture before churning and adjust as needed.
- No Ice Cream Maker? If you don’t have an ice cream maker, you can still make this recipe! Pour the banana mixture into a freezer-safe container and freeze for 2-3 hours, stirring every 30 minutes to break up ice crystals. While the texture won’t be quite as smooth as ice cream made in an ice cream maker, it will still be delicious.
Serving & Storage Suggestions
Serve this Chunky Banana Nut Chip Ice Cream immediately after churning for a soft-serve consistency. For a firmer texture, freeze for a few hours. Garnish with extra toasted walnuts, a drizzle of chocolate sauce, or a sprinkle of cinnamon for a beautiful presentation.
Store any leftover ice cream in an airtight container in the freezer. It will keep for up to 2 weeks, although the texture may become slightly icier over time. To soften the ice cream for serving, let it sit at room temperature for 5-10 minutes before scooping.
Avoid leaving the ice cream out at room temperature for extended periods, as it will melt quickly.
Nutritional Information
Please note that the following nutritional information is an estimate and may vary based on specific ingredients and serving sizes.
| Nutrient | Amount per Serving | % Daily Value |
|---|---|---|
| Calories | 401 kcal | 20% |
| Total Fat | 24g | 37% |
| Saturated Fat | 12g | 60% |
| Cholesterol | 57mg | 19% |
| Sodium | 27mg | 1% |
| Total Carbohydrate | 49g | 16% |
| Dietary Fiber | 3g | 10% |
| Sugars | 38g | N/A |
| Protein | 4g | 8% |
Variations & Substitutions
- Dairy-Free: Substitute the heavy cream and milk with equal amounts of coconut cream and almond milk for a dairy-free version. Be aware that this will slightly change the flavor and texture.
- Nut-Free: Omit the walnuts or substitute with toasted sunflower seeds or pumpkin seeds.
- Chocolate Chunk: Use larger chocolate chunks instead of miniature chocolate chips for a more intense chocolate experience.
- Peanut Butter Swirl: Drizzle in some peanut butter during the last few minutes of churning for a peanut butter banana ice cream.
- Caramel Ripple: Swirl in some caramel sauce after churning for a decadent treat.
- Spice it Up: Add a pinch of cinnamon or nutmeg to the banana mixture for a warm, spiced flavor.
- Boozy Banana: Add a tablespoon or two of rum or banana liqueur to the banana mixture for an adult twist.
FAQs (Frequently Asked Questions)
Q: Can I use frozen bananas for this recipe?
A: Yes, you can use frozen bananas, but be sure to thaw them slightly before blending to ensure a smooth consistency.
Q: What if I don’t have an ice cream maker?
A: You can still make this ice cream without a machine! Follow the instructions in the “Expert Tips & Tricks” section for a no-churn version.
Q: Can I use a different type of nut?
A: Absolutely! Pecans, almonds, or macadamia nuts would all be delicious substitutes for walnuts.
Q: How ripe should the bananas be?
A: The riper the bananas, the sweeter and more flavorful the ice cream will be. Look for bananas with brown spots all over the peel.
Q: My ice cream is too hard after freezing. What can I do?
A: Let the ice cream sit at room temperature for 5-10 minutes before scooping. This will soften it up and make it easier to serve.
Final Thoughts
This Chunky Banana Nut Chip Ice Cream is more than just a recipe; it’s a journey back to simpler times, a reminder of warm kitchens and sweet memories. Whether you’re a seasoned ice cream maker or a first-time churner, I encourage you to try this recipe and experience the magic of homemade ice cream. Feel free to adapt it to your own tastes and preferences, and most importantly, share it with those you love. After all, good food is always best enjoyed in good company.