
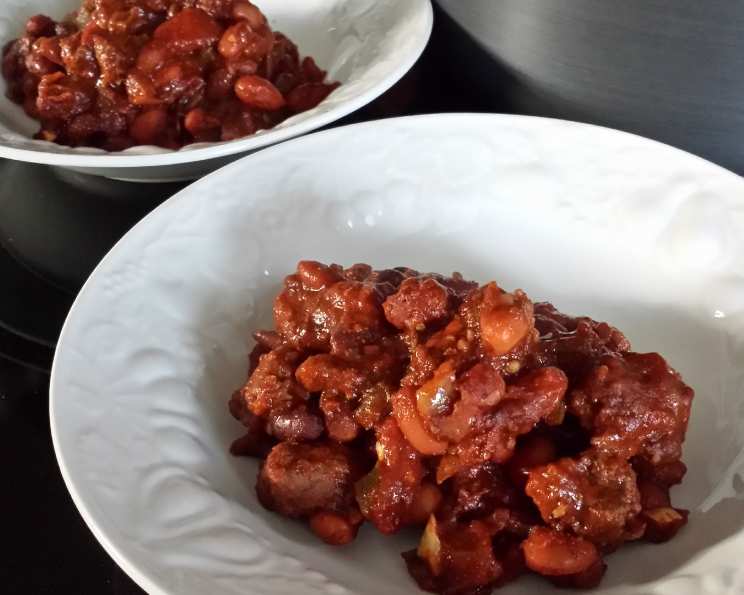
Chunky Oven Chili: A Chef’s Comfort Food Revelation
My earliest memories of chili involve standing on a stool next to my grandmother, watching her meticulously chop vegetables while a symphony of spices filled the air. The only problem? The lingering scent! It permeated everything, from our clothes to the curtains. While the aroma was undeniably comforting in the moment, its persistence wasn’t always welcome. That’s why I adore this Chunky Oven Chili – all the hearty flavor and comforting warmth, without the lingering kitchen perfume. The oven’s gentle heat coaxes out the best in every ingredient, creating a rich, complex chili that’s both deeply satisfying and refreshingly aroma-controlled.
Recipe Overview
- Prep Time: 20 minutes
- Cook Time: 1 hour 35 minutes
- Total Time: 1 hour 55 minutes
- Servings: 6
- Yield: About 8 cups
- Dietary Type: Can be easily made gluten-free and dairy-free
Ingredients
- 2 small onions, diced
- 8 garlic cloves, minced
- 4 celery stalks, chopped
- ½ large green sweet pepper, chopped
- 2 tablespoons chili powder
- 1 tablespoon ground cumin
- 1 teaspoon salt
- 1 teaspoon black pepper
- 1 dash red pepper flakes
- 1 ½ lbs ground beef (can substitute with ground turkey, chicken, or plant-based crumbles)
- 12 ounces tomato paste
- 14 ounces Mexican-style tomatoes (diced tomatoes with chilies)
- 15 ounces pinto beans, drained and rinsed
- 15 ounces black beans, drained and rinsed
- 15 ounces red kidney beans, drained and rinsed
- 1 – 2 cups water (or beef broth for extra flavor)
Equipment Needed
- Large Soup Pot or Dutch Oven (oven-safe)
- Cutting Board
- Chef’s Knife
- Measuring Cups and Spoons
- Wooden Spoon or Spatula
Instructions
- Preheat your oven to 375ºF (190ºC). If your oven has a convection setting, use it for more even browning and cooking.
- In your soup pot or Dutch oven, combine the diced onions, minced garlic, chopped celery, and chopped green sweet pepper. These aromatic vegetables form the flavorful base of the chili.
- Add the chili powder, ground cumin, salt, black pepper, and red pepper flakes to the pot. These spices will infuse the meat and vegetables with a rich, warming flavor.
- Place the ground beef into the pot with the vegetables and seasonings. Use your hands or a wooden spoon to thoroughly mix the ingredients together, ensuring the meat and vegetables are well coated with the spices. This step is crucial for even flavor distribution.
- Place the pot into the preheated oven and cook, uncovered, for 15 – 20 minutes. This will brown the meat and soften the vegetables, building a deeper flavor profile. Keep an eye on it to prevent burning.
- Remove the pot from the oven. The meat should be nicely browned.
- Add the Mexican-style tomatoes, tomato paste, pinto beans, black beans, red kidney beans, and water (or beef broth) to the pot.
- Stir all the ingredients together until well combined. The amount of water you add will determine the final consistency of the chili. Start with 1 cup and add more gradually until you reach your desired thickness.
- Return the pot to the oven, uncovered, and continue cooking for about an hour. Stir the chili every 15-20 minutes, if you like, to ensure even cooking and prevent sticking.
- After an hour, check the chili for consistency. If it’s too thick, add a little more water or broth. Taste and adjust the seasonings if needed. You can add more chili powder for heat, cumin for earthiness, or salt and pepper to taste. Continue baking for 15-20 minutes if you’d like to further meld the flavors.
Expert Tips & Tricks
- Meat Matters: For the richest flavor, use ground beef with a higher fat content (80/20). However, for a leaner option, use 90/10 or ground turkey. Drain off any excess fat after browning to avoid a greasy chili.
- Bean Variety: Feel free to experiment with different types of beans! Great Northern beans, cannellini beans, or even chickpeas would be delicious additions or substitutions.
- Spice Level: Adjust the amount of red pepper flakes to control the heat. For a milder chili, omit them altogether. For a spicier kick, add a pinch of cayenne pepper or a finely chopped jalapeño pepper.
- Flavor Boosters: A tablespoon of unsweetened cocoa powder or a splash of balsamic vinegar can add depth and complexity to the chili’s flavor.
- Make-Ahead Magic: This chili is even better the next day! Make it a day or two in advance and store it in the refrigerator. The flavors will meld together beautifully.
Serving & Storage Suggestions
Serve your Chunky Oven Chili hot, straight from the oven or after reheating. Garnish with your favorite toppings, such as:
- Shredded cheddar cheese
- Sour cream or Greek yogurt
- Chopped green onions or chives
- Diced avocado
- A dollop of salsa
- Tortilla chips or cornbread
Leftover chili can be stored in an airtight container in the refrigerator for up to 3-4 days. It can also be frozen for up to 2-3 months. Thaw overnight in the refrigerator before reheating. Reheat gently on the stovetop over medium heat or in the microwave until heated through.
Nutritional Information
| Nutrient | Amount per Serving | % Daily Value |
|---|---|---|
| Calories | 646 kcal | N/A |
| Total Fat | 22 g | 33% |
| Saturated Fat | 7.6 g | 38% |
| Cholesterol | 77.1 mg | 25% |
| Sodium | 1256.8 mg | 52% |
| Total Carbohydrate | 76.3 g | 25% |
| Dietary Fiber | 25.2 g | 100% |
| Sugars | 11.2 g | N/A |
| Protein | 44.4 g | 88% |
Note: Nutritional information is an estimate and may vary based on specific ingredients and portion sizes.
Variations & Substitutions
- Vegetarian Chili: Omit the ground beef and add an extra can of beans or a cup of chopped vegetables like corn, zucchini, or butternut squash.
- Vegan Chili: Substitute the ground beef with plant-based crumbles and ensure your toppings are dairy-free.
- Spicy Chili: Add a chopped jalapeño pepper or a dash of cayenne pepper to the chili for extra heat. You could also use hot sauce as a topping.
- White Chicken Chili: Substitute the ground beef with shredded cooked chicken or ground chicken and use Great Northern beans instead of kidney beans.
- Sweet Potato Chili: Add diced sweet potatoes along with the other vegetables for a touch of sweetness and added nutrients.
FAQs (Frequently Asked Questions)
Q: Can I use canned tomatoes instead of Mexican-style tomatoes?
A: Yes, you can. Just add a can of diced tomatoes and a can of diced tomatoes with green chilies, or add a pinch of chili flakes to your regular diced tomatoes.
Q: Can I cook this in a slow cooker instead of the oven?
A: Yes, you can, but you would still need to brown the ground beef in a skillet before adding it to the slow cooker. Cook on low for 6-8 hours or on high for 3-4 hours.
Q: What’s the best way to thicken the chili if it’s too watery?
A: You can remove a cup of the chili and blend it until smooth, then stir it back into the pot. Alternatively, you can mix a tablespoon of cornstarch with two tablespoons of cold water and stir it into the chili.
Q: Can I add other vegetables to this chili?
A: Absolutely! Corn, zucchini, bell peppers (different colors), and squash are all great additions. Add them along with the other vegetables.
Q: What are some good side dishes to serve with chili?
A: Cornbread, crackers, a side salad, or grilled cheese sandwiches are all classic accompaniments to chili.
Final Thoughts
This Chunky Oven Chili is more than just a recipe; it’s an invitation to create a comforting, flavorful meal that will warm you from the inside out, without overwhelming your kitchen with lingering aromas. Don’t be afraid to experiment with different ingredients and toppings to make it your own. And most importantly, gather around the table with loved ones and enjoy the simple pleasure of a delicious, home-cooked meal. Share your creations and feedback – I can’t wait to hear what you think! Pair this hearty chili with a crisp, refreshing beer or a robust red wine for the perfect culinary experience. Happy cooking!