
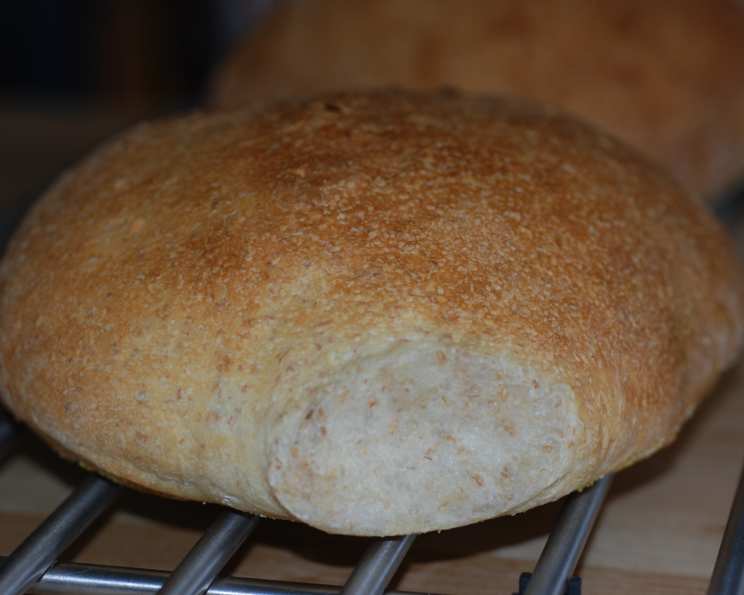
The Rustic Charm of Homemade Ciabatta
I’ll never forget the first time I tasted authentic ciabatta. It was a small trattoria in Florence, tucked away on a cobbled street, and the aroma of baking bread filled the air. The bread, served simply with olive oil and balsamic vinegar, was an experience – the crust shattering with a satisfying crackle, the interior airy and full of irregular holes, each bite bursting with a subtle, tangy flavor. Back home, I was determined to recreate that magic, and after many trials, I found this recipe. It’s the closest I’ve come to capturing that authentic taste and texture, all made possible with the help of a bread machine!
Recipe Overview
- Prep Time: 20 minutes
- Cook Time: 25-30 minutes
- Total Time: 2 hours 30 minutes
- Servings: 12
- Yield: 2 loaves
- Dietary Type: Vegetarian
Ingredients
- 1 1/2 cups water
- 1 1/2 teaspoons salt
- 1 teaspoon white sugar
- 1 tablespoon olive oil
- 3 1/4 cups bread flour
- 1 1/2 teaspoons bread machine yeast
Equipment Needed
- Bread Machine
- Lightly Floured Board
- Large Bowl
- Baking Sheets (lightly floured or parchment-lined)
- Oven
- Spray Bottle with Water
Instructions
- Begin by adding all the ingredients to the pan of your bread machine. It’s crucial to follow the order recommended by your bread machine manufacturer for optimal results. Generally, liquids go first, followed by dry ingredients, with the yeast added last, away from the salt.
- Select the “Dough” cycle on your bread machine and press “Start”. This cycle will mix and knead the dough, and then allow it to rise.
- Once the dough cycle is complete, you’ll notice the dough is quite sticky and wet. This is perfectly normal for ciabatta. Resist the urge to add more flour at this stage, as that will result in a denser bread. The high hydration is what creates those characteristic air pockets.
- Gently transfer the dough to a lightly floured board. Shape it into a ball as best you can, even if it’s a bit messy.
- Cover the dough with a large bowl and let it rest for 15 minutes. This resting period, called the bench rest, allows the gluten to relax, making the dough easier to handle.
- Prepare your baking sheets. Lightly flour them, or line them with parchment paper. Parchment paper is especially helpful for preventing the sticky dough from adhering to the pan.
- Divide the dough into 2 equal pieces.
- Gently shape each piece into a rough oval, approximately 3×14 inches. Avoid overworking the dough; the goal is to maintain as many air pockets as possible. Think gentle stretching and patting rather than forceful kneading.
- Place the shaped loaves onto the prepared baking sheets. Use your fingertips to dimple the surface of the dough, creating shallow indentations. This helps to create the characteristic ciabatta texture. Lightly dust the surface of the loaves with flour.
- Cover the loaves loosely with plastic wrap or a clean kitchen towel, and let them rise in a draft-free place for approximately 45 minutes. The dough should noticeably increase in size, but it won’t double.
- Preheat your oven to 425°F (220°C). Make sure the oven is fully preheated before baking.
- Just before baking, dimple the surface of the dough for a second time.
- Place the baking sheets with the loaves in the middle rack of the preheated oven.
- Bake for 25 to 30 minutes, or until the loaves are golden brown and sound hollow when tapped on the bottom.
- During the baking process, spritz the loaves with water every 5 to 10 minutes. This creates steam in the oven, resulting in a crispier, more flavorful crust. Be careful when opening the oven door to avoid burns from the steam.
Expert Tips & Tricks
- Don’t be afraid of the stickiness: Ciabatta dough is known for being wet and sticky. Embrace it! It’s the key to the open crumb structure.
- Handle with care: When shaping the dough, be gentle to avoid deflating it.
- Steam is your friend: The steam created by spritzing the loaves with water is essential for a good crust. If you don’t want to spritz, you can also place a pan of hot water on the bottom rack of the oven.
- The poke test: To check if the bread is fully baked, insert a toothpick into the center. If it comes out clean, the bread is ready.
- Cool completely: Let the ciabatta cool completely on a wire rack before slicing to prevent a gummy texture.
Serving & Storage Suggestions
Ciabatta is incredibly versatile. Serve it warm, sliced, with olive oil and balsamic vinegar for dipping. It makes fantastic sandwiches, especially with Italian meats and cheeses. It’s also delicious toasted and topped with bruschetta or used to make paninis.
Store leftover ciabatta at room temperature in a paper bag or loosely wrapped in a clean kitchen towel. It will stay fresh for 1-2 days. For longer storage, freeze the bread tightly wrapped in plastic wrap or in a freezer bag. To reheat, thaw completely and then warm in a preheated oven at 350°F (175°C) for 5-10 minutes, or until heated through. You can also slice it and toast it.
Nutritional Information
| Nutrient | Amount per Serving | % Daily Value |
|---|---|---|
| Calories | 136.2 kcal | – |
| Calories from Fat | 13 g | – |
| Total Fat | 1.5 g | 2% |
| Saturated Fat | 0.2 g | 1% |
| Cholesterol | 0 mg | 0% |
| Sodium | 292.5 mg | 12% |
| Total Carbohydrate | 26.4 g | 8% |
| Dietary Fiber | 1.1 g | 4% |
| Sugars | 0.4 g | 1% |
| Protein | 3.7 g | 7% |
Note: Nutritional information is an estimate and may vary based on specific ingredients and preparation methods.
Variations & Substitutions
- Herbed Ciabatta: Add 1-2 tablespoons of dried herbs, such as rosemary, thyme, or oregano, to the dough for a flavorful twist.
- Olive Ciabatta: Incorporate 1/2 cup of chopped olives (kalamata or green) into the dough during the kneading process.
- Whole Wheat Ciabatta: Substitute up to half of the bread flour with whole wheat flour for a nuttier flavor and increased fiber.
- Garlic Ciabatta: Brush the baked loaves with garlic-infused olive oil for a savory treat.
- Sourdough Ciabatta: For a tangier flavor, replace half of the bread machine yeast with 1/4 cup of active sourdough starter.
FAQs (Frequently Asked Questions)
Q: Why is my ciabatta so flat?
A: Flat ciabatta can be caused by over-proofing, not enough gluten development, or too much handling during shaping. Be gentle with the dough and avoid over-kneading. Also, ensure your yeast is fresh.
Q: Can I make this recipe without a bread machine?
A: Yes, you can! Combine all the ingredients in a large bowl, mix until a shaggy dough forms, and then knead for 8-10 minutes until smooth and elastic. Follow the remaining steps, adjusting rising times as needed.
Q: How do I get those big air pockets in my ciabatta?
A: The high hydration of the dough is key. Also, gentle handling during shaping and proper proofing will help create those signature air pockets.
Q: What if I don’t have bread flour?
A: Bread flour has a higher protein content than all-purpose flour, which is important for gluten development. However, you can substitute all-purpose flour, but the texture may be slightly different.
Q: My crust isn’t crispy enough. What can I do?
A: Make sure to spritz the loaves with water frequently during baking. You can also try increasing the oven temperature slightly for the last few minutes of baking.
Final Thoughts
This ciabatta recipe, born from a craving for authentic Italian flavors, is a testament to the magic that a simple bread machine can create. Don’t be intimidated by the sticky dough – embrace the challenge and enjoy the rewarding experience of baking your own beautiful, rustic ciabatta. Share it with friends and family, and let the aroma and taste transport you to a sun-drenched Italian trattoria. Pair it with a hearty bowl of tomato soup, a charcuterie board, or simply enjoy it with a drizzle of good olive oil. I encourage you to try this recipe, experiment with variations, and let me know what you think. Happy baking!