
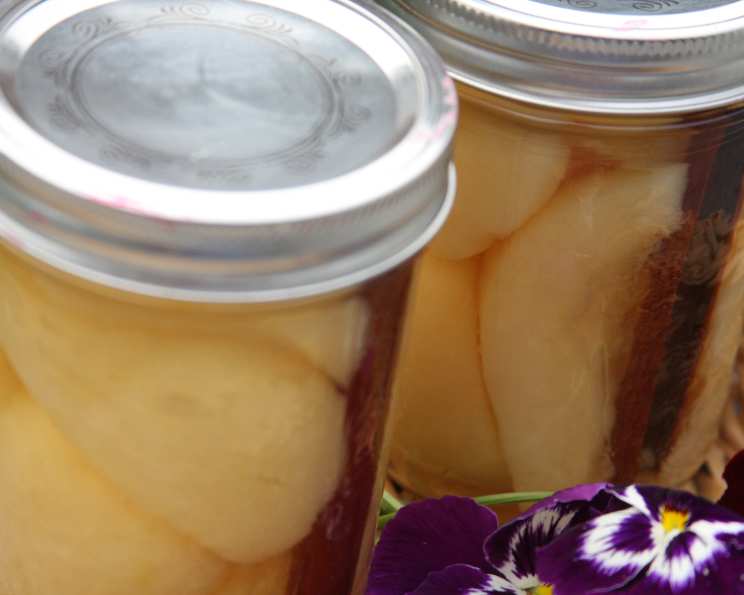
Cinnamon Pears in Apple Juice: A Taste of Autumn Preserved
Canning has always been more than just a method of food preservation to me; it’s a way of bottling memories. I remember my grandmother, her hands stained crimson from berry juice, meticulously filling jars with homemade preserves. The aroma of simmering fruit, the gentle clinking of glass, and the satisfying “pop” of the lids sealing – these are the scents and sounds of love and tradition. These Cinnamon Pears in Apple Juice are a simpler, healthier twist on those classic recipes, perfect for capturing the essence of autumn’s bounty and enjoying it year-round.
Recipe Overview
- Prep Time: 30 minutes
- Cook Time: 20 minutes
- Total Time: 50 minutes
- Yields: Approximately 1 pound per pint jar
- Dietary Type: Vegan, Gluten-Free, Dairy-Free
Ingredients
- 1 – 1 ½ lbs pears per pint jar
- Cinnamon sticks
- Unsweetened apple juice
Equipment Needed
- Large pot for cooking pears
- Large pot for boiling water canning
- Canning jars (pint size)
- Jar lifter
- Lid lifter (optional)
- Bubble remover/headspace tool (optional)
- Knife
- Cutting board
- Peeler
- Kitchen towels
Instructions
-
Start by preparing your pears. Wash them thoroughly. Then, peel the pears, cut them into halves, and core them.
-
To prevent the pears from browning, treat them as you work. A simple solution of lemon juice and water works wonders. Submerge the pear halves in this mixture until you are ready to cook them.
-
Drain the pears from the lemon juice solution, then rinse and drain them again.
-
In a large pot, cook the pear halves in water, one layer at a time, until they are heated through. Don’t overcook them; you want them to be firm but heated.
-
While the pears are heating, heat the apple juice in a separate pot until it just reaches a boil. Keep it hot, but don’t let it boil vigorously.
-
Ensure your canning jars are clean and hot. You can sterilize them by boiling them in water for 10 minutes or running them through a hot cycle in your dishwasher.
-
Pack the hot pears into the hot jars, leaving ½ inch of headspace at the top. This is crucial for proper sealing.
-
Place 1 cinnamon stick in each jar among the pears. Adjust the size of the stick based on the jar size if needed, so it doesn’t extend past the headspace.
-
Carefully ladle the hot apple juice over the pears in each jar, again maintaining that ½ inch headspace.
-
Remove any trapped air bubbles. A specialized bubble remover tool is helpful, but a clean knife or spatula works just as well. Gently slide it down the inside of the jar to release any bubbles. Recheck the headspace after removing bubbles and add more apple juice if necessary to maintain ½ inch.
-
Wipe the rim of each jar with a clean, damp cloth to ensure a clean seal.
-
Adjust the two-piece canning lids according to the manufacturer’s instructions. Typically, this involves placing the flat lid on top of the jar and then screwing on the band until it is fingertip-tight – not too loose, not too tight.
-
Process the filled jars in a boiling water canner for 20 minutes (for pints). The water level should be at least 1 inch above the tops of the jars. Once the water is at a rolling boil, start timing. If you live at a higher altitude, you may need to adjust the processing time; consult a reliable canning guide for specific recommendations.
-
After processing, carefully remove the jars from the canner using a jar lifter and place them on a towel-lined surface, leaving space between them for air circulation. Let the jars cool completely, undisturbed, for 12-24 hours.
-
As the jars cool, you should hear a “pop” sound as the lids seal. After they’ve cooled completely, check the seals by pressing down on the center of each lid. If the lid doesn’t flex or move, it’s properly sealed. If a lid flexes, it hasn’t sealed; you can either reprocess it with a new lid or store the jar in the refrigerator and use it within a few days.
Expert Tips & Tricks
- Pear Variety: Bartlett pears are a classic choice for canning, but other varieties like Bosc or Anjou also work well. Choose pears that are firm but ripe, not overly soft.
- Cinnamon Intensity: Adjust the amount of cinnamon based on your preference. If you like a stronger cinnamon flavor, you can add a pinch of ground cinnamon to the apple juice as it heats.
- Don’t Skip the Headspace: Maintaining the proper headspace is crucial for a good seal. Too little headspace can cause the jars to explode during processing, while too much can prevent a proper seal.
- Jar Preparation: Heating your jars before filling them helps prevent them from cracking when filled with hot ingredients. It also helps to create a better vacuum seal.
- Altitude Adjustments: Processing times need to be adjusted based on your altitude. At higher altitudes, water boils at a lower temperature, so you need to process the jars for a longer time to ensure proper sterilization.
- Pear Texture: If you prefer a softer pear, you can simmer them in the apple juice for a few minutes before packing them into the jars. However, be careful not to overcook them, as they will continue to soften during processing.
Serving & Storage Suggestions
These Cinnamon Pears in Apple Juice are delightful on their own as a healthy snack or dessert. They also make a wonderful topping for yogurt, oatmeal, or pancakes. You can also serve them alongside roasted meats, such as pork or chicken, for a sweet and savory contrast.
Properly sealed jars can be stored in a cool, dark place for up to one year. Once opened, store the jar in the refrigerator and consume within a week.
Nutritional Information
(Estimated values per serving – varies depending on pear variety and apple juice used)
| Nutrient | Amount per Serving | % Daily Value* |
|---|---|---|
| Calories | 120 kcal | 6% |
| Total Fat | 0.5g | 1% |
| Saturated Fat | 0g | 0% |
| Cholesterol | 0mg | 0% |
| Sodium | 5mg | 0% |
| Total Carbohydrate | 30g | 11% |
| Dietary Fiber | 3g | 12% |
| Sugars | 25g | |
| Protein | 1g | 2% |
*Percent Daily Values are based on a 2,000 calorie diet.
Variations & Substitutions
- Spice It Up: Add other spices, such as cloves, allspice, or nutmeg, to the apple juice for a more complex flavor profile. A star anise pod in each jar would also be lovely.
- Sweeten It: While the recipe aims for a healthier option, you can add a touch of honey or maple syrup to the apple juice if you prefer a sweeter preserve.
- Use Other Fruit Juices: Experiment with other unsweetened fruit juices, such as white grape juice or pear juice, as a substitute for apple juice.
- Vanilla Bean: Add a small piece of vanilla bean to each jar for a subtle vanilla flavor.
FAQs (Frequently Asked Questions)
Q: Why is it important to prevent the pears from browning?
A: Browning occurs when the pears are exposed to air and oxidize. Treating them with lemon juice helps to prevent this discoloration, preserving their vibrant color and appealing appearance.
Q: Can I use sugar-free apple juice?
A: Yes, using sugar-free apple juice is perfectly acceptable, especially if you’re trying to reduce your sugar intake. The pears will still absorb the flavor of the juice.
Q: Do I have to use cinnamon sticks, or can I use ground cinnamon?
A: Cinnamon sticks provide a more subtle and complex cinnamon flavor. While you can use ground cinnamon, start with a small amount (about 1/4 teaspoon per jar) to avoid overpowering the other flavors.
Q: How long do the jars need to cool before I can check the seals?
A: It’s best to let the jars cool completely, undisturbed, for 12-24 hours before checking the seals. This allows the vacuum to fully form inside the jar.
Q: What if a jar doesn’t seal properly?
A: If a jar doesn’t seal, you can either reprocess it with a new lid within 24 hours, or store it in the refrigerator and consume the pears within a few days. Reprocessing involves emptying the contents, reheating everything, using a new lid and repeating the canning process.
Final Thoughts
These Cinnamon Pears in Apple Juice are a testament to the simple pleasures of homemade goodness. They’re a delightful way to enjoy the flavors of fall all year round, and they make a thoughtful and heartfelt gift. Don’t be intimidated by the canning process; with a little practice and attention to detail, you’ll be preserving your own delicious creations in no time. I encourage you to try this recipe and share the fruits (pun intended!) of your labor with friends and family. Perhaps pair them with a slice of warm gingerbread or a scoop of vanilla ice cream – the possibilities are endless! Happy canning!