
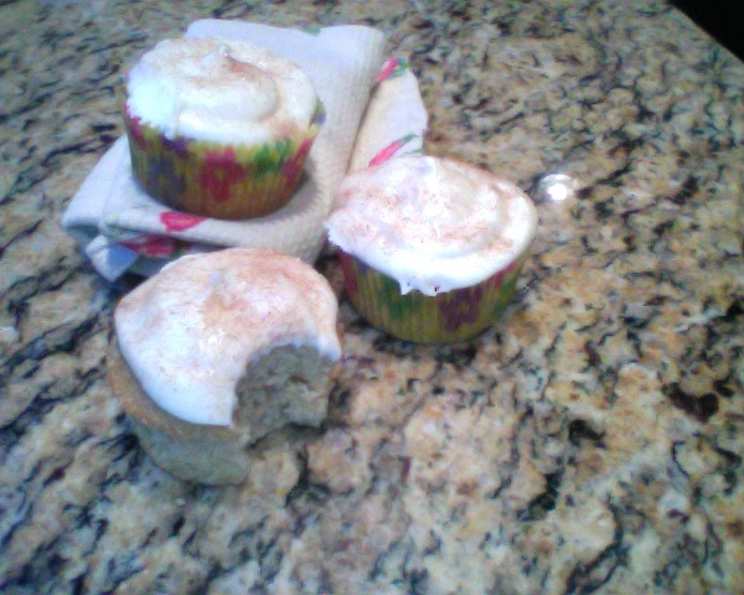
Cinnamon Vanilla Cupcakes: A Taste of Nostalgia
The aroma of cinnamon always takes me back to my grandmother’s kitchen. She wasn’t a fancy baker, but her cinnamon-spiced treats were legendary in our family. Her famous snickerdoodles were always a hit, but I fondly remember those afternoons where she would let me help her make her cinnamon cupcakes, delicately sweet and topped with a swirl of vanilla frosting. These cupcakes are my attempt to recapture that simple joy, that cozy feeling of warmth and love, with every single bite.
Recipe Overview
- Prep Time: 15 minutes
- Cook Time: 18-20 minutes
- Total Time: 35 minutes
- Yields: 1 dozen
- Serves: 12
- Dietary Type: Vegetarian
Ingredients
- 1 1⁄4 cups all-purpose flour, plus 2 tablespoons all-purpose flour
- 1 1⁄8 teaspoons baking powder
- 1⁄4 teaspoon salt (heaping)
- 1-2 teaspoons ground cinnamon (more or less to taste)
- 1⁄2 cup milk
- 1 teaspoon pure vanilla extract
- 1⁄2 cup butter, room temperature
- 1 cup sugar
- 2 eggs, room temperature
Equipment Needed
- Muffin pan
- Muffin liners
- Mixing bowls
- Electric mixer
- Sifter
- Measuring cups and spoons
- Cooling rack
Instructions
-
Preheat your oven to 350 degrees Fahrenheit (175 degrees Celsius). Position a rack in the center of the oven for even baking. Prepare a muffin pan by lining it with paper or silicone liners. This prevents the cupcakes from sticking and makes for easy removal.
-
In a medium-sized mixing bowl, sift together the 1 1/4 cups of all-purpose flour (plus the additional 2 tablespoons), baking powder, salt, and cinnamon. Sifting is crucial because it aerates the dry ingredients, ensuring they are evenly distributed and preventing lumps, which can lead to a tough cupcake. Adjust the amount of cinnamon to your liking. For a more subtle flavor, use 1 teaspoon. For a bolder cinnamon kick, go for 2 teaspoons.
-
In a separate small cup or bowl, mix together the milk and vanilla extract. This simple step allows the vanilla to infuse the milk, enhancing its flavor throughout the batter.
-
In a large mixing bowl, cream together the butter and sugar. Use an electric mixer for this step; it will help you achieve the proper consistency. Start with the butter at room temperature, which allows it to blend smoothly with the sugar. Add the sugar gradually, a little at a time, and continue to mix until the mixture becomes light and fluffy. This creaming process incorporates air into the batter, resulting in a tender and airy cupcake.
-
Beat in the eggs one at a time, making sure each egg is fully incorporated before adding the next. Beat until the mixture is light and fluffy. Room temperature eggs emulsify better, contributing to a smoother batter and better rise.
-
Now, it’s time to combine the wet and dry ingredients. Add the flour mixture and milk mixture alternately to the butter-sugar mixture. Start and end with the flour mixture. This ensures that the flour coats the wet ingredients, preventing gluten development and resulting in a more tender cupcake. Mix until just combined. Be careful not to overmix, as this can lead to a tough cupcake. A few streaks of flour are okay.
-
Fill each muffin liner approximately 3/4 full. Overfilling the liners will cause the cupcakes to overflow during baking. An ice cream scoop can be helpful for portioning the batter evenly.
-
Bake for 18-20 minutes, or until a toothpick inserted into the center comes out clean or with just a few moist crumbs attached. The tops of the cupcakes should spring back lightly when touched. Be vigilant and check your cupcakes around the 18-minute mark as ovens can vary.
-
Once baked, remove the muffin pan from the oven and let the cupcakes cool in the pan for a few minutes before transferring them to a wire cooling rack to cool completely. This prevents the bottoms from becoming soggy.
Expert Tips & Tricks
- Room Temperature is Key: Ensure your butter and eggs are at room temperature. This helps them emulsify properly, creating a smoother batter and a more tender cupcake.
- Don’t Overmix: Overmixing develops the gluten in the flour, leading to a tough cupcake. Mix until just combined.
- Even Baking: Rotate the muffin pan halfway through baking to ensure even browning.
- Frosting Timing: Allow the cupcakes to cool completely before frosting. Frosting warm cupcakes will cause the frosting to melt.
- Flavor Boost: For an extra burst of vanilla flavor, add a pinch of vanilla bean powder to the batter.
- Brown Butter: For a richer, nuttier flavor, brown the butter before creaming it with the sugar. Be sure to let it cool slightly before adding the sugar.
Serving & Storage Suggestions
These Cinnamon Vanilla Cupcakes are best enjoyed fresh, ideally within a day or two of baking. For an elegant presentation, pipe a swirl of vanilla buttercream frosting on top and sprinkle with a dash of cinnamon. They pair wonderfully with a cup of hot coffee, tea, or a glass of cold milk.
To store, place the cooled, unfrosted cupcakes in an airtight container at room temperature for up to 2 days. If frosted, store them in the refrigerator in an airtight container to prevent the frosting from melting. Refrigerated cupcakes may become slightly drier, so allow them to come to room temperature before serving for the best texture.
For longer storage, unfrosted cupcakes can be frozen for up to 2 months. Wrap them individually in plastic wrap and then place them in a freezer-safe bag or container. Thaw them completely at room temperature before frosting and serving.
Nutritional Information
| Nutrient | Amount per Serving | % Daily Value |
|---|---|---|
| Calories | 204.4 kcal | N/A |
| Calories from Fat | 80g | 40% |
| Total Fat | 9g | 13% |
| Saturated Fat | 5.4g | 26% |
| Cholesterol | 52.8mg | 17% |
| Sodium | 167.3mg | 6% |
| Total Carbohydrate | 28.4g | 9% |
| Dietary Fiber | 0.5g | 2% |
| Sugars | 16.8g | 67% |
| Protein | 2.9g | 5% |
Variations & Substitutions
- Gluten-Free: Substitute the all-purpose flour with a gluten-free all-purpose flour blend. Be sure to add a teaspoon of xanthan gum to help bind the ingredients.
- Dairy-Free: Use a dairy-free butter substitute and non-dairy milk, such as almond milk or soy milk.
- Spice it Up: Add a pinch of nutmeg or cloves to the batter for a warmer, more complex spice profile.
- Citrus Zest: Incorporate the zest of an orange or lemon for a bright, refreshing twist.
- Chocolate Chips: Fold in a handful of chocolate chips for a decadent treat.
FAQs (Frequently Asked Questions)
Q: Can I use self-rising flour instead of all-purpose flour and baking powder?
A: No, self-rising flour already contains baking powder and salt. Using it in this recipe would throw off the balance of ingredients.
Q: Can I make these cupcakes ahead of time?
A: Yes, you can bake the cupcakes a day in advance and store them in an airtight container at room temperature. Frost them just before serving.
Q: My cupcakes came out dry. What did I do wrong?
A: Overbaking is a common cause of dry cupcakes. Be sure to check them around the 18-minute mark and remove them from the oven as soon as a toothpick inserted into the center comes out clean. Also, avoid overmixing the batter.
Q: Can I use a different type of frosting?
A: Absolutely! While vanilla frosting is a classic pairing, cream cheese frosting, chocolate frosting, or even a simple glaze would also be delicious.
Q: How do I prevent my cupcakes from sticking to the liners?
A: Ensure that the muffin liners are properly greased or use silicone liners, which are naturally non-stick. Also, avoid overfilling the liners, as this can cause the batter to stick to the sides.
Final Thoughts
These Cinnamon Vanilla Cupcakes are more than just a recipe; they’re a celebration of simple pleasures and cherished memories. The warm spice of cinnamon and the sweet scent of vanilla combine to create a comforting treat that’s perfect for any occasion. I encourage you to try this recipe and create your own memories in the kitchen. Don’t be afraid to experiment with variations and substitutions to make it your own. And, of course, I’d love to hear your feedback and see your creations! Happy baking!