
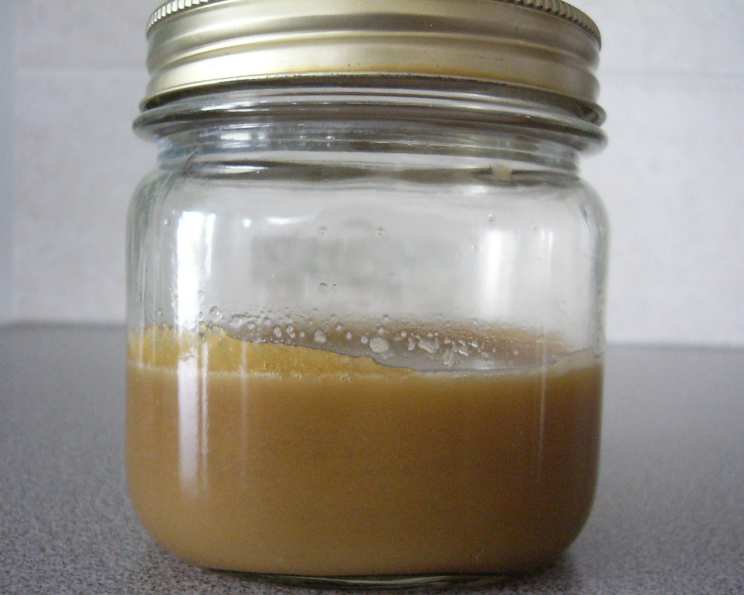
Liquid Gold: Mastering the Art of Homemade Ghee
The scent of gently simmering butter is one of my earliest and fondest culinary memories. My grandmother, a woman of unwavering traditions, would spend hours patiently coaxing the nutty aroma from sticks of butter, transforming them into the golden elixir we called ghee. It wasn’t just an ingredient; it was a ritual, a symbol of nourishment, and a testament to the simple magic of transforming the ordinary into the extraordinary. To this day, the warm, comforting fragrance instantly transports me back to her kitchen, filled with love and the promise of delicious meals.
Recipe Overview
- Prep Time: 5 minutes
- Cook Time: 20 minutes
- Total Time: 25 minutes
- Yields: 1/2 – 1 cup
- Dietary Type: Gluten-Free, Casein-Free, Lactose-Free
Ingredients
- 1-2 cups unsalted butter (high-quality butter yields the best flavor)
- Coffee filter or cheesecloth
Equipment Needed
- Saucepan (light-colored is preferable to monitor browning)
- Stove
- Wooden spoon or spatula
- Fine-mesh sieve
- Glass jar with a lid for storage
Instructions
- Begin by placing your saucepan on the stove over a medium-low heat setting. It’s crucial to start slow; patience is key to preventing the butter from burning.
- Add the butter to the pan. Allow it to melt completely, watching carefully.
- Once the butter has melted, increase the heat to medium. The butter will now begin to crackle, bubble, and foam. This is the moisture evaporating and the milk solids separating from the butterfat. The kitchen will fill with a delightful, rich aroma.
- Continue cooking the butter, undisturbed, for approximately 20 minutes. During this time, the bubbling will become more vigorous, and a thick foam will form on the surface. Observe the color of the butter; it will gradually deepen. The sound will also change, becoming quieter as the moisture evaporates.
- Keep a close eye on the foam; as it begins to clear, and the smell transforms from buttery to a more “roasted,” nutty fragrance, immediately remove the pan from the heat. The solids at the bottom should be a light golden-brown color. Be careful not to let them burn, as this will impart a bitter taste to the ghee.
- Allow the ghee to cool slightly for a few minutes. Then, carefully pour the liquid ghee through a fine-mesh sieve lined with a coffee filter or several layers of cheesecloth into a clean glass jar. This step is essential for removing any remaining milk solids (the “little white bits”). The foam on top can also be filtered out, although some people prefer to include it for added flavor.
- Let the ghee cool completely before sealing the jar. Properly prepared, it should be a beautiful golden color and have a clear, nutty aroma.
- Store the ghee at room temperature for up to one month or in the refrigerator for up to one year. It will solidify when chilled but will liquefy again at room temperature.
Expert Tips & Tricks
- Quality Matters: Start with the best quality unsalted butter you can find. The flavor of the butter will directly impact the flavor of the ghee.
- Low and Slow: Resist the urge to crank up the heat. Cooking the butter too quickly can cause it to burn, resulting in a bitter taste.
- Patience is a Virtue: The process of making ghee requires patience. Allow the butter to simmer gently and evenly to achieve the best results.
- Mind the Solids: Watch the milk solids closely as they begin to brown. They should be a light golden-brown color, not dark brown or burnt.
- Prevent Splattering: Use a splatter screen to minimize messy splatters on your stovetop.
- Infusion: For a unique flavor profile, try infusing the ghee with herbs or spices during the cooking process. Add a few sprigs of rosemary or thyme, a cinnamon stick, or some cardamom pods to the butter as it simmers. Remove them before filtering.
Serving & Storage Suggestions
Ghee is a versatile ingredient that can be used in a wide variety of culinary applications. Its high smoke point makes it ideal for sautéing, frying, and roasting. It adds a rich, nutty flavor to baked goods and can even be used as a spread on toast or crackers.
Store your homemade ghee in a clean, airtight glass jar. At room temperature, it will remain liquid and have a shelf life of up to one month. In the refrigerator, it will solidify and can be stored for up to one year. If you notice any signs of spoilage, such as an off odor or discoloration, discard the ghee.
To use solidified ghee, simply scoop out the desired amount and allow it to come to room temperature or gently warm it in a pan until it liquefies.
Nutritional Information
Here’s an approximate breakdown of the nutritional content per tablespoon of ghee:
| Nutrient | Amount per Serving | % Daily Value |
|---|---|---|
| Calories | 120 kcal | 6% |
| Total Fat | 14 g | 22% |
| Saturated Fat | 9 g | 45% |
| Cholesterol | 45 mg | 15% |
| Sodium | 0 mg | 0% |
| Total Carbohydrate | 0 g | 0% |
| Protein | 0 g | 0% |
Note: Nutritional information is approximate and may vary depending on the butter used.
Variations & Substitutions
- Salted Butter: While unsalted butter is generally preferred, you can use salted butter if you prefer. Just be mindful of the added salt when using the ghee in your recipes.
- Infused Ghee: Experiment with different herbs and spices to create unique flavor infusions. Try adding garlic, ginger, chili peppers, or turmeric to the butter as it simmers.
- Vegan Ghee: While traditional ghee is made from butter, there are vegan alternatives available. These are typically made from coconut oil or other plant-based fats.
FAQs (Frequently Asked Questions)
Q: Why is ghee preferred over regular butter for high-heat cooking?
A: Ghee has a higher smoke point than butter (around 482°F or 250°C), meaning it can withstand higher temperatures without burning and producing harmful compounds.
Q: How can I tell if my ghee is properly made?
A: Properly made ghee should be a clear, golden color with a nutty aroma. The milk solids at the bottom of the pan should be a light golden-brown, not burnt.
Q: Can I use ghee if I’m lactose intolerant?
A: Ghee contains very little lactose and casein due to the removal of milk solids during the clarification process. Many lactose-intolerant individuals can tolerate ghee, but it’s best to consult with a doctor if you have concerns.
Q: What should I do if my ghee turns out bitter?
A: A bitter taste usually indicates that the milk solids were burned during the cooking process. Unfortunately, there’s no way to fix bitter ghee. Be more careful to maintain low heat in your next attempt.
Q: How long does homemade ghee last?
A: When stored properly in an airtight container, ghee can last up to one month at room temperature or up to one year in the refrigerator.
Final Thoughts
Making ghee at home is a simple yet rewarding culinary endeavor. It’s a chance to connect with traditional cooking methods and create a flavorful, versatile ingredient that can elevate your dishes. Don’t be intimidated by the process – with a little patience and attention, you’ll be enjoying your own liquid gold in no time. So, gather your ingredients, embrace the aroma, and embark on this delightful culinary journey. I encourage you to share your experiences and any creative variations you discover along the way! Perhaps try pairing your homemade ghee with some freshly baked naan bread or using it to sauté some flavorful vegetables. The possibilities are endless.