
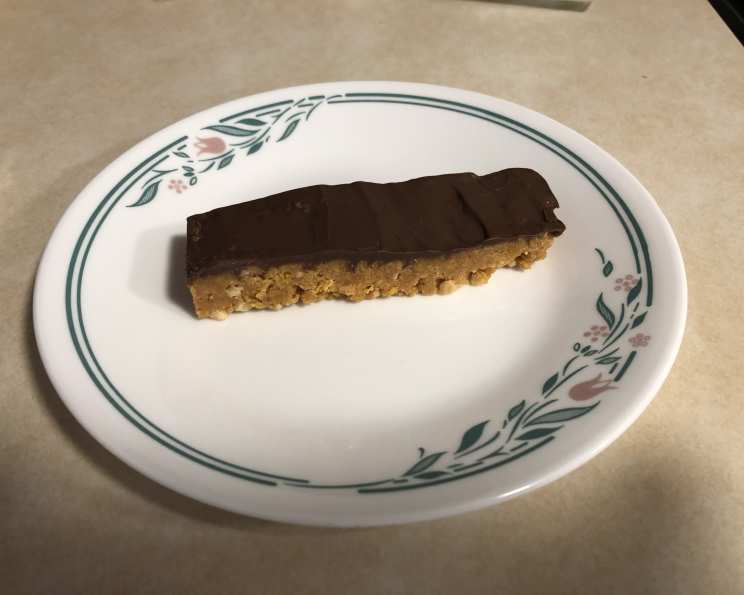
Homemade Clark Bars: A Childhood Classic Reimagined
My grandmother, affectionately known as Nana, had a knack for transforming simple ingredients into unforgettable treats. While her pies were legendary, and her cookies were always a hit, it was her homemade “Clark Bars” that truly captured my heart. These weren’t the store-bought candy bars; they were Nana’s ingenious creation, a symphony of peanut butter, corn flakes, and chocolate that tasted like pure, unadulterated joy. Every bite transported me back to her cozy kitchen, filled with the aroma of warm sugar and the sound of her humming along to the radio. It was a memory I wanted to relive, and now share with you.
Recipe Overview: Nana’s “Clark Bars”
- Prep Time: 15 minutes
- Cook Time: 5 minutes
- Total Time: 1 hour 30 minutes (includes cooling time)
- Servings: 16 squares
- Yield: 1 (8×8 inch) pan
- Dietary Type: Vegetarian
Ingredients
- 1/2 cup sugar
- 1/2 cup light corn syrup
- 1 cup peanut butter (creamy or chunky, your preference!)
- 3 cups corn flakes, crushed (measure after crushing)
- 1 cup chocolate chips (semi-sweet or dark)
- 1 tablespoon shortening (optional, for smoother chocolate)
Equipment Needed
- 8×8 inch baking pan
- Medium saucepan
- Mixing bowl
- Measuring cups and spoons
- Spatula or wooden spoon
- Microwave-safe bowl (or double boiler)
- Rolling pin or food processor (for crushing corn flakes)
Instructions
- Prepare the Base: Lightly grease an 8×8 inch baking pan. This will prevent the bars from sticking and make it easier to remove them later.
- Crush the Corn Flakes: Place the corn flakes in a large zip-top bag. Use a rolling pin to crush them into smaller pieces. You can also use a food processor, but be careful not to over-process them into a powder. Measure out 3 cups of crushed corn flakes.
- Create the Peanut Butter Mixture: In a medium saucepan, combine the sugar and light corn syrup.
- Bring to a Boil: Place the saucepan over medium heat and bring the mixture to a boil, stirring constantly to prevent burning. The sugar should dissolve completely.
- Incorporate Peanut Butter: Remove the saucepan from the heat. Immediately add the peanut butter and stir vigorously until it is completely melted and smooth. This should happen quickly due to the residual heat.
- Combine with Corn Flakes: Pour the peanut butter mixture over the crushed corn flakes in a large mixing bowl.
- Mix Thoroughly: Stir until all the corn flakes are evenly coated with the peanut butter mixture. Ensure there are no dry patches.
- Press into Pan: Transfer the mixture to the prepared 8×8 inch pan. Use a spatula or your fingers to press the mixture evenly into the pan. Pack it down firmly to create a solid base.
- Melt the Chocolate: In a microwave-safe bowl, combine the chocolate chips and shortening (if using).
- Microwave in Intervals: Microwave on 50% power in 30-second intervals, stirring after each interval, until the chocolate is completely melted and smooth. Be careful not to overheat the chocolate, as it can seize up and become grainy. Alternatively, melt the chocolate and shortening in a double boiler over simmering water.
- Spread Chocolate Topping: Pour the melted chocolate evenly over the corn flake base in the pan. Use a spatula to spread it into a smooth, uniform layer.
- Cool Completely: Allow the bars to cool completely at room temperature, or for quicker results, refrigerate for at least one hour. The chocolate needs to harden completely before cutting.
- Cut into Squares: Once the chocolate is firm, cut the bars into squares. Use a sharp knife for clean cuts.
Expert Tips & Tricks
- Peanut Butter Choice: Using creamy peanut butter will create a smoother texture, while chunky peanut butter adds a delightful crunch.
- Crushing the Corn Flakes: Don’t over-crush the corn flakes. You want small pieces, not a fine powder. The texture is key to the bar’s appeal.
- Melting Chocolate: Microwaving the chocolate at half power, in short intervals, is crucial to prevent burning or seizing. Stir well between each interval.
- Shortening for Smoothness: The shortening is optional, but it helps to create a smoother, glossier chocolate topping. You can also use a tablespoon of coconut oil or vegetable oil.
- Preventing a Crumbly Base: Ensure the peanut butter mixture is evenly distributed over the corn flakes and that you press the mixture firmly into the pan.
- Clean Cuts: For neat squares, use a warm, sharp knife to cut the cooled bars. Run the knife under hot water and wipe it dry between cuts.
- Elevate the Chocolate: A sprinkle of sea salt on top of the melted chocolate before it sets adds a wonderful contrast of sweet and salty.
Serving & Storage Suggestions
Serve the “Clark Bars” chilled or at room temperature. They make a great snack, dessert, or addition to a lunchbox.
- Storage: Store the bars in an airtight container at room temperature for up to 3 days, or in the refrigerator for up to a week.
- Freezing: For longer storage, freeze the bars in a single layer on a baking sheet, then transfer them to a freezer-safe bag or container. They can be frozen for up to 2 months. Thaw at room temperature before serving.
Nutritional Information
(Estimated per serving – 1 square)
| Nutrient | Amount per Serving | % Daily Value |
|---|---|---|
| Calories | 218 kcal | 11% |
| Total Fat | 11.3 g | 17% |
| Saturated Fat | 3.5 g | 18% |
| Cholesterol | 0 mg | 0% |
| Sodium | 119.7 mg | 5% |
| Total Carbohydrate | 28.8 g | 10% |
| Dietary Fiber | 1.7 g | 7% |
| Sugars | 16.9 g | 34% |
| Protein | 4.8 g | 10% |
Variations & Substitutions
- Different Cereal: While corn flakes are traditional, you can experiment with other cereals like Rice Krispies or Special K.
- Nut Butter Alternatives: Use almond butter, cashew butter, or sunflower seed butter instead of peanut butter for a different flavor profile or to accommodate allergies.
- Chocolate Variations: Try using white chocolate chips, peanut butter chips, or a combination of different chocolate chips.
- Add-Ins: Incorporate chopped nuts, dried fruit, or sprinkles into the corn flake mixture for added texture and flavor.
- Vegan Option: Ensure your chocolate chips are vegan-friendly and use a plant-based shortening if desired. Many peanut butters are naturally vegan, but always check the label.
- Spiced Chocolate: Add a pinch of cinnamon, cayenne pepper, or chili powder to the melted chocolate for a warm, spicy kick.
FAQs (Frequently Asked Questions)
Q: Can I use a different size pan?
A: Yes, but the thickness of the bars will vary. A larger pan will result in thinner bars, and a smaller pan will create thicker bars. You may need to adjust the cooling time accordingly.
Q: My chocolate is seizing up when I melt it. What am I doing wrong?
A: This usually happens when the chocolate gets overheated or comes into contact with water. Make sure your bowl and utensils are completely dry, and melt the chocolate in short intervals at reduced power (50%) in the microwave, stirring frequently.
Q: Can I make these bars ahead of time?
A: Absolutely! They store well in the refrigerator or freezer, making them a great make-ahead treat.
Q: My bars are too crumbly. What can I do to fix this?
A: Make sure you’re pressing the corn flake mixture firmly into the pan. You can also try adding a little extra peanut butter to help bind the ingredients together.
Q: Are these bars gluten-free?
A: Corn flakes themselves are often gluten-free, but it is essential to check the packaging to ensure there is no cross-contamination during processing. If gluten is a concern, choose certified gluten-free corn flakes.
Final Thoughts
These homemade “Clark Bars” are more than just a recipe; they’re a nostalgic journey back to simpler times, filled with the warmth of family and the joy of homemade treats. I encourage you to try this recipe and create your own memories with your loved ones. Feel free to experiment with variations and substitutions to make it your own signature treat. Share your creations and feedback – I’d love to hear how you’ve made this classic your own! Pair them with a glass of cold milk or a warm cup of coffee for the ultimate comforting indulgence. Enjoy!