
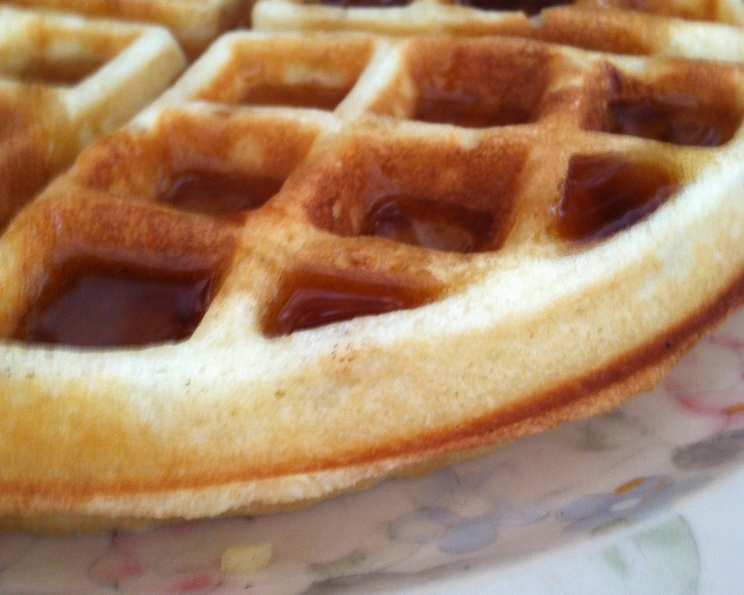
The Soul-Satisfying Simplicity of Classic Belgian Waffles
The aroma alone can transport me back to cobblestone streets and cozy cafes. My first trip to Belgium wasn’t about grand monuments or bustling cities; it was about the waffles. The simple squares of golden dough, warm and impossibly light, dusted with powdered sugar and paired with a strong, dark coffee, became an instant obsession. That first bite, the satisfying crunch giving way to a fluffy interior, remains etched in my memory, a reminder of how even the most humble ingredients, when treated with care, can create something truly extraordinary. I’ve been chasing that perfect waffle ever since, and this recipe comes incredibly close.
Recipe Overview
- Prep Time: 20 minutes (plus overnight rest)
- Cook Time: 3 minutes per waffle
- Total Time: 3 minutes (plus overnight rest)
- Servings: 4-6
- Yield: Approximately 12 waffles
- Dietary Type: Not specified (contains dairy, gluten, and eggs)
Ingredients
- 2 cups all-purpose flour
- 2 tablespoons sugar
- 1 teaspoon salt
- 1 teaspoon active dry yeast
- ¾ cup unsalted butter, melted and cooled
- 1 ½ cups milk
- 1 teaspoon vanilla extract
- 3 eggs, separated
Equipment Needed
- Large mixing bowl
- Whisk
- Spoon
- Plastic wrap
- Electric mixer or whisk for egg whites
- Deep waffle iron
Instructions
-
The magic begins the night before. In a large mixing bowl, thoroughly combine the flour, sugar, salt, and active dry yeast. Sifting the dry ingredients helps ensure even distribution and a lighter waffle.
-
Add the melted and cooled butter, milk, and vanilla extract to the dry ingredients. Mix until just combined. Do not overmix; a few lumps are perfectly acceptable.
-
Cover the bowl tightly with plastic wrap. This is crucial to prevent the batter from drying out and to allow the yeast to work its magic overnight. Let the bowl sit at room temperature overnight. Allowing the batter to rest and ferment develops a deeper flavor and a lighter texture.
-
The next morning, preheat your deep waffle iron according to the manufacturer’s instructions. This ensures even cooking and a crispy exterior.
-
Separate the eggs, placing the yolks into the batter and the whites into a clean, grease-free bowl. Gently beat the egg yolks into the yeast mixture until well combined.
-
Using an electric mixer or a whisk, beat the egg whites until stiff peaks form. This step is essential for creating the airy texture that defines a great Belgian waffle. The whites should be firm enough to hold their shape but not dry.
-
Gently fold the beaten egg whites into the batter using a spoon. Be careful not to overmix, as this will deflate the whites and result in a denser waffle. The goal is to incorporate the whites while maintaining their volume.
-
Pour the batter onto the preheated waffle iron, using the manufacturer’s recommended amount. Typically, this is about ½ to ¾ cup of batter per waffle, but it depends on the size and depth of your iron.
-
Cook for approximately 3 minutes, or until the waffle is golden brown and cooked through. The exact cooking time may vary depending on your waffle iron. Look for a deep golden color and a crisp exterior.
-
Carefully remove the waffle from the iron and serve immediately.
Expert Tips & Tricks
- Butter Temperature is Key: Make sure your butter is melted and cooled, not hot. Hot butter can cook the yeast and result in a flat waffle.
- Don’t Overmix: Overmixing the batter, especially after adding the egg whites, will develop the gluten in the flour and lead to a tough waffle. Gently fold in the egg whites until just combined.
- Waffle Iron Maintenance: Keeping your waffle iron clean and properly seasoned is crucial for preventing sticking and ensuring even cooking. Follow the manufacturer’s instructions for cleaning and seasoning.
- Crispy Edges: For extra crispy edges, try adding a tablespoon of cornstarch to the dry ingredients.
- Yeast Activation: Ensure your yeast is active by proofing it in a small amount of warm milk with a pinch of sugar before adding it to the batter. This will guarantee a good rise.
Serving & Storage Suggestions
Serve these classic Belgian waffles immediately while they are warm and crispy. They are delicious on their own, dusted with powdered sugar, or topped with fresh berries, whipped cream, maple syrup, or your favorite fruit compote.
Leftover waffles can be stored in an airtight container in the refrigerator for up to 2 days. To reheat, toast them in a toaster oven or oven until crisp. You can also freeze them for longer storage. To freeze, place the cooled waffles in a single layer on a baking sheet and freeze until solid. Then, transfer them to a freezer-safe bag or container. They can be stored in the freezer for up to 2 months. Reheat directly from frozen in a toaster or oven.
Nutritional Information
Note: Nutritional information is an estimate and may vary based on specific ingredients and portion sizes.
| Nutrient | Amount per Serving | % Daily Value |
|---|---|---|
| Calories | 450 kcal | 23% |
| Total Fat | 25g | 38% |
| Saturated Fat | 15g | 75% |
| Cholesterol | 150mg | 50% |
| Sodium | 400mg | 17% |
| Total Carbohydrate | 50g | 17% |
| Dietary Fiber | 2g | 7% |
| Sugars | 7g | N/A |
| Protein | 10g | 20% |
Variations & Substitutions
- Gluten-Free: Substitute all-purpose flour with a gluten-free all-purpose flour blend. You may need to adjust the liquid slightly to achieve the correct batter consistency.
- Dairy-Free: Use non-dairy milk, such as almond, soy, or oat milk, and substitute the butter with a plant-based butter alternative.
- Lemon Zest: Add 1-2 teaspoons of lemon zest to the batter for a bright, citrusy flavor.
- Cinnamon Spice: Incorporate ½ teaspoon of ground cinnamon into the dry ingredients for a warm, comforting flavor.
- Chocolate Chip: Fold in ½ cup of chocolate chips into the batter before cooking.
FAQs (Frequently Asked Questions)
Q: Why do I have to let the batter sit overnight?
A: Letting the batter rest overnight allows the yeast to ferment, which develops a deeper flavor and a lighter, more airy texture in the waffles. It’s a crucial step for achieving that classic Belgian waffle consistency.
Q: Can I use a regular waffle iron instead of a deep waffle iron?
A: While a regular waffle iron will work, a deep waffle iron is recommended for authentic Belgian waffles because it creates the characteristic deep pockets and crispy exterior. The cooking time may also vary depending on the iron.
Q: What if my waffles are sticking to the waffle iron?
A: Make sure your waffle iron is properly preheated and seasoned. You can also lightly grease the iron with cooking spray or melted butter before adding the batter.
Q: Can I make the batter ahead of time and cook the waffles later the same day?
A: Yes, you can let the batter rest for a longer period, up to 24 hours, in the refrigerator. Just be sure to gently stir it before adding the beaten egg whites.
Q: Why are my waffles not as crispy as I’d like?
A: Make sure your waffle iron is hot enough and that you’re not overfilling it with batter. Cooking the waffles for a slightly longer time can also help to achieve a crispier exterior.
Final Thoughts
These classic Belgian waffles are more than just a breakfast treat; they’re a culinary experience. From the overnight fermentation to the delicate folding of the egg whites, each step contributes to the creation of a waffle that is both light and flavorful. I urge you to try this recipe, to share it with your loved ones, and to experience the simple joy of a truly exceptional waffle. Whether you enjoy them with a dusting of powdered sugar or a mountain of fresh berries, I hope these waffles bring a little bit of Belgian sunshine to your day. Don’t be afraid to experiment with different toppings and flavors to make them your own. Happy cooking!