
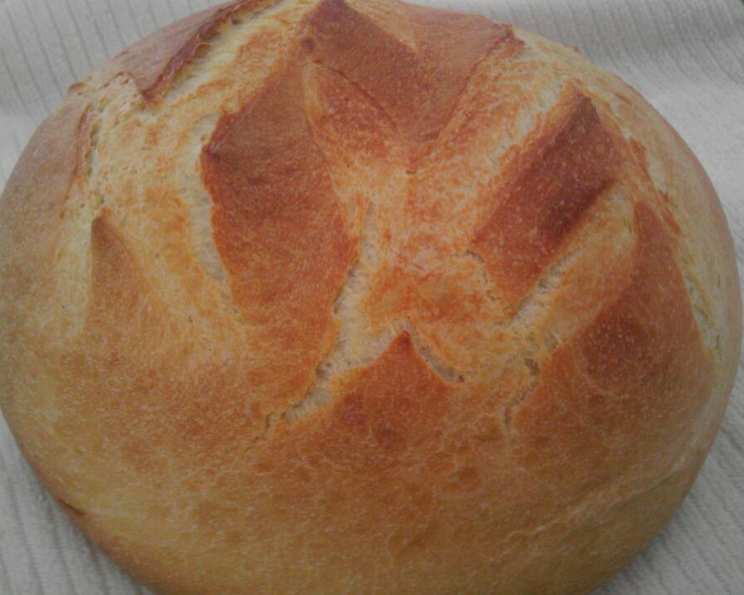
The Simple Joy of Bread Machine Bread: A Classic Recipe
The aroma of freshly baked bread holds a special place in my heart, a fragrant portal back to my grandmother’s kitchen. Every Sunday, without fail, the comforting scent of yeast and warm dough would waft through the house, a promise of the delicious sandwiches and toast to come. While she always made her bread by hand, kneading with practiced ease, I’ve found that a bread machine can bring that same joy, and that incredible smell, into your home with surprisingly little effort. This recipe is a testament to the idea that simple ingredients, combined with a little technology, can create something truly extraordinary.
Recipe Overview
- Prep Time: 10 minutes
- Cook Time: varies by machine, approximately 3 hours
- Total Time: approximately 3 hours 10 minutes
- Servings: approximately 12 slices
- Yield: 1 loaf (1 1/2 lb)
- Dietary Type: Vegetarian
Ingredients
- 10 – 11 ounces warm milk
- 1 teaspoon salt
- 1 1⁄2 tablespoons butter (melted)
- 3 cups bread flour
- 1 1⁄2 tablespoons sugar
- 2 teaspoons bread machine yeast
Equipment Needed
- Bread Machine
- Measuring cups and spoons
- Liquid measuring cup
Instructions
- Begin by adding the warm milk to the bread machine pan. The milk should be comfortably warm to the touch, not scalding, to activate the yeast properly.
- Next, add the salt. Salt controls the yeast activity and strengthens the gluten, so it’s crucial for the bread’s structure.
- Pour in the melted butter. Make sure the butter has cooled slightly after melting to avoid damaging the yeast.
- Carefully measure and add the bread flour. Bread flour has a higher protein content than all-purpose flour, which results in a chewier, more structured loaf.
- Add the sugar. Sugar provides food for the yeast and contributes to the bread’s browning and flavor.
- Finally, sprinkle the bread machine yeast on top of the flour. It’s important that the yeast doesn’t come into direct contact with the salt, as this can inhibit its activity.
- Select your bread machine’s dough setting (if you plan to bake the dough in a conventional oven). This setting will mix, knead, and proof the dough. Alternatively, choose the setting for a 1 1/2 lb loaf if you want the bread machine to handle the entire baking process.
- If using the dough setting: Once the dough cycle is complete, gently remove the dough from the machine. Preheat your oven to 375°F (190°C). Shape the dough into a loaf and place it in a greased loaf pan. Let it rest for about 20 minutes to allow for a final proof.
- Bake the loaf for 30-35 minutes, or until golden brown and the internal temperature reaches 200-210°F (93-99°C).
- If using the bread machine to bake the bread: Allow the machine to complete its cycle. Once finished, carefully remove the bread from the pan and let it cool on a wire rack before slicing.
Expert Tips & Tricks
- Flour Power: The amount of flour may need slight adjustments depending on humidity. If the dough seems too wet, add a tablespoon of flour at a time until it forms a smooth ball. Conversely, if it seems too dry, add a little milk.
- Yeast Considerations: Always check the expiration date of your yeast. Old yeast will not rise properly.
- Butter Bliss: Using clarified butter (ghee) can enhance the flavor and texture of the bread.
- Dough Rise: For the best results when baking in the oven, let the dough rise in a warm, draft-free place. Covering it with a damp towel will prevent it from drying out.
- Even Baking: If the top of the loaf browns too quickly in the oven, tent it loosely with foil.
- Temperature Check: An instant-read thermometer is your best friend when baking. Accurate internal temperature ensures the bread is fully cooked.
Serving & Storage Suggestions
This classic bread machine bread is incredibly versatile. Serve it warm with butter and jam for breakfast, use it to make delicious sandwiches for lunch, or enjoy it as a side with soups and stews for dinner.
- Room Temperature: Store the cooled bread in an airtight container or bread bag at room temperature for up to 3 days.
- Refrigerator: For longer storage (up to a week), store the bread in the refrigerator. However, refrigeration can dry out the bread, so it’s best to toast it before serving.
- Freezer: To freeze, slice the bread and wrap it tightly in plastic wrap, then place it in a freezer bag. Frozen bread can last for up to 3 months. To thaw, simply remove the slices from the freezer and let them come to room temperature. You can also toast them directly from frozen.
- Reheating: To reheat the bread, wrap it in foil and warm it in a 350°F (175°C) oven for about 10-15 minutes, or until heated through.
Nutritional Information
| Nutrient | Amount per Serving | % Daily Value |
|---|---|---|
| Calories | 151 kcal | 8% |
| Total Fat | 2.7g | 4% |
| Saturated Fat | 1.5g | 8% |
| Cholesterol | 7.4mg | 2% |
| Sodium | 220mg | 9% |
| Total Carbohydrate | 26.9g | 10% |
| Dietary Fiber | 1.0g | 4% |
| Sugars | 1.7g | – |
| Protein | 4.4g | 9% |
Nutritional information is an estimate and may vary based on specific ingredients and portion sizes.
Variations & Substitutions
- Whole Wheat: Replace up to half of the bread flour with whole wheat flour for a nuttier flavor and added fiber.
- Herb Infusion: Add a tablespoon of dried herbs like rosemary, thyme, or oregano to the dough for an herbaceous twist.
- Cheese Bread: Incorporate 1/2 cup of shredded cheddar or parmesan cheese into the dough for a cheesy delight.
- Sweet Bread: Add 1/4 cup of dried cranberries or raisins for a touch of sweetness. You can also substitute brown sugar for white sugar for a richer flavor.
- Dairy-Free: Use plant-based milk (almond, soy, or oat milk) instead of dairy milk. Substitute the butter with a dairy-free butter alternative or vegetable oil.
FAQs (Frequently Asked Questions)
Q: Can I use all-purpose flour instead of bread flour?
A: While you can, bread flour is recommended for its higher protein content, which creates a better texture and rise. All-purpose flour will result in a softer, less structured loaf.
Q: Why is my bread dense and doesn’t rise properly?
A: This could be due to old yeast, incorrect measurements, or not enough liquid. Make sure your yeast is fresh, measure ingredients accurately, and adjust the liquid if necessary.
Q: Can I add seeds or nuts to the dough?
A: Yes, you can add seeds or nuts during the kneading process. Add about 1/2 cup of your favorite seeds or nuts, such as sunflower seeds, pumpkin seeds, or chopped walnuts.
Q: How do I prevent the bread from sticking to the bread machine pan?
A: Make sure to grease the pan thoroughly with butter or cooking spray before adding the ingredients.
Q: Can I halve this recipe?
A: It’s not recommended to halve bread machine recipes as the proportions are crucial for proper rising and baking. However, some machines have a small loaf setting, which may accommodate a smaller batch.
Final Thoughts
There’s something undeniably satisfying about making your own bread, and this bread machine recipe makes it incredibly accessible. Don’t be afraid to experiment with different flours, herbs, and flavors to create your own signature loaf. I encourage you to try this recipe and share your creations with friends and family. Pair it with a warm bowl of soup on a chilly evening, or simply enjoy a slice with a pat of butter and a cup of coffee. Happy baking!