
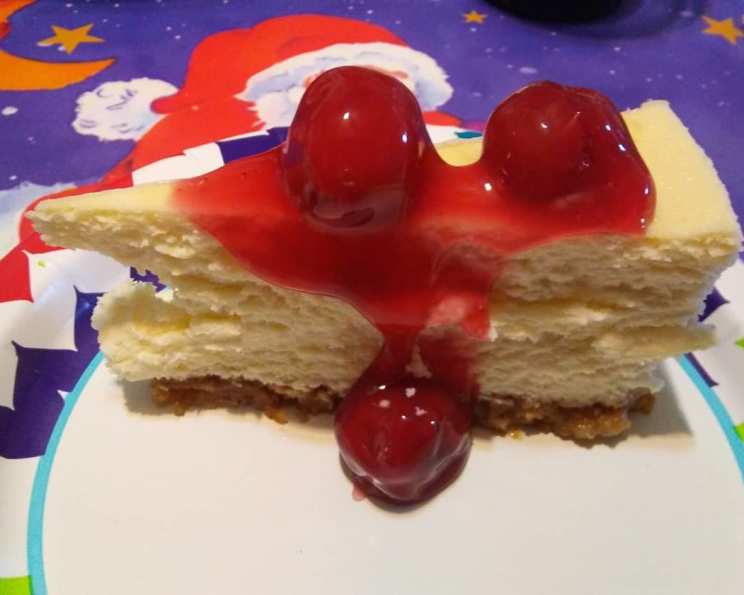
The Enduring Allure of Classic Cheesecake
My earliest memory of cheesecake isn’t the taste, but the anticipation. Every Christmas, without fail, my mother would embark on her annual cheesecake ritual. The scent of vanilla and something impossibly rich would waft from the kitchen for hours, a siren song to a child’s sweet tooth. But the true torture? The agonizing wait as it cooled, then chilled, for what felt like an eternity. Finally, that first bite – a velvety smooth cloud of creamy goodness – made all the patience worthwhile. This isn’t just a dessert; it’s a culinary tradition, a symbol of love baked into every slice.
Recipe Overview
- Prep Time: 30 minutes
- Cook Time: 1 hour
- Total Time: 8 hours 30 minutes (including cooling and refrigeration)
- Servings: 12-16
- Yields: 1 cheesecake
- Dietary Type: Not Gluten-Free
Ingredients
- 4 (8 ounce) packages cream cheese, room temperature
- 16 ounces sour cream, room temperature
- 1/4 lb (1 stick) butter, room temperature
- 1 1/4 cups granulated sugar
- 2 tablespoons cornstarch
- 1 1/4 teaspoons vanilla extract
- 1 teaspoon lemon juice
- 5 eggs
Equipment Needed
- Stand mixer or hand mixer
- Springform pan (9 or 10 inch)
- Large roasting pan
- Measuring cups and spoons
Instructions
-
Preheat your oven to 375 degrees F (190 degrees C). Gather all your ingredients and ensure they are at room temperature. This is crucial for a smooth, lump-free cheesecake.
-
In a large mixing bowl (or the bowl of your stand mixer), beat the cream cheese, sour cream, and butter until the mixture is completely smooth and creamy. This may take several minutes, but don’t rush it. Scrape down the sides of the bowl periodically to ensure everything is evenly incorporated.
-
Add the granulated sugar and cornstarch to the cream cheese mixture. Mix until well combined, ensuring there are no lumps of cornstarch remaining. The cornstarch helps to stabilize the cheesecake and prevent excessive cracking.
-
Stir in the vanilla extract and lemon juice. The lemon juice adds a subtle tang that balances the richness of the cheesecake.
-
Add the eggs one at a time, beating well after each addition. Be careful not to overbeat the batter at this stage, as this can incorporate too much air and cause the cheesecake to puff up and then collapse during baking. Mix just until the eggs are incorporated.
-
Pour the cheesecake batter into a springform pan. A springform pan is essential for easy removal of the cheesecake after baking. If desired, you can lightly grease the pan before pouring in the batter, though this is generally not necessary.
-
Place the springform pan inside a larger roasting pan. This creates a water bath, which helps to bake the cheesecake evenly and prevent cracking.
-
Carefully add hot water to the larger roasting pan, filling it halfway up the sides of the springform pan. Be careful not to splash any water into the cheesecake batter.
-
Carefully transfer the entire setup (roasting pan with springform pan inside) to the preheated oven.
-
Bake at 375 degrees F (190 degrees C) for 1 hour. The cheesecake should be set around the edges but still have a slight jiggle in the center.
-
After 1 hour, turn off the oven. Crack open the oven door slightly and let the cheesecake cool in the oven for 1 hour. This slow cooling process helps to prevent the cheesecake from cracking due to sudden temperature changes.
-
Remove the cheesecake from the oven and let it cool at room temperature for another hour. The top of the cheesecake should be slightly browned and may have some cracks. Don’t worry if it cracks; it’s part of the charm of a classic cheesecake.
-
Cover the cheesecake with plastic wrap and refrigerate for at least 6 hours, or preferably overnight. This allows the cheesecake to fully set and develop its flavor.
-
Before serving, carefully remove the cheesecake from the springform pan. Run a thin knife around the edge of the pan to loosen the cheesecake, then release the sides of the pan.
Expert Tips & Tricks
- Room Temperature Ingredients: Using room temperature cream cheese, sour cream, and butter is absolutely crucial. If the ingredients are cold, they won’t blend together properly, resulting in a lumpy cheesecake.
- Water Bath is Key: Don’t skip the water bath! It helps to create a moist environment in the oven, which prevents the cheesecake from drying out and cracking.
- Don’t Overbeat: Overbeating the batter, especially after adding the eggs, can incorporate too much air, causing the cheesecake to puff up and then collapse. Mix just until the ingredients are combined.
- Cooling is Critical: The slow cooling process, both in the oven and at room temperature, is essential for preventing cracks. Be patient and resist the urge to speed up the process.
- Cracks Happen: Even with all the precautions, your cheesecake might still crack. Don’t worry! It doesn’t affect the taste, and you can always cover it with toppings.
- Prevent a Soggy Crust: Although this recipe doesn’t include instructions for the crust, if you do use a crust, prevent it from getting soggy by brushing it with melted chocolate and allowing it to harden before adding the cheesecake batter.
- Browning: If your cheesecake starts to brown too quickly, tent it loosely with foil.
Serving & Storage Suggestions
Serve the cheesecake chilled, either plain or with your favorite toppings. Fresh berries, chocolate sauce, caramel sauce, or a dusting of powdered sugar are all excellent choices. Leftover cheesecake should be stored in the refrigerator, tightly covered, for up to 5 days. You can also freeze cheesecake for longer storage. Wrap it tightly in plastic wrap and then foil, and it will keep for up to 2 months. Thaw the cheesecake in the refrigerator overnight before serving. Avoid leaving the cheesecake at room temperature for more than 2 hours.
Nutritional Information
| Nutrient | Amount per Serving | % Daily Value |
|---|---|---|
| Calories | 534.7 kcal | N/A |
| Calories from Fat | N/A | 75% |
| Total Fat | 44.5 g | 68% |
| Saturated Fat | 27.3 g | 136% |
| Cholesterol | 209.2 mg | 69% |
| Sodium | 328.7 mg | 13% |
| Total Carbohydrate | 26 g | 8% |
| Dietary Fiber | 0 g | 0% |
| Sugars | 21.3 g | N/A |
| Protein | 9.7 g | 19% |
Note: Nutritional information is an estimate and may vary based on specific ingredients and portion sizes.
Variations & Substitutions
- Chocolate Cheesecake: Add melted chocolate to the batter for a decadent chocolate cheesecake.
- Lemon Cheesecake: Increase the amount of lemon juice and add lemon zest for a bright and tangy lemon cheesecake.
- Berry Swirl Cheesecake: Swirl in your favorite berry jam or compote for a beautiful and flavorful twist.
- Gluten-Free Cheesecake: Use a gluten-free crust or omit the crust altogether for a gluten-free option.
- Lower-Fat Cheesecake: Use a reduced-fat cream cheese and sour cream for a lighter version. Note that this may affect the texture and flavor of the cheesecake.
- Different Extracts: Experiment with different flavor extracts such as almond or maple for a different twist.
FAQs (Frequently Asked Questions)
Q: Why did my cheesecake crack?
A: Cheesecakes crack due to rapid temperature changes or overbaking. Using a water bath and slow cooling are essential for preventing cracks.
Q: Can I use a pre-made crust?
A: Yes, you can use a pre-made crust, but make sure it fits your springform pan. Consider blind-baking the crust for a few minutes before adding the filling to prevent it from becoming soggy.
Q: How do I know when the cheesecake is done?
A: The cheesecake is done when the edges are set but the center still has a slight jiggle. It will continue to set as it cools.
Q: Can I freeze the cheesecake?
A: Yes, you can freeze the cheesecake. Wrap it tightly in plastic wrap and then foil, and it will keep for up to 2 months. Thaw it in the refrigerator overnight before serving.
Q: What can I use if I don’t have a springform pan?
A: While a springform pan is recommended for easy removal, you can use a regular cake pan lined with parchment paper, leaving enough overhang to lift the cheesecake out after baking. However, be aware that this method may not be as clean or easy.
Final Thoughts
There’s something truly magical about a classic cheesecake. Its rich, creamy texture and comforting flavor are timeless and universally appealing. While it may seem intimidating at first, this recipe is surprisingly straightforward, and the results are well worth the effort. So, gather your ingredients, preheat your oven, and embark on a culinary adventure. Don’t be afraid to experiment with different toppings and variations to create your own signature cheesecake. And most importantly, enjoy the process! Whether you’re sharing it with loved ones or savoring a slice all to yourself, this classic cheesecake is sure to bring a smile to your face.