
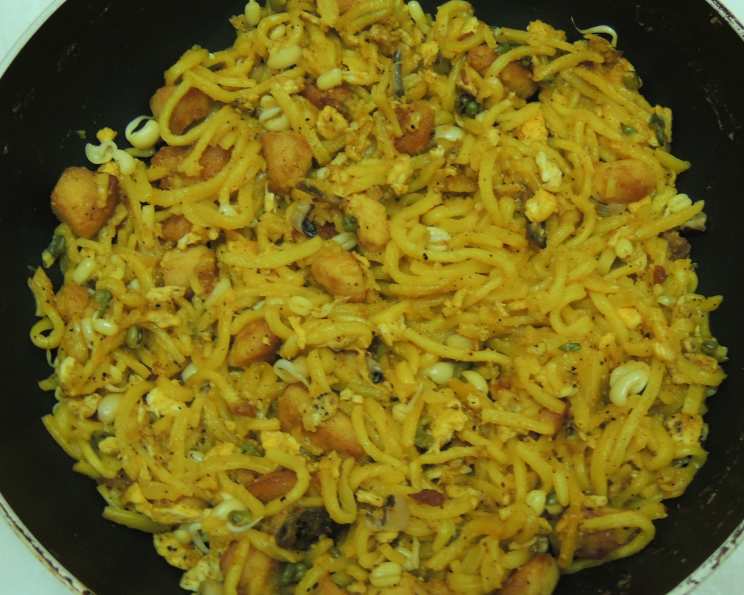
Classic Chicken Pad Thai: A Culinary Journey
The aroma of Pad Thai instantly transports me back to the bustling streets of Bangkok. I remember navigating through the vibrant night markets, the air thick with the scent of sizzling noodles, tangy tamarind, and the infectious energy of the city. Each vendor had their own unique twist, but the core flavors – the perfect balance of sweet, sour, salty, and savory – were always unmistakably Pad Thai. After returning home, I knew I had to recreate that magical experience in my own kitchen, and this recipe is my tribute to those unforgettable flavors.
Recipe Overview
- Prep Time: 20 minutes
- Cook Time: 25 minutes
- Total Time: 45 minutes
- Servings: 6
- Yield: Approx. 8 cups
- Dietary Type: Adaptable (Can be Gluten-Free)
Ingredients
For the Sauce:
- 1/2 cup low-fat coconut milk
- 6 tablespoons creamy peanut butter
- 4 tablespoons light soy sauce
- 4 tablespoons fresh squeezed lime juice
- 1/2 tablespoon rice wine vinegar
- 2 tablespoons brown sugar
- 2 teaspoons grated gingerroot
- 1/2 teaspoon red pepper flakes
For the Chicken Stir Fry:
- 1/2 tablespoon canola oil
- 1/2 tablespoon dark sesame oil
- 1-2 teaspoon curry powder (optional)
- 1 lb chicken breast, cut into bite-size pieces
- 6-8 ounces frozen sugar snap peas
- 1 medium onion, chopped
- 2 garlic cloves, minced
- 1/4 cup dry roasted peanuts, chopped (lightly salted)
- Cilantro, for garnish
- 1/2 lb cooked noodles or 1/2 lb cooked pasta
Equipment Needed
- Large bowl
- Large, deep skillet
- Measuring cups and spoons
- Cutting board
- Knife
Instructions
-
Begin by preparing the sauce. In a large bowl, combine the low-fat coconut milk, creamy peanut butter, light soy sauce, fresh squeezed lime juice, rice wine vinegar, brown sugar, grated gingerroot, and red pepper flakes. Whisk thoroughly until all ingredients are well combined and the sauce is smooth. Set aside. This sauce is the heart of the dish, so taste and adjust the flavors to your liking – add a touch more lime for tanginess or brown sugar for sweetness.
-
Next, prepare the noodles. Cook your choice of noodles or pasta according to package directions until al dente. Once cooked, drain the noodles completely and set aside. While traditional Pad Thai uses rice noodles, feel free to experiment with other options like whole wheat fettuccine for a healthier twist.
-
Now, it’s time to stir-fry the chicken and vegetables. Place a large, deep skillet over medium heat. Add the canola oil and dark sesame oil to the skillet. The combination of these oils provides a lovely balance of flavor – the canola oil ensures even cooking, while the sesame oil adds a nutty depth.
-
If using, add the curry powder to the oil and let it bloom for about 30 seconds, stirring constantly, to release its aroma. This optional addition will give your Pad Thai a warm, earthy note.
-
Add the chopped onion to the skillet and cook for about 3-5 minutes, or until softened and translucent. Then, add the chicken pieces and cook, stirring occasionally, until they are cooked through and no longer pink inside. This typically takes about 5-7 minutes, depending on the size of your chicken pieces.
-
Halfway through the chicken cooking process, add the minced garlic to the pan. Cook for about 30 seconds, or until fragrant, being careful not to burn it. Garlic burns easily and can impart a bitter taste to the dish.
-
Once the chicken is cooked, add the frozen sugar snap peas to the pan. Stir to heat through for about a minute or two. The sugar snap peas add a nice sweetness and crunch to the Pad Thai.
-
Pour the prepared sauce mixture over the chicken and vegetables in the skillet. Stir to coat everything evenly. Let the sauce simmer for a minute or two, allowing the flavors to meld together beautifully.
-
Now, it’s time to bring it all together. Add the cooked noodles or pasta to the skillet, a little at a time, stirring continuously to ensure that the noodles are thoroughly coated with the sauce. Be gentle as you stir, so you don’t break the noodles.
-
Serve immediately, garnished generously with chopped peanuts and fresh cilantro. The peanuts add a delightful crunch and nutty flavor, while the cilantro provides a burst of freshness that complements the richness of the sauce.
Expert Tips & Tricks
- Adjust the spice level: If you prefer a spicier Pad Thai, increase the amount of red pepper flakes in the sauce or add a pinch of cayenne pepper.
- Don’t overcrowd the pan: When stir-frying the chicken, make sure not to overcrowd the skillet. Cook in batches if necessary to ensure that the chicken browns evenly.
- Make it ahead: The sauce can be made ahead of time and stored in the refrigerator for up to 3 days. This will save you time when you’re ready to cook the Pad Thai.
- For an authentic flavor: Use Tamarind paste in the sauce for the most authentic flavor. Adjust other ingredients based on the tartness of the tamarind paste.
- Egg Addition: If you would like to add egg, push all the ingredients to one side of the pan. Scramble 1-2 eggs on the empty side and then mix in with the rest of the ingredients.
Serving & Storage Suggestions
Serve your Chicken Pad Thai immediately for the best flavor and texture. Garnish generously with chopped peanuts, fresh cilantro, and a wedge of lime for an extra burst of tanginess.
Leftovers can be stored in an airtight container in the refrigerator for up to 3 days. To reheat, simply microwave until heated through, or stir-fry in a skillet with a little bit of oil. Be aware that the noodles may become slightly softer upon reheating. It is not recommended to freeze this dish, as the texture of the noodles can change significantly.
Nutritional Information
(Estimated per serving)
| Nutrient | Amount per Serving | % Daily Value |
|---|---|---|
| Calories | 420 kcal | 21% |
| Total Fat | 25g | 38% |
| Saturated Fat | 6g | 30% |
| Cholesterol | 65mg | 22% |
| Sodium | 900mg | 38% |
| Total Carbohydrate | 30g | 10% |
| Dietary Fiber | 5g | 20% |
| Sugars | 10g | – |
| Protein | 30g | 60% |
Variations & Substitutions
- Vegetarian Pad Thai: Substitute the chicken with tofu or extra vegetables like bell peppers, broccoli, or carrots.
- Gluten-Free Pad Thai: Use gluten-free rice noodles and tamari instead of soy sauce.
- Shrimp Pad Thai: Replace the chicken with shrimp for a delicious seafood version.
- Spicy Pad Thai: Add more red pepper flakes or a dash of sriracha to the sauce.
- Nut-Free Pad Thai: Substitute the peanut butter with tahini or sunflower seed butter.
FAQs (Frequently Asked Questions)
Q: Can I use different types of noodles for Pad Thai?
A: Absolutely! While traditional Pad Thai uses flat rice noodles, you can experiment with other types of noodles like linguine, fettuccine, or even soba noodles. Just adjust the cooking time accordingly.
Q: Can I make Pad Thai sauce ahead of time?
A: Yes, the sauce can be made up to 3 days in advance and stored in the refrigerator. This is a great way to save time when you’re ready to cook the dish.
Q: How do I prevent the noodles from sticking together?
A: To prevent the noodles from sticking, rinse them with cold water immediately after cooking. You can also toss them with a little bit of oil to keep them separated.
Q: Can I add more vegetables to my Pad Thai?
A: Of course! Feel free to add any vegetables you like, such as bell peppers, carrots, broccoli, or bean sprouts.
Q: Is Pad Thai spicy?
A: Pad Thai can be as spicy or mild as you like. Adjust the amount of red pepper flakes in the sauce to your preference.
Final Thoughts
This Chicken Pad Thai recipe is more than just a dish; it’s a culinary adventure that brings the vibrant flavors of Thailand to your home. Don’t be intimidated by the list of ingredients – the process is simple and the result is incredibly rewarding. I encourage you to try this recipe, experiment with different variations, and share your creation with friends and family. Pair it with a refreshing Thai iced tea or a crisp Sauvignon Blanc for a complete and unforgettable meal. Bon appétit!