
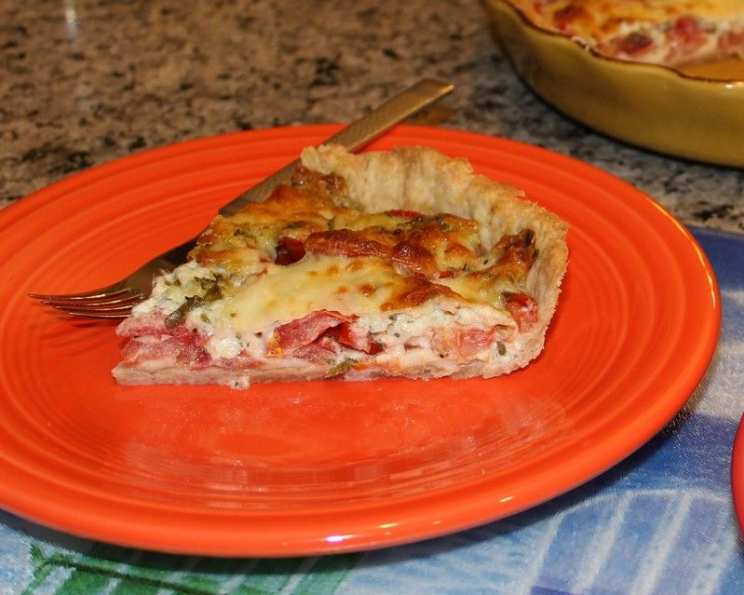
The Timeless Allure of Crisco Pie Crust: A Baker’s Journey
My grandmother, a woman whose hands seemed eternally dusted with flour, swore by Crisco for her pie crusts. I remember standing on a small stool, mesmerized as she’d cut the shortening into the flour, a rhythmic dance of the pastry blender that always ended with the promise of warm apple pie and a scoop of vanilla ice cream. The flakiness, the tenderness, the subtle sweetness – it all started with that familiar blue can. That perfect crust wasn’t just food; it was love baked into every bite.
Recipe Overview
- Prep Time: 30 minutes
- Cook Time: 10-20 minutes (pre-baking) + varies based on filling
- Total Time: 1 hour (plus chilling time)
- Servings: 8
- Yield: 1 pie
- Dietary Type: Vegetarian (can be made vegan with appropriate filling)
Ingredients
SINGLE CRUST
- 1 1/3 cups Pillsbury BEST® All Purpose Flour
- 1/2 teaspoon salt
- 1/2 stick well-chilled Crisco® All-Vegetable Shortening Sticks (or 1/2 cup well-chilled Crisco® All-Vegetable Shortening)
- 3-6 tablespoons ice cold water
DOUBLE CRUST
- 2 cups Pillsbury BEST® All Purpose Flour
- 1 teaspoon salt
- 3/4 stick well-chilled Crisco® All-Vegetable Shortening Sticks (or 3/4 cup well-chilled Crisco® All-Vegetable Shortening)
- 4-8 tablespoons ice cold water
DEEP DISH DOUBLE CRUST
- 2 2/3 cups Pillsbury BEST® All Purpose Flour
- 1 teaspoon salt
- 1 stick well-chilled Crisco® All-Vegetable Shortening Sticks (or 1 cup well-chilled Crisco® All-Vegetable Shortening)
- 6-10 tablespoons ice cold water
Equipment Needed
- Medium mixing bowl
- Pastry blender or food processor
- Fork
- Plastic wrap
- Rolling pin
- 9-inch pie plate
- Measuring cups and spoons
- Optional: Wax paper or parchment paper
- Optional: Pie weights or dried beans
Instructions
-
BLEND the flour and salt in a medium mixing bowl. Ensure they are thoroughly combined for even distribution.
-
CUT the chilled shortening into ½-inch cubes. This step is crucial for achieving a flaky crust. Using a pastry blender, cut the chilled shortening cubes into the flour mixture with an up-and-down chopping motion. Continue until the mixture resembles coarse crumbs with some small pea-sized pieces remaining. Don’t overmix; you want visible pieces of shortening. You can also use a food processor, pulsing until the mixture reaches the desired consistency.
-
SPRINKLE half of the maximum recommended amount of ice-cold water over the flour mixture. This is where the cold temperature becomes vital. Using a fork, stir and draw the flour from the bottom of the bowl to the top, distributing the moisture evenly into the flour. Press the chunks down to the bottom of the bowl with the fork.
-
TEST for proper moistness. Squeeze a marble-sized ball of dough in your hand. If it holds together firmly, do not add any additional water. If the dough crumbles, add more water by the tablespoonful, until the dough is moist enough to form a smooth ball when pressed together. Be careful not to add too much water, as this will result in a tough crust.
-
SHAPE the dough into a ball for a single pie crust. For a double crust or double deep dish crust, divide the dough in two, making one ball slightly larger than the other. Flatten the ball(s) into ½-inch thick round disk(s). This makes rolling easier later on.
-
For ease in rolling, WRAP the dough in plastic wrap. CHILL in the refrigerator for at least 30 minutes or up to 2 days. Chilling allows the gluten to relax, resulting in a more tender crust.
-
ROLL the dough (the larger ball of dough for a double crust pie) from the center outward with steady pressure on a lightly floured work surface (or between two sheets of wax or parchment paper) into a circle that is 2 inches wider than the pie plate for the bottom crust. Using wax paper can prevent sticking.
-
TRANSFER the dough to the pie plate by loosely rolling it around the rolling pin. Center the rolling pin over the pie plate, and then unroll, easing the dough into the pie plate. Gently press the dough into the bottom and up the sides of the pie plate. Avoid stretching the dough, as this can cause it to shrink during baking.
-
FINISH the crust according to your pie needs:
- SINGLE Pie Crust: TRIM the edges of the dough, leaving a ¾-inch overhang. Fold the edge under. FLUTE the dough as desired. BAKE according to specific recipe directions.
- DOUBLE Pie Crust: ROLL the larger disk for the bottom crust, TRIMMING the edges of the dough even with the outer edge of the pie plate. FILL the unbaked pie crust according to recipe directions. ROLL out the smaller dough disk. TRANSFER the dough carefully onto the filled pie. TRIM the edges of the dough, leaving a ¾-inch overhang. Fold the top edge under the bottom crust. PRESS the edges together to seal, and FLUTE as desired. CUT slits in the top crust or PRICK with a fork to vent steam. BAKE according to specific recipe directions.
-
PRE-BAKING (Blind Baking) – This step is crucial for pies with wet fillings.
- Pre-baking without weights: Thoroughly PRICK the bottom and sides of the unbaked pie dough with a fork (approximately 50 times) to prevent it from blistering or rising. BAKE the crust in the lower third of the oven at 425°F for 10-12 minutes or until the edges and bottom are golden brown.
- Pre-baking with weights: Thoroughly PRICK the bottom and sides of the unbaked pie dough with a fork (approximately 50 times) to prevent it from blistering or rising. CHILL or FREEZE for 30 minutes. Line the pie dough snugly with foil or parchment paper. FILL with dried beans or pie weights. BAKE at 375°F for 20 minutes. REMOVE the foil and weights. REDUCE the oven to 350°F and BAKE for 5-10 minutes or until the edges and bottom are golden brown.
Expert Tips & Tricks
- Keep Everything Cold: This is the golden rule of pie crust. Cold shortening and ice water prevent the gluten from developing too much, resulting in a tender crust.
- Don’t Overwork the Dough: Overmixing develops the gluten, leading to a tough crust. Mix only until the dough just comes together.
- Use a Liquid Measuring Cup for Water: It can be easier to control the amount of water added using a liquid measuring cup, adding a tablespoon at a time.
- For Extra Flaky Crust: After cutting in the shortening, add a tablespoon of vinegar to the ice water. The acid will inhibit gluten formation.
- Prevent a Soggy Bottom Crust: Pre-bake the crust, use a hot baking sheet, or brush the bottom crust with a lightly beaten egg white before adding the filling.
Serving & Storage Suggestions
Serve your pie warm or at room temperature, depending on the filling. For best results, allow fruit pies to cool completely before slicing to allow the filling to set.
- Room Temperature: Fruit pies can be stored at room temperature for up to 2 days, but keep in mind that refrigeration is always the safest way to store food to prevent bacterial growth.
- Refrigerator: Store pies covered in the refrigerator for up to 4 days.
- Freezer: Wrap the pie tightly in plastic wrap and then aluminum foil and freeze for up to 2 months. Thaw in the refrigerator overnight before serving.
Nutritional Information
Please note: Nutritional information will vary depending on the ingredients used in your pie filling.
| Nutrient | Amount per Serving | % Daily Value |
|---|---|---|
| Calories | 250 kcal | 13% |
| Total Fat | 14g | 22% |
| Saturated Fat | 8g | 40% |
| Cholesterol | 0mg | 0% |
| Sodium | 150mg | 7% |
| Total Carbohydrate | 28g | 10% |
| Dietary Fiber | 1g | 4% |
| Sugars | 0g | 0% |
| Protein | 3g | 6% |
Variations & Substitutions
- Gluten-Free Crust: Substitute the all-purpose flour with a gluten-free blend. Be sure to follow the blend’s specific instructions, as they may require different liquid ratios.
- Vegan Crust: This recipe is already vegetarian; to make it vegan, ensure your filling is also vegan.
- Sweetened Crust: Add 1-2 tablespoons of granulated sugar to the flour mixture for a slightly sweeter crust.
- Herb Crust: Incorporate finely chopped fresh herbs, such as rosemary or thyme, for a savory twist that complements quiches or vegetable pies.
- Lemon Zest Crust: Add the zest of one lemon to the flour mixture for a bright, citrusy flavor that pairs well with fruit fillings.
FAQs (Frequently Asked Questions)
Q: Why is my pie crust tough?
A: A tough pie crust is often caused by overmixing the dough, which develops too much gluten. Be sure to mix only until the dough just comes together and avoid overworking it during rolling.
Q: How can I prevent my pie crust from shrinking during baking?
A: Avoid stretching the dough when placing it in the pie plate. Chill the dough thoroughly before baking and consider using pie weights to keep the crust from shrinking during blind baking.
Q: Can I make pie dough ahead of time?
A: Absolutely! Pie dough can be made up to 2 days in advance and stored in the refrigerator, wrapped tightly in plastic wrap. You can also freeze the dough for up to 2 months.
Q: What is the best way to transfer the rolled-out dough to the pie plate?
A: Gently roll the dough around your rolling pin, then unroll it over the pie plate. You can also fold the dough into quarters and then unfold it into the pie plate.
Q: Why is my pie crust soggy on the bottom?
A: A soggy bottom crust can be prevented by pre-baking the crust, using a hot baking sheet, or brushing the bottom crust with a lightly beaten egg white before adding the filling.
Final Thoughts
There’s something deeply satisfying about creating a perfect pie crust from scratch. It’s a testament to patience, precision, and the simple joy of transforming basic ingredients into something truly special. Don’t be intimidated – even if your first attempt isn’t flawless, the process itself is a rewarding experience. So, gather your ingredients, channel your inner baker, and create a pie that will bring warmth and happiness to your table. I encourage you to try this recipe, experiment with your favorite fillings, and share your creations with loved ones. And if you’re feeling adventurous, pair your masterpiece with a scoop of homemade vanilla ice cream or a steaming cup of coffee. Happy baking!