
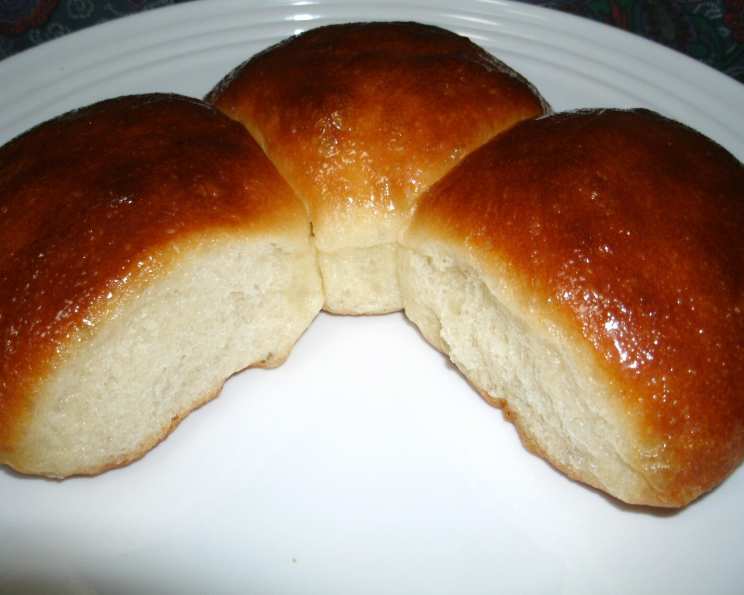
Classic Dinner Rolls: A Taste of Home
There’s something about the aroma of freshly baked bread that instantly transports me back to my grandmother’s kitchen. I can almost see her now, flour dusting her apron as she expertly kneaded dough on a well-worn wooden board. But it wasn’t fancy sourdough or artisanal loaves; it was her simple, perfect dinner rolls that always stole the show. Soft, pillowy, and subtly sweet, they were a staple at every family gathering, slathered with butter and devoured in minutes. Recreating those rolls is like holding onto a piece of my childhood.
Recipe Overview
- Prep Time: 30 minutes
- Cook Time: 20 minutes
- Total Time: 1 hour 30 minutes (includes rising time)
- Servings: 12
- Yield: 12 dinner rolls
- Dietary Type: Vegetarian
Ingredients
- 2 – 2 ¼ cups flour
- ¼ ounce fast-rising yeast
- 2 tablespoons sugar
- ½ teaspoon salt
- ½ cup milk
- ¼ cup water
- 2 tablespoons butter
- Additional melted butter, for brushing (optional)
Equipment Needed
- Large mixing bowl
- Electric mixer
- Lightly floured surface
- 8-inch round pan
- Measuring cups and spoons
- Clean kitchen towel
- Wire rack (optional)
Instructions
- In a large bowl, combine ¾ cup of the flour, the yeast, sugar, and salt.
- In a separate microwave-safe bowl or small saucepan, heat the milk, water, and butter together until very warm (120-130°F). It’s crucial that the mixture isn’t too hot, as it will kill the yeast. Aim for the temperature of bath water.
- Pour the warm liquid mixture into the dry ingredients in the large bowl.
- Using an electric mixer, beat the mixture for 2 minutes at medium speed, scraping down the sides of the bowl occasionally to ensure everything is well incorporated.
- Add ¼ cup of the remaining flour and beat for an additional 2 minutes at high speed. This step develops the gluten and creates a smooth batter.
- Stir in enough of the remaining flour to form a soft dough that pulls away from the sides of the bowl. You might not need all of the flour, so add it gradually until the dough reaches the right consistency.
- Turn the dough out onto a lightly floured surface and knead until smooth and elastic, about 8 to 10 minutes. This is where the magic happens! Kneading develops the gluten structure that gives the rolls their characteristic chewiness.
- Place the dough in a lightly oiled bowl, turning to coat. Cover the bowl with a clean kitchen towel and let the dough rest for 10 minutes. This brief rest period allows the gluten to relax, making the dough easier to shape.
- After the rest, divide the dough into 12 equal pieces. Shape each piece into a smooth ball.
- Place the dough balls in a greased 8-inch round pan. Arrange them evenly, leaving a little space between each roll so they have room to rise.
- Cover the pan with a clean kitchen towel and let the rolls rise in a warm, draft-free place until doubled in size, about 30 minutes. A slightly warm oven (turned off!) or a sunny windowsill are great spots.
- Preheat your oven to 375°F (190°C).
- Bake the rolls in the preheated oven for 20 minutes, or until they are golden brown and cooked through. To check for doneness, insert a toothpick into the center of a roll; it should come out clean.
- Remove the rolls from the oven and immediately remove them from the pan.
- If desired, brush the tops of the warm rolls with additional melted butter for extra richness and shine.
- Serve warm and enjoy!
Expert Tips & Tricks
- Temperature Matters: Ensuring your milk and water mixture is the correct temperature (120-130°F) is critical for activating the yeast. Too hot and you’ll kill the yeast; too cold and it won’t activate. A thermometer is your best friend here.
- Kneading is Key: Don’t skimp on the kneading time. This develops the gluten, which gives the rolls their soft, chewy texture. If you have a stand mixer with a dough hook, you can use that to knead the dough.
- Perfect Rise: For the best rise, find a warm, draft-free spot. A slightly warmed oven (turned off) or placing the dough near a warm stovetop can help.
- Baking Time: Baking times can vary slightly depending on your oven. Keep an eye on the rolls during the last few minutes of baking to prevent them from becoming too brown.
- Make-Ahead Tip: You can prepare the dough ahead of time and let it rise in the refrigerator overnight. This slows down the rising process and develops even more flavor. Just be sure to bring the dough back to room temperature before shaping and baking.
Serving & Storage Suggestions
Serve these classic dinner rolls warm, straight from the oven, with a generous pat of butter. They are also delicious alongside soups, stews, salads, or as a side for your favorite main course.
- Storage: Store leftover rolls in an airtight container at room temperature for up to 2 days. For longer storage, freeze them in a freezer-safe bag for up to 2 months.
- Reheating: To reheat, wrap the rolls in foil and bake in a preheated oven at 350°F (175°C) for about 10-15 minutes, or until warmed through. You can also microwave them for a few seconds, but they may become slightly tougher.
Nutritional Information
| Nutrient | Amount per Serving | % Daily Value* |
|---|---|---|
| Calories | 109.2 kcal | N/A |
| Calories from Fat | 22 kcal | N/A |
| Total Fat | 2.5 g | 3% |
| Saturated Fat | 1.5 g | 7% |
| Cholesterol | 6.5 mg | 2% |
| Sodium | 116.3 mg | 4% |
| Total Carbohydrate | 18.7 g | 6% |
| Dietary Fiber | 0.7 g | 2% |
| Sugars | 2.2 g | N/A |
| Protein | 2.7 g | 5% |
*Percent Daily Values are based on a 2,000 calorie diet. Your daily values may be higher or lower depending on your calorie needs.
Variations & Substitutions
- Whole Wheat Rolls: Substitute half of the all-purpose flour with whole wheat flour for a nuttier flavor and added fiber.
- Sweet Rolls: Add an extra tablespoon of sugar and a teaspoon of vanilla extract to the dough for a slightly sweeter roll.
- Herb Rolls: Mix in 1-2 tablespoons of chopped fresh herbs, such as rosemary, thyme, or parsley, into the dough for a savory twist.
- Garlic Rolls: Brush the baked rolls with garlic butter for a flavorful side dish.
- Dairy-Free Rolls: Substitute the milk with a plant-based milk alternative like almond or soy milk, and use a vegan butter substitute.
FAQs (Frequently Asked Questions)
Q: Can I use active dry yeast instead of fast-rising yeast?
A: Yes, but you’ll need to proof the active dry yeast first. Dissolve it in the warm milk and water mixture with the sugar and let it sit for 5-10 minutes until foamy before adding the other ingredients.
Q: My dough isn’t rising. What could be the problem?
A: The most common reasons for dough not rising are expired yeast, liquid that is too hot or too cold, or a drafty environment. Make sure your yeast is fresh, your liquid is between 120-130°F, and the dough is in a warm, draft-free place.
Q: Can I freeze the baked rolls?
A: Yes, baked rolls freeze well. Let them cool completely before wrapping them tightly in plastic wrap and placing them in a freezer-safe bag. They can be stored in the freezer for up to 2 months.
Q: How do I prevent the rolls from drying out?
A: Brushing the baked rolls with melted butter helps to keep them moist. You can also store them in an airtight container to prevent them from drying out.
Q: Can I add a glaze to these rolls?
A: Absolutely! A simple powdered sugar glaze or a honey glaze would be delicious on these rolls. Apply the glaze while the rolls are still slightly warm.
Final Thoughts
There’s truly nothing quite like the simple pleasure of a warm, homemade dinner roll. Whether you’re a seasoned baker or just starting out, this recipe is sure to bring a touch of comfort and nostalgia to your table. So, preheat your oven, dust off your flour, and get ready to create a batch of these irresistible rolls. Don’t hesitate to add your own personal touch – a sprinkle of herbs, a hint of sweetness, or a brush of garlic butter – to make them your own. I encourage you to share your baking successes (and even your learning experiences!) with friends and family, and perhaps pair these rolls with a hearty soup or a comforting stew for the ultimate cozy meal. Happy baking!