
Classic Italian Easter Bread: A Sweet Tradition
The aroma of warm, yeasty dough mingling with lemon zest is a scent forever etched in my memory. As a child, Easter at my grandmother’s house always meant one thing: Italian Easter Bread. Nonna Emilia, her hands dusted with flour, would preside over a flurry of activity in the kitchen, guiding us grandchildren as we carefully placed dyed eggs into the braided loaves. More than just a bread, it was a symbol of family, renewal, and the joy of springtime. The subtle sweetness, the tender crumb, and the vibrant colors always made it the centerpiece of our Easter feast.
Recipe Overview
- Prep Time: 2 hours
- Cook Time: 20 minutes
- Total Time: 2 hours 20 minutes (plus rising time of approximately 2 hours)
- Yields: 2 loaves
- Serves: 12
- Dietary Type: Vegetarian
Ingredients
- 1 1/4 cups milk
- 1/4 lb (1 stick or 113g) butter
- 2 large eggs
- 1/2 cup sugar
- 1 teaspoon vanilla extract
- Lemon rind (from 1 lemon, finely grated)
- 1 (8g) envelope active dry yeast
- 4 cups all-purpose flour, sifted
Egg Wash
- 1 large egg
- 1 tablespoon water
Decoration
- 2 raw eggs, dyed
- Colored sprinkles
Equipment Needed
- Saucepan
- Large mixing bowl
- Electric mixer (optional, but helpful)
- Measuring cups and spoons
- Plastic wrap
- Large towel
- Parchment paper
- 2 large baking sheets
Instructions
-
Begin by preparing the milk and butter. In a saucepan, combine the 1 1/4 cups of milk and 1/4 lb (1 stick) of butter. Heat over low heat, stirring occasionally, until the butter is completely melted. Be careful not to scald the milk; you just want it warm enough to melt the butter. Remove the saucepan from the heat and set aside to cool slightly.
-
In a large mixing bowl, whisk together the 2 eggs, 1/2 cup of sugar, lemon rind, and 1 teaspoon of vanilla extract. Beat with an electric mixer (or by hand) for several minutes until the mixture is light and frothy. This step incorporates air and helps create a tender crumb in the finished bread.
-
Gradually pour the warm milk and butter mixture into the egg mixture, beating constantly to ensure everything is well combined. The temperature of the milk mixture is important here; if it’s too hot, it could cook the eggs. If it’s too cool, it might not activate the yeast properly later.
-
Add the active dry yeast to the wet ingredients and beat until it is fully blended. This gives the yeast a head start and ensures even distribution throughout the dough.
-
Gradually incorporate the sifted all-purpose flour, adding it about 1/2 cup at a time while beating continuously. Stop adding flour once all 4 cups are mixed in and the dough comes together. The dough should be soft and slightly sticky, but not overly wet. Sifting the flour ensures a lighter texture.
-
Lightly flour a clean counter or work surface. Turn the dough out onto the floured surface and knead it for several minutes until it becomes smooth and elastic. Kneading develops the gluten in the flour, which gives the bread its structure. If the dough is too sticky, add a little more flour, a tablespoon at a time, until it’s manageable.
-
Place the kneaded dough in a large, lightly oiled bowl. Cover the bowl with plastic wrap and then a large towel. This creates a warm, draft-free environment for the dough to rise. Let the dough rise in a warm place until it has doubled in size, which should take approximately 1 hour, maybe longer depending on the temperature of your kitchen.
-
Once the dough has doubled, turn it out onto a lightly floured surface. Gently deflate the dough and cut it into four equal pieces. Knead each piece for about a minute to redistribute the air.
-
Roll each piece of dough into a long cylinder, about 18-20 inches long. Take two cylinders and loosely twist them together. Form the twisted strand into a circle, pressing the ends firmly together to seal. Repeat with the remaining two cylinders.
-
Line two large baking sheets with parchment paper. Place one ring of dough on each baking sheet. Cover the baking sheets with plastic wrap and let the rings rise again for about an hour, or until they have noticeably puffed up. This second rise is crucial for a light and airy bread.
-
Preheat the oven to 350°F (175°C).
-
Prepare the egg wash by beating together the egg and water in a small bowl. Brush the entire surface of each risen ring with the egg wash. This will give the bread a beautiful golden-brown sheen.
-
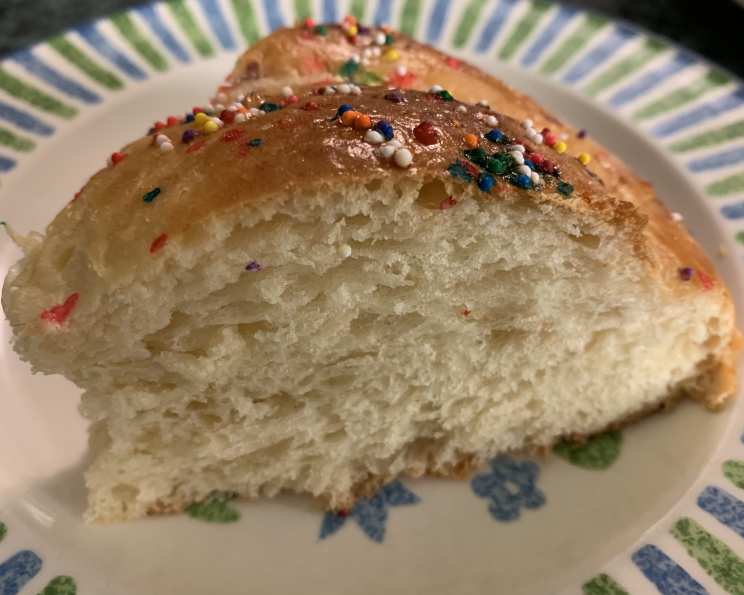
Generously sprinkle the top of each ring with colored sprinkles. Place a dyed raw egg in the center of each ring. Gently press the egg into the dough to secure it. Important note: The egg is NOT pre-cooked; it will bake along with the bread.
-
Bake for approximately 20 minutes, or until the bread is a nice golden brown color and the internal temperature reaches 200°F (93°C). Keep an eye on the bread during baking; if it starts to brown too quickly, you can tent it with foil.
-
Remove the baked bread from the oven and let it cool completely on a wire rack before serving.
Expert Tips & Tricks
- For a richer flavor: Use whole milk instead of lower-fat varieties.
- To prevent the dyed eggs from cracking: Make sure they are at room temperature before baking.
- If your kitchen is cold: Place the dough in a slightly warmed oven (turned off) to rise.
- Make ahead: You can prepare the dough the night before and let it rise slowly in the refrigerator. Bring it to room temperature before shaping and baking.
- Don’t overbake: Overbaking will result in a dry bread. Use a toothpick inserted into the bread (avoiding the egg) to check for doneness. If it comes out clean, the bread is ready.
Serving & Storage Suggestions
This Italian Easter Bread is best served warm or at room temperature. It’s delicious on its own, or you can slice it and serve it with butter, jam, or ricotta cheese.
- Storage: Store leftover bread in an airtight container at room temperature for up to 2 days.
- Refrigeration: For longer storage, wrap the bread tightly in plastic wrap and store it in the refrigerator for up to 5 days.
- Freezing: To freeze, wrap the bread tightly in plastic wrap and then in foil. Freeze for up to 2 months. Thaw overnight in the refrigerator before serving. To reheat, wrap the bread in foil and warm it in a low oven (300°F/150°C) for about 15-20 minutes.
Nutritional Information
Please note that these values are approximate and may vary based on specific ingredients and portion sizes.
| Nutrient | Amount per Serving | % Daily Value |
|---|---|---|
| Calories | 301 kcal | 15% |
| Total Fat | 11g | 16% |
| Saturated Fat | 6.2g | 30% |
| Cholesterol | 101.4mg | 33% |
| Sodium | 110.9mg | 4% |
| Total Carbohydrate | 41.8g | 13% |
| Dietary Fiber | 1.3g | 5% |
| Sugars | 8.6g | 34% |
| Protein | 8.1g | 16% |
Variations & Substitutions
- Gluten-Free: Use a gluten-free all-purpose flour blend and add a teaspoon of xanthan gum for better structure.
- Dairy-Free: Substitute the milk with almond milk or oat milk and the butter with a dairy-free butter substitute.
- Add Citrus: Incorporate the zest of an orange or grapefruit along with the lemon zest for a more complex flavor.
- Anise Flavor: Add a teaspoon of anise extract to the dough for a traditional Italian twist.
- Different Sprinkles: Use different colors and shapes of sprinkles to personalize your bread for any occasion.
FAQs (Frequently Asked Questions)
Q: Can I use a bread machine to make the dough?
A: Yes, you can use a bread machine to mix and knead the dough. Use the dough cycle and then proceed with the recipe as directed.
Q: Why are the eggs baked raw inside the bread?
A: Baking the eggs raw is a traditional symbol of rebirth and new life, representing the Easter season. They cook through while the bread bakes.
Q: Can I use pre-dyed Easter eggs from the store?
A: It’s not recommended to use hard-boiled, pre-dyed eggs, as they will become overcooked during baking and can develop an unpleasant texture. It’s important to bake raw, dyed eggs.
Q: My bread is browning too quickly; what can I do?
A: If the bread is browning too quickly, tent it loosely with aluminum foil to prevent it from burning.
Q: Can I freeze the dough after it has risen the first time?
A: Yes, you can freeze the dough after the first rise. Punch down the dough, wrap it tightly in plastic wrap, and freeze for up to 2 months. Thaw it overnight in the refrigerator before shaping and baking.
Final Thoughts
This Classic Italian Easter Bread is more than just a recipe; it’s a connection to family, tradition, and the joy of springtime. I encourage you to try this recipe and share the experience with your loved ones. Don’t be afraid to put your own personal touch on it – experiment with different flavors and decorations to create a unique bread that reflects your own style. And, most importantly, share your creations and feedback! Buon Appetito, and Happy Easter!