
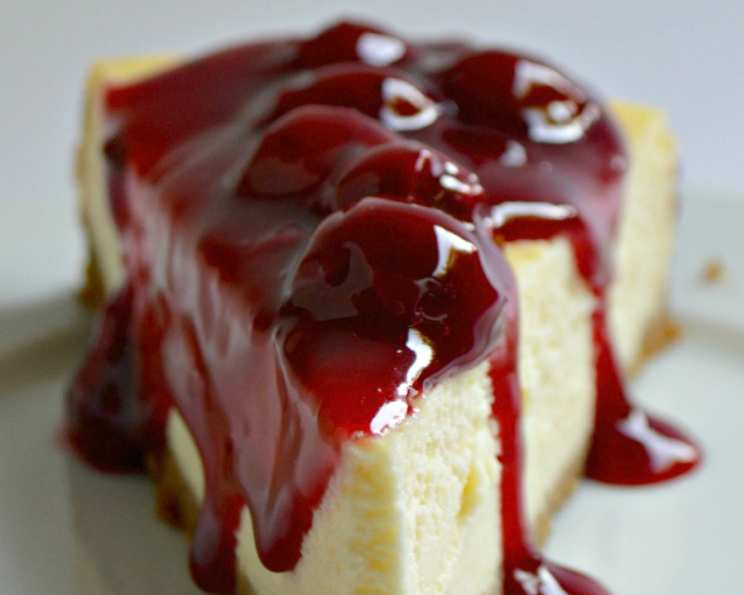
Classic New York Style Cherry Cheesecake
The aroma of a perfectly baked cheesecake always transports me back to my childhood. My grandmother, a true New Yorker, made the most incredible cheesecakes. I remember standing on a stool in her tiny Brooklyn kitchen, mesmerized as she meticulously blended the cream cheese, the electric mixer humming like a happy bee. The anticipation of that first creamy bite, the sweet tang of the cherry topping, is a memory I cherish, and this recipe attempts to recreate that perfect slice of Brooklyn nostalgia.
Recipe Overview
- Prep Time: 20 minutes
- Cook Time: 50 minutes
- Total Time: 5 hours 50 minutes (including chilling time)
- Servings: 12-16
- Yield: 1 Cheesecake
- Dietary Type: Not specified
Ingredients
For the Crust:
- 1 cup graham cracker crumbs or 1 cup crumbled digestive biscuit
- 3 tablespoons butter, melted
- 1 tablespoon sugar
For the Filling:
- 2 lbs cream cheese, room temperature
- ¾ cup granulated sugar
- 3 tablespoons all-purpose flour
- 1 tablespoon vanilla or 1 sachet vanilla sugar
- ¾ cup heavy cream
- 4 eggs
- 1 (21 ounce) can cherry pie filling
Equipment Needed
- 10-inch springform pan
- Mixing bowls
- Electric mixer
- Measuring cups and spoons
- Oven
Instructions
- Preheat the oven to 400°F (200°C).
- Prepare the crust: In a large springform pan (10 inches or 26 cm in diameter), mix the graham cracker crumbs (or crumbled digestive biscuits), melted butter, and sugar together well.
- Press the mixture firmly onto the bottom of the pan. If you prefer a crust that goes up the sides of the cheesecake, double the crust recipe.
- Bake the crust for 5-7 minutes, or until golden brown. Keep a close watch; it can burn easily.
- Set the crust aside to cool.
- Prepare the filling: In a medium bowl, mix together the cream cheese, flour, sugar, vanilla (or vanilla sugar), and heavy cream with an electric mixer on low speed until well blended. Make sure the cream cheese is at room temperature for a smooth, lump-free filling.
- Beat in the eggs, one at a time, beating just until combined after each addition. It’s crucial not to overmix the batter at this stage, as overmixing incorporates too much air and can lead to cracks in the cheesecake.
- Pour the batter into the prepared springform pan, over the cooled crust.
- Bake at 400°F (200°C) for 10 minutes. This initial high temperature helps to set the edges of the cheesecake.
- Reduce the temperature to 300°F (150°C) and continue baking for another 40 minutes.
- After the baking time is up, gently shake the pan back and forth. The cheesecake should be evenly baked through and uniformly wobbly. If only the center is wobbly (about the size of a baseball or roughly 10 cm), it is also fine. This is a good sign of a creamy texture.
- Remove the cheesecake from the oven and carefully run a knife along the edge to loosen the cheesecake from the pan. This helps prevent cracks as the cheesecake cools and shrinks slightly.
- Place the cheesecake back in the oven with the heat turned off. Leave the cheesecake in the oven overnight (with the oven door shut) to cool slowly. This is the secret to a crack-free cheesecake!
- The next day, put the cheesecake in the fridge for a minimum of 4 hours and up to 24 hours. This chilling period allows the cheesecake to fully set and develop its flavor.
- Before serving, top with cherry pie filling or your favorite topping.
Expert Tips & Tricks
- Room Temperature Cream Cheese: This is non-negotiable. Cold cream cheese will result in a lumpy batter. Allow the cream cheese to sit out for at least an hour, or even longer, until it’s completely softened.
- Don’t Overmix: Overmixing incorporates too much air, which can cause the cheesecake to puff up in the oven and then crack as it cools. Mix just until the ingredients are combined.
- The Overnight Cool: The slow cooling process is essential for preventing cracks. The residual heat gently finishes cooking the cheesecake, and the slow cooling prevents it from shrinking too quickly.
- Crust Options: For a richer, more flavorful crust, try adding a pinch of salt or a teaspoon of cinnamon to the graham cracker mixture. You can also use other types of cookies, such as Oreos (without the filling) or biscoff cookies.
- Even Baking: If you find your cheesecake is browning too quickly on top, tent it loosely with aluminum foil during the last 15-20 minutes of baking.
Serving & Storage Suggestions
This New York style cheesecake is best served cold. For an elegant presentation, slice with a warm, damp knife for clean cuts. The cherry topping is a classic choice, but feel free to experiment with other toppings, such as fresh berries, chocolate ganache, or caramel sauce.
Leftover cheesecake should be stored in an airtight container in the refrigerator. It will keep for up to 5 days. For longer storage, you can freeze individual slices. Wrap them tightly in plastic wrap and then in foil, and they’ll keep for up to 2 months. Thaw in the refrigerator overnight before serving.
Nutritional Information
| Nutrient | Amount per Serving | % Daily Value |
|---|---|---|
| Calories | 508.7 kcal | N/A |
| Calories from Fat | 329 g | 65% |
| Total Fat | 36.7 g | 56% |
| Saturated Fat | 20.5 g | 102% |
| Cholesterol | 173.3 mg | 57% |
| Sodium | 340.4 mg | 14% |
| Total Carbohydrate | 38 g | 12% |
| Dietary Fiber | 0.5 g | 2% |
| Sugars | 18.4 g | 73% |
| Protein | 7.8 g | 15% |
Note: Nutritional information is an estimate and may vary based on specific ingredients and portion sizes.
Variations & Substitutions
- Gluten-Free: Use gluten-free graham crackers or cookies for the crust, and substitute the all-purpose flour in the filling with a gluten-free all-purpose blend.
- Lemon Zest: Add the zest of one lemon to the filling for a bright, citrusy flavor.
- Chocolate Swirl: Melt some dark chocolate and swirl it into the batter before baking for a decadent chocolate cheesecake.
- Different Toppings: Get creative with your toppings! Try blueberry compote, salted caramel sauce, or even a sprinkle of chopped nuts.
- Crustless Cheesecake: For a truly simple version, skip the crust altogether and bake the filling in a greased springform pan.
FAQs (Frequently Asked Questions)
Q: Why do I need to use room temperature cream cheese?
A: Room temperature cream cheese blends much more smoothly, preventing lumps and ensuring a creamy cheesecake texture.
Q: Can I skip the overnight cooling in the oven?
A: While you can, it’s highly recommended not to. The slow cooling prevents the cheesecake from cracking as it cools and sets.
Q: My cheesecake is browning too much on top. What should I do?
A: Tent the cheesecake loosely with aluminum foil during the last 15-20 minutes of baking to prevent it from browning too much.
Q: Can I freeze the cheesecake?
A: Yes, you can freeze individual slices wrapped tightly in plastic wrap and foil for up to 2 months. Thaw in the refrigerator overnight before serving.
Q: Why does the recipe specify to not overmix the batter after adding the eggs?
A: Overmixing introduces too much air, leading to a puffy cheesecake that’s prone to cracking. Mix just until the eggs are incorporated.
Final Thoughts
This Classic New York Style Cherry Cheesecake is more than just a dessert; it’s a testament to simple ingredients transformed into something truly special. Don’t be intimidated by the seemingly long process – the active time is minimal, and the results are well worth the wait. Gather your ingredients, follow the steps, and prepare to be transported to a New York bakery with every bite. I encourage you to try this recipe and share your feedback! Perhaps pair it with a strong cup of coffee or a glass of dessert wine for the ultimate indulgence. Happy baking!