
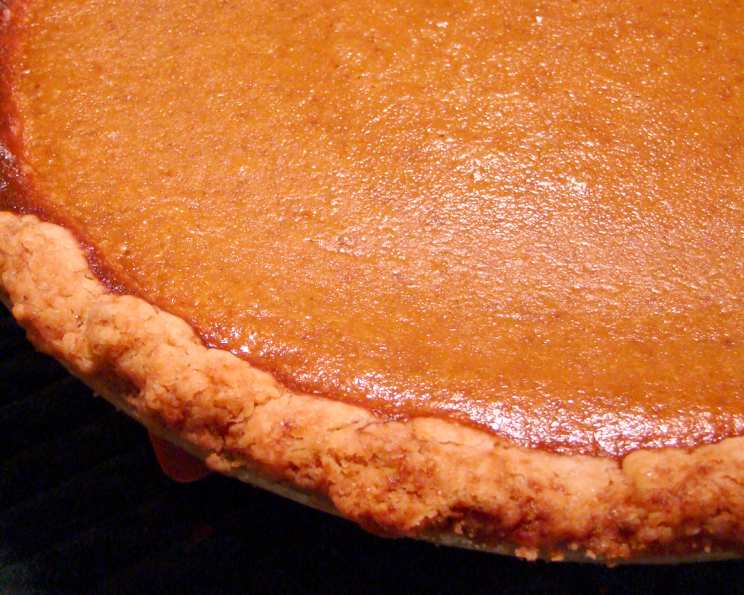
The Only Pie Crust Recipe You’ll Ever Need: A Step-by-Step Guide
I remember the first time I attempted pie crust. It was Thanksgiving, I was barely a teenager, and I envisioned myself a culinary prodigy. The reality? A tough, shrunken, hockey-puck-like disaster. My grandmother, bless her heart, simply smiled and said, “Well, dear, at least you tried!” But inside, I vowed to conquer the elusive art of perfect pie crust. Years of experimentation, countless batches (both successes and failures!), and a few secret techniques later, I’m thrilled to share this “idiot-proof” recipe that consistently delivers flaky, tender perfection.
Recipe Overview
- Prep Time: 20 minutes
- Cook Time: According to pie filling recipe
- Total Time: 1 hour 20 minutes (including chilling)
- Servings: Varies depending on pie size
- Yield: One 9-12 inch double crust pie
- Dietary Type: Vegetarian (can be made vegan with appropriate shortening)
Ingredients
- 11 1/4 ounces (320g) all-purpose flour
- 1 tablespoon sugar
- 1/2 teaspoon salt
- 1/4 lb (115g) cold unsalted butter, cut into 1/2 inch pieces
- 1/4 cup cold vegetable shortening, cut into 1/2 inch pieces
- 2 teaspoons fresh lemon juice
- 3 ounces cold water
- 1 egg yolk (for egg wash)
- 1 tablespoon water (for egg wash)
Equipment Needed
- Food Processor
- Plastic Wrap
- Rolling Pin
- 9-12 inch Pie Dish
- Pastry Brush
- Fork
Instructions
-
Preheat your oven according to the pie filling recipe you’re using. Different fillings require different baking temperatures, so this step is crucial.
-
Combine dry ingredients: In a food processor, add the flour, sugar, and salt. Pulse briefly, about 2-3 times, to combine evenly. This ensures the salt and sugar are distributed throughout the flour, contributing to even flavor and gluten development.
-
Incorporate fats: Add the cold butter and cold shortening to the food processor. Pulse in short bursts, about 8-10 times, until the mixture resembles coarse crumbs. The butter pieces should be no larger than pea-sized. The key here is to keep the fats cold; this is what creates the flaky layers in the crust. Over-processing will result in a tough crust.
-
Add liquids: In a small bowl, combine the lemon juice and cold water. Pour this mixture into the food processor.
-
Pulse until just combined: Pulse the food processor in short bursts again, until the dough just begins to come together and form moist crumbs. Be careful not to over-process. You should still see streaks of butter and shortening in the dough.
-
Shape the dough: Turn the dough out onto a lightly floured work surface. Gently shape it into two equal disks, each about 4-5 inches (10-12 cm) in diameter. Don’t knead the dough; just press it together gently.
-
Chill the dough: Wrap each disk tightly in plastic wrap and refrigerate for at least 1 hour, or up to 1 day. You can also freeze the dough for longer storage. Chilling allows the gluten to relax, which results in a more tender crust.
-
Roll out the first crust: On a lightly floured surface, roll out one of the dough disks into a circle that is slightly larger than your pie dish.
-
Transfer to pie dish: Lightly grease the pie dish with cooking spray or butter. Carefully roll the pastry around your rolling pin, then unroll it into the pie dish. This helps prevent the crust from breaking during transfer. Gently press the pastry into the bottom and up the sides of the dish.
-
Prepare egg yolk wash: In a small dish, separate the egg yolk from the white (the egg white is not needed for this recipe). Using a pastry brush, “paint” the bottom crust with a thin layer of the egg yolk. This creates a seal that helps prevent the bottom crust from becoming soggy when the wet filling is added. Don’t use all the egg yolk; you’ll need some for the top crust.
-
Add the filling: Pour your prepared pie filling into the crust.
-
Roll out the second crust: Roll out the second dough disk into a circle that is slightly larger than your pie dish.
-
Cover the pie: Carefully place the second crust on top of the pie. Dampen the top edge of the bottom crust with a small amount of water. This helps the two crusts adhere together.
-
Seal the edges: Use a fork to crimp the edges of the crust, pressing them together to seal.
-
Trim excess dough: Trim any excess pastry from around the edges of the pie dish.
-
Decorate (optional): Gather the pastry scraps, roll them out, and cut out decorative shapes like leaves. Wet the bottoms of the decorations with a tiny amount of water and place them on top of the pie.
-
Prepare egg wash: Add 1 tablespoon of water to the remaining egg yolk and mix well. Gently “paint” the entire top of the pie with this egg wash. This will give the crust a beautiful golden-brown color.
-
Vent the crust: Use a fork to poke several holes in the top crust to allow steam to escape during baking. This prevents the crust from puffing up and cracking.
-
Bake the pie: Place the pie in the preheated oven and bake according to the instructions for your specific pie filling recipe. Remember that different fillings require different cooking times and temperatures. For example, if you are using a pre-cooked filling as I did for the Australian Meat Pie (recipe #21726) in the photo series, you might bake it at 220°C (425°F) for the first 15 minutes, then reduce the temperature to 180°C (350°F) for another 25 minutes, or until the crust is golden brown.
Expert Tips & Tricks
- Keep everything cold! This is the golden rule of pie crust. Cold ingredients prevent the gluten from developing too much, which leads to a tough crust.
- Don’t over-process the dough. Over-mixing develops the gluten and makes the crust tough. Pulse just until the dough comes together.
- Use a pastry blender if you don’t have a food processor. Cut the butter and shortening into the flour mixture using a pastry blender until the mixture resembles coarse crumbs.
- If the dough is too dry, add a teaspoon of cold water at a time until it comes together.
- If the dough is too wet, add a tablespoon of flour at a time until it is no longer sticky.
- For a golden-brown crust, brush the top with an egg wash before baking. You can also sprinkle it with sugar for added sweetness and shine.
- To prevent the crust from burning, cover the edges with aluminum foil during the last part of baking.
Serving & Storage Suggestions
Serve your pie warm or at room temperature, depending on the filling. Leftover pie can be stored in the refrigerator for up to 3 days. Cover it loosely with plastic wrap or foil to prevent it from drying out. You can also freeze baked pie for up to 2 months. Wrap it tightly in plastic wrap and then in foil. To reheat, bake in a preheated oven at 350°F (175°C) until warmed through.
Nutritional Information
Note: Nutritional information will vary greatly depending on the pie filling used.
| Nutrient | Amount per Serving | % Daily Value |
|---|---|---|
| Calories | ~300 kcal | ~15% |
| Total Fat | ~20g | ~30% |
| Saturated Fat | ~12g | ~60% |
| Cholesterol | ~50mg | ~17% |
| Sodium | ~200mg | ~8% |
| Total Carbohydrate | ~25g | ~8% |
| Dietary Fiber | ~1g | ~4% |
| Sugars | ~5g | N/A |
| Protein | ~3g | ~6% |
Values are approximate and based on a basic double-crust pie, without considering the filling.
Variations & Substitutions
- Gluten-Free Crust: Use a gluten-free all-purpose flour blend and follow the recipe as directed. You may need to add a little extra water to bring the dough together.
- Vegan Crust: Substitute the butter with a vegan butter alternative. Ensure the vegetable shortening is also vegan-friendly.
- Different Flours: Experiment with using a portion of whole wheat flour for a nuttier flavor. Be mindful that whole wheat flour absorbs more liquid, so you might need to adjust the water accordingly.
- Spice it up: Add a pinch of cinnamon, nutmeg, or ginger to the flour mixture for a warm, spiced crust.
FAQs (Frequently Asked Questions)
Q: Why is my pie crust tough?
A: Overworking the dough develops the gluten, resulting in a tough crust. Be careful not to over-process the dough in the food processor and avoid kneading it. Also, ensure your ingredients are cold.
Q: Why does my pie crust shrink when baking?
A: This is usually caused by gluten that hasn’t relaxed enough. Make sure to chill the dough for at least 1 hour before rolling it out. Also, avoid stretching the dough when placing it in the pie dish.
Q: Can I make pie crust ahead of time?
A: Absolutely! Pie crust dough can be made up to 2 days in advance and stored in the refrigerator, or frozen for up to 2 months.
Q: What is the purpose of the lemon juice?
A: The lemon juice helps to tenderize the gluten in the flour, resulting in a more tender crust. You won’t taste the lemon flavor in the baked crust.
Q: My pie crust is browning too quickly. What should I do?
A: Cover the edges of the crust with aluminum foil to prevent them from burning. You can also reduce the oven temperature slightly.
Final Thoughts
Making pie crust from scratch might seem daunting, but with this recipe and a little practice, you’ll be baking beautiful, flaky pies in no time. Don’t be afraid to experiment with different fillings and decorations to create your own signature pies. Share your creations with friends and family, and enjoy the satisfaction of knowing you made it all from scratch. Happy baking!