
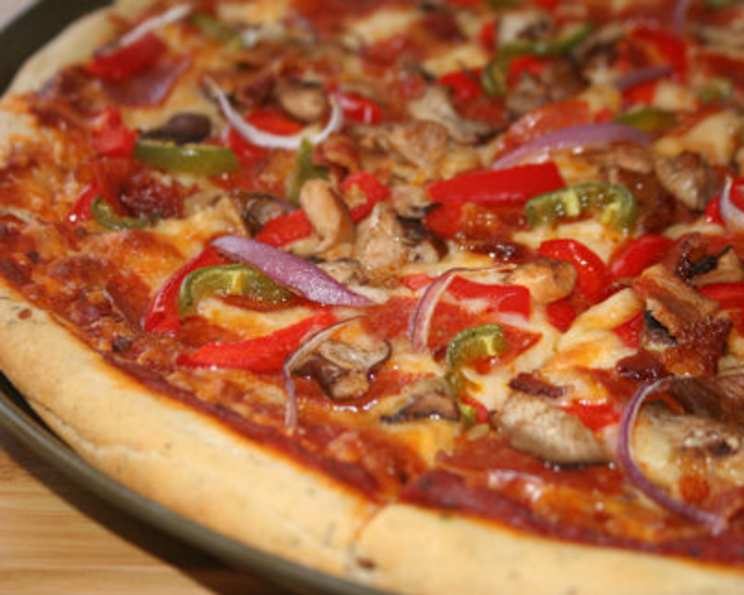
Classic Pizza Crust: A Culinary Journey Home
The scent of baking bread has always been my Proustian madeleine. Even now, decades later, the aroma instantly transports me back to my grandmother’s tiny kitchen. I see her, flour dusting her apron, humming softly as she expertly kneaded dough for what seemed like hours. And while she was a master of all things baked, her pizza crust was legendary – thin, crispy, and the perfect canvas for her simple, yet sublime, tomato sauce and mozzarella. Making this classic pizza crust recipe brings back those cherished memories and allows me to share a taste of that legacy with you.
Recipe Overview
- Prep Time: 30 minutes
- Cook Time: 25 minutes
- Rise Time: 3 hours 30 minutes
- Total Time: 4 hours 25 minutes
- Yields: 2 12-inch crusts
- Dietary Type: Vegetarian
Ingredients
- 1 package active dry yeast
- 2 ½ cups flour, sifted
- 1 teaspoon salt
- 1 cup water
- 1 tablespoon cooking oil
Equipment Needed
- Large mixing bowl
- Electric mixer (optional, but recommended)
- Measuring cups and spoons
- Clean kitchen towel
- Greased bowl for rising
- Rolling pin
- Baking sheet or pizza stone
Instructions
-
In a large mixing bowl, combine the yeast, 1 cup of the sifted flour, and the salt. Be sure your water is warm (around 110°F) to activate the yeast. If the water is too hot, it can kill the yeast and prevent the dough from rising.
-
Next, add the water and cooking oil to the bowl. The oil adds richness and helps to create a tender crust.
-
Using an electric mixer, beat the mixture on low speed for 30 seconds. This helps to combine the ingredients evenly.
-
Scrape the sides of the bowl to ensure everything is incorporated, then continue to beat on high speed for 3 minutes. This step is crucial for developing the gluten in the flour, which gives the crust its structure and chewiness. If you don’t have an electric mixer, you can do this by hand, but it will require a bit more elbow grease!
-
By hand, stir in enough of the remaining flour to make the dough stiff enough to handle. You may not need all of the flour, so add it gradually until the dough comes together.
-
Turn the dough out onto a lightly floured surface and knead it until it is smooth and elastic, which can take up to 10 minutes. Kneading develops the gluten, resulting in a more flavorful and textured crust. If the dough is too sticky, add a little more flour, a tablespoon at a time, until it is easier to handle.
-
Place the dough in a well-greased bowl and turn it to coat it lightly with the grease. This prevents the dough from drying out as it rises.
-
Cover the bowl with a clean kitchen towel and let the dough rise in a warm place for about 1 ½ hours, or until it has doubled in size. The rising time will vary depending on the temperature of your kitchen. A warm environment encourages the yeast to work its magic.
-
Once the dough has doubled, punch it down to release the air bubbles. This step helps to create a more even texture in the final crust.
-
Cover the dough and chill it in the refrigerator for at least 2 hours. This chilling period allows the gluten to relax, making the dough easier to roll out and resulting in a more tender crust.
-
After chilling, cut the dough in half. Each half will make approximately one 12-inch pizza crust.
-
On a lightly floured surface, roll each half of the dough into a 12-inch circle, about 1/8 inch thick. Aim for an even thickness for consistent baking.
-
Brush the surfaces of the dough with olive oil. This helps to create a crispy crust and adds flavor.
-
Add your favorite pizza toppings! Be careful not to overload the crust, as this can make it soggy.
-
Cook the pizza in a preheated oven at 425°F for 25 minutes, or until the crust is golden brown and the cheese is melted and bubbly.
Expert Tips & Tricks
- For an extra crispy crust, place a pizza stone in the oven while it preheats. The hot stone will help to cook the crust evenly and quickly.
- If you don’t have a pizza stone, you can use a baking sheet. Lightly grease the baking sheet with cooking oil before placing the crust on it.
- Don’t have time to let the dough rise for 1 1/2 hours? You can use rapid-rise yeast, which will significantly reduce the rising time.
- To add extra flavor to the crust, try adding herbs like oregano, basil, or garlic powder to the dough.
- If the crust starts to brown too quickly in the oven, you can tent it with foil to prevent it from burning.
- Make a double batch of dough and freeze half for later use. Thaw the dough in the refrigerator overnight before using.
Serving & Storage Suggestions
Serve your freshly baked pizza immediately for the best flavor and texture. A simple green salad pairs perfectly with pizza, adding a refreshing contrast to the richness of the toppings.
Leftover pizza can be stored in an airtight container in the refrigerator for up to 3 days. To reheat, preheat your oven to 350°F and bake the pizza for about 10 minutes, or until heated through. You can also reheat pizza in a skillet on the stovetop for a crispy crust. Freezing is possible, too. Wrap slices individually in plastic wrap, then place in a freezer bag for up to 2 months. Reheat directly from frozen in the oven.
Nutritional Information
(Approximate values, will vary based on toppings)
| Nutrient | Amount per Serving | % Daily Value |
|---|---|---|
| Calories | 320 kcal | 16% |
| Total Fat | 7g | 11% |
| Saturated Fat | 1g | 5% |
| Cholesterol | 0mg | 0% |
| Sodium | 585mg | 24% |
| Carbohydrates | 59g | 20% |
| Fiber | 2.5g | 10% |
| Sugar | 0.2g | 0% |
| Protein | 8.8g | 18% |
Variations & Substitutions
- Gluten-Free Pizza Crust: Substitute the all-purpose flour with a gluten-free flour blend. You may need to adjust the amount of water slightly, as gluten-free flours tend to absorb more liquid.
- Whole Wheat Pizza Crust: Replace up to half of the all-purpose flour with whole wheat flour for a heartier, more nutritious crust.
- Herb-Infused Crust: Add 1-2 tablespoons of dried herbs, such as oregano, basil, or rosemary, to the dough for an extra layer of flavor.
- Garlic Pizza Crust: Mix 1-2 teaspoons of garlic powder or minced garlic into the dough for a savory twist.
- Spicy Pizza Crust: Add a pinch of red pepper flakes to the dough for a subtle kick.
FAQs (Frequently Asked Questions)
Q: My dough isn’t rising. What could be the problem?
A: The most common reason for dough not rising is that the yeast is inactive. Check the expiration date of your yeast and make sure the water you used wasn’t too hot, as this can kill the yeast.
Q: Can I make the dough ahead of time?
A: Absolutely! In fact, chilling the dough for a longer period can actually improve the flavor and texture of the crust. You can make the dough up to 24 hours in advance and store it in the refrigerator.
Q: How do I prevent the crust from getting soggy?
A: Avoid overloading the crust with too many toppings. Also, pre-cook any vegetables that release a lot of moisture, such as mushrooms or zucchini.
Q: Can I use this dough for other things besides pizza?
A: Yes! This dough can also be used to make calzones, stromboli, or even breadsticks.
Q: What’s the best way to reheat leftover pizza?
A: Reheating in the oven at 350°F for about 10 minutes will help to restore the crispness of the crust. You can also reheat pizza in a skillet on the stovetop for an even crispier result.
Final Thoughts
Baking your own pizza crust might seem intimidating, but trust me, it’s a truly rewarding experience. Not only does it allow you to customize the crust to your exact preferences, but it also fills your home with the comforting aroma of freshly baked bread. So, gather your ingredients, put on some music, and get ready to create a pizza that’s sure to impress. And most importantly, don’t be afraid to experiment with different toppings and flavors to create your own signature pizza masterpiece. Share your creations with friends and family – and don’t forget to let me know how it turns out! Buon appetito!