
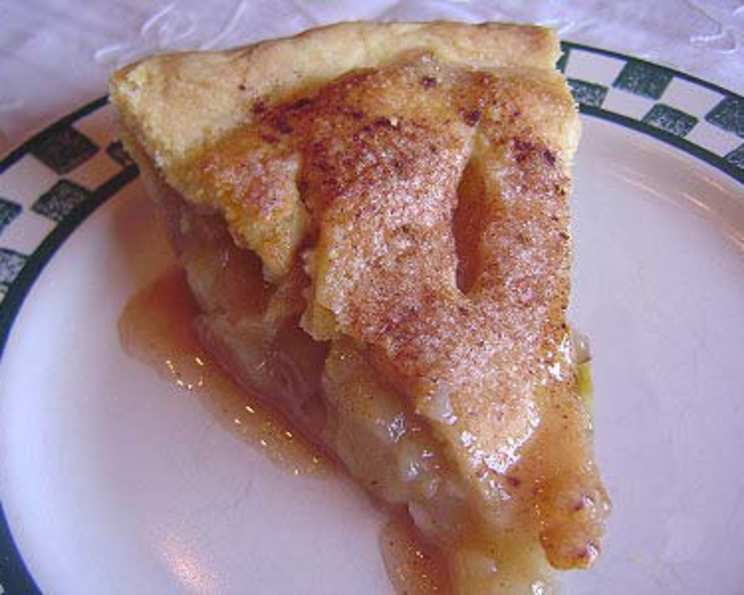
Classic Two-Crust Apple Pie: A Slice of Nostalgia
My grandmother’s apple pie was legendary. Not because it was fancy – quite the opposite. It was the epitome of simple, honest baking. I remember standing on a stool in her warm kitchen, the air thick with the scent of cinnamon and baked apples, watching her deftly crimp the edges of the crust. Each bite was a taste of pure comfort, a reminder of simpler times and the enduring power of a perfectly baked pie. It was never about fancy techniques, just good apples, a tender crust, and a whole lot of love.
Recipe Overview
- Prep Time: 30 minutes
- Cook Time: 50-60 minutes
- Total Time: 1 hour 20-30 minutes
- Servings: 6
- Yield: 1 9-inch pie
- Dietary Type: Vegetarian
Ingredients
- 6 cups firmly textured tart apples, such as Granny Smith, Honeycrisp, or a mix
- 1 tablespoon lemon juice (optional)
- 1 cup sugar
- 2 tablespoons flour
- ½ teaspoon cinnamon
- 1 dash nutmeg
- 2 tablespoons butter, cut into small pieces
- 2 (9-inch) pie crusts, homemade or store-bought
Equipment Needed
- 9-inch pie plate
- Peeler
- Cutting board
- Knife
- Large bowl
- Measuring cups and spoons
- Aluminum foil
Instructions
-
Preheat your oven to 425°F (220°C). Make sure the rack is in the center position.
-
Prepare the apples: Peel, core, and slice the apples. Aim for a mix of thin and slightly thicker slices for varied texture in the baked pie. Place the sliced apples in a large bowl.
-
Add lemon juice (optional): If desired, sprinkle the lemon juice over the apples to prevent browning and add a touch of brightness. Toss gently to coat.
-
Combine dry ingredients: In the same bowl, add the sugar, flour, cinnamon, and nutmeg to the apples. Mix well, ensuring the apples are evenly coated with the dry mixture. The flour will help thicken the juices as the pie bakes.
-
Assemble the pie: Line a 9-inch pie plate with one of the pie crusts. Gently press the crust into the bottom and up the sides of the plate.
-
Fill the pie: Pour the apple mixture into the crust-lined pie plate. Distribute the apples evenly.
-
Dot with butter: Dot the top of the apple filling with small pieces of butter. This adds richness and helps create a delicious, buttery sauce as the pie bakes.
-
Add the top crust: Place the second pie crust over the apple filling. Trim any excess crust around the edges.
-
Seal and vent: Crimp the edges of the top and bottom crusts together to seal the pie. Cut several slits in the top crust to allow steam to escape during baking. This prevents the crust from puffing up too much and potentially bursting. Get creative with your vent designs!
-
Protect the edges: Cover the edges of the crust with a narrow band of aluminum foil, shiny side out. This will prevent the crust from browning too quickly and burning before the apple filling is fully cooked.
-
Bake: Bake the pie at 425°F (220°C) for 20 minutes. This initial high temperature helps set the crust and start the apples cooking.
-
Reduce temperature: Reduce the oven temperature to 375°F (190°C) and continue baking for another 30-40 minutes, or until the filling is bubbling and the crust is nicely browned.
-
Remove foil (if needed): If the crust edges are not yet golden brown after the initial baking time, remove the foil for the last 10 minutes to allow them to brown.
-
Cool completely: Once the pie is done, remove it from the oven and let it cool completely on a wire rack before slicing and serving. This is crucial! The filling needs time to set, otherwise it will be too runny. Resist the urge to cut into it while it’s still hot.
Expert Tips & Tricks
- Apple Selection is Key: Don’t be afraid to mix different types of apples for a more complex flavor. A combination of sweet and tart varieties works wonderfully.
- Pre-bake the bottom crust (optional): For a particularly crisp bottom crust, you can pre-bake it for about 10-15 minutes before adding the filling. Just be sure to dock the crust with a fork to prevent it from puffing up.
- Egg Wash for Shine: For a beautiful, glossy crust, brush the top with an egg wash (1 egg beaten with 1 tablespoon of water) before baking.
- Chill the Dough: Always work with cold dough! If using store-bought crusts, keep them refrigerated until ready to use. If making your own, chill the dough for at least 30 minutes before rolling it out.
- Prevent a Soggy Bottom Crust: Besides pre-baking, you can also sprinkle a thin layer of breadcrumbs or ground nuts on the bottom crust before adding the filling to absorb excess moisture.
Serving & Storage Suggestions
Serve the apple pie warm or at room temperature. A scoop of vanilla ice cream or a dollop of whipped cream is a classic and delicious accompaniment. For a little extra flair, drizzle with caramel sauce.
Store leftover apple pie loosely covered at room temperature for up to 2 days, or in the refrigerator for up to 4 days. To reheat, warm individual slices in the oven at 350°F (175°C) for about 10 minutes, or microwave on low power. You can also freeze baked apple pie for up to 3 months. Wrap it tightly in plastic wrap and then in foil. Thaw overnight in the refrigerator before reheating.
Nutritional Information
| Nutrient | Amount per Serving | % Daily Value |
|---|---|---|
| Calories | 450 kcal | 23% |
| Total Fat | 20g | 31% |
| Saturated Fat | 9g | 45% |
| Cholesterol | 15mg | 5% |
| Sodium | 300mg | 13% |
| Total Carbohydrate | 65g | 22% |
| Dietary Fiber | 4g | 16% |
| Sugars | 35g | N/A |
| Protein | 3g | 6% |
Variations & Substitutions
- Gluten-Free Apple Pie: Use a gluten-free pie crust recipe or a store-bought gluten-free crust.
- Vegan Apple Pie: Use a vegan pie crust recipe (many store-bought crusts are already vegan) and substitute the butter with a vegan butter alternative.
- Caramel Apple Pie: Stir in 1/2 cup of caramel sauce into the apple filling before baking.
- Spiced Apple Pie: Add a pinch of ground cloves or ginger to the cinnamon and nutmeg for a warmer, spicier flavor.
- Crumble Topping: Instead of a top crust, use a crumble topping made with flour, butter, sugar, and oats.
FAQs (Frequently Asked Questions)
Q: Why is my apple pie filling runny?
A: This is often due to not letting the pie cool completely after baking. The filling needs time to set. Also, be sure to use enough flour in the filling to help thicken the juices.
Q: How do I prevent my pie crust from burning?
A: Covering the edges of the crust with aluminum foil during baking is the best way to prevent burning. Remove the foil during the last 10 minutes to allow the edges to brown if needed.
Q: Can I use frozen apples for apple pie?
A: Yes, you can! Thaw the apples completely and drain off any excess liquid before using them in the filling.
Q: Can I make apple pie ahead of time?
A: Absolutely! You can bake the pie a day ahead of time and store it at room temperature or in the refrigerator.
Q: What are the best apples for apple pie?
A: Tart, firm apples like Granny Smith, Honeycrisp, and Braeburn are excellent choices. A combination of different apples can also create a more complex flavor.
Final Thoughts
Baking this classic two-crust apple pie is more than just following a recipe; it’s about creating a moment, a memory, a connection to those who came before us. The simple act of combining apples, spices, and a tender crust transforms into something truly special. I encourage you to try this recipe, make it your own, and share it with those you love. There’s nothing quite like the aroma of a freshly baked apple pie wafting through the kitchen, inviting everyone to gather around and enjoy a slice of pure comfort. Perhaps serve it with a cup of hot apple cider for the perfect autumn treat!