
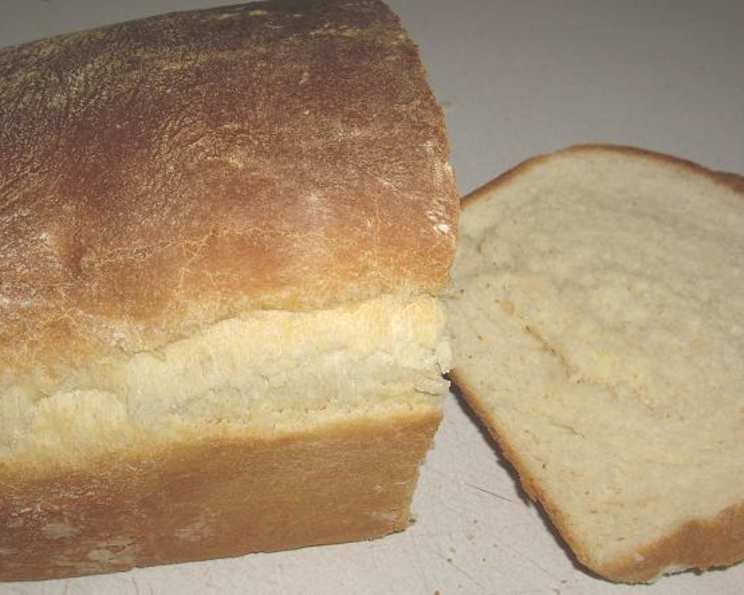
The Soul of Simplicity: Baking Classic White Sandwich Bread
I remember the first time I truly appreciated a slice of simple white bread. It wasn’t fancy, no artisanal grains, no exotic seeds. It was after a long, blustery day helping my grandfather in his garden. We were both chilled to the bone, covered in dirt, and ravenously hungry. He pulled out a loaf of homemade white bread, still slightly warm, slathered it with butter and a sprinkle of salt, and handed me a thick slice. That humble bite, the soft crumb yielding to the salty butter, was pure comfort and contentment. That’s the magic of a perfect loaf of white bread—it’s a blank canvas for simple joys.
Recipe Overview
- Prep Time: 3 hours 10 minutes
- Yields: 2 loaves
- Dietary Type: Vegetarian
Ingredients
- 1/4 cup warm water
- 2 cups warm milk (recipe calls for whole milk but I use 1%)
- 4 teaspoons active dry yeast
- 2 tablespoons sugar (I always use the sugar, never tried honey) or 2 tablespoons honey
- 1 pinch sugar
- 2 tablespoons unsalted butter, melted (margarine works well, too)
- 1 tablespoon salt
- 6 – 6 1/4 cups bread flour, plus extra
- Canola oil, for greasing (I use regular vegetable oil)
Equipment Needed
- Small bowl
- Large bowl
- Measuring cups and spoons
- Deep bowl
- Plastic wrap
- Two 9×5 inch loaf pans
- Lightly floured board
- Cooling racks
Instructions
-
In a small bowl, combine the warm water and 1/4 cup of the warm milk. Sprinkle the yeast and a pinch of sugar over the liquid. Stir to combine. Let sit until foamy, about 10 minutes. This step is crucial – it proves that your yeast is active and will leaven the bread properly. If it doesn’t foam, your yeast might be old or the water too hot, and you’ll need to start again with fresh yeast.
-
In a large bowl, combine the remaining milk, melted butter, 2 tablespoons sugar, salt, and 2 cups of bread flour. Mix until creamy. I usually mix everything by hand, but you can use a mixer on medium-low speed for about 1 minute if preferred. A stand mixer with a dough hook will make this step even easier.
-
Add the yeast mixture and 1 cup of bread flour to the large bowl and mix by hand or beat with a mixer until combined.
-
Mix or beat in the remaining flour 1/2 cup at a time until the dough begins to pull away from the sides of the bowl. Switch to kneading the dough until all the flour is incorporated and the dough is smooth and elastic. This can take about 5-10 minutes of vigorous kneading. The dough should be tacky but not sticky. If it’s too sticky, add a tablespoon of flour at a time until it reaches the right consistency.
-
Transfer the dough to an oiled deep bowl, turning the dough once to coat it with the oil. This prevents the dough from drying out during its first rise.
-
Cover the bowl loosely with plastic wrap and let the dough rise until it has doubled in bulk. This will take about 1 1/2 hours, depending on the temperature of your kitchen. A warmer environment will speed up the process.
-
Lightly grease two 9×5 inch loaf pans with canola oil (or your preferred vegetable oil).
-
Turn the dough out onto a lightly floured board. Divide the dough in half.
-
Pat each half into a long rectangle.
-
Fold one rectangle like a letter, overlapping the short sides into the middle. Press to flatten the dough slightly. This step helps to create structure and even layering in the final loaf.
-
Beginning at the narrow end, roll the dough into a log and roll the log until it is the same length as the loaf pan.
-
Pinch the ends and along the seam of the log to seal it. Place the log in the loaf pan, seam side down.
-
Repeat the folding and shaping process with the other half of the dough.
-
Cover the loaf pans loosely with plastic wrap and let the dough rise until it is about 1 inch above the rim of the pan. This second rise will take about 1 hour.
-
Bake in an oven preheated to 375 degrees F (190 degrees C) until the loaves are golden brown and pull away from the edges of the pans. This will take about 40 minutes. If the tops of the loaves start to brown too quickly, you can tent them with foil during the last 10-15 minutes of baking.
-
Turn the loaves out onto racks and let cool completely before slicing. This is essential to prevent a gummy texture.
Expert Tips & Tricks
- The water temperature is key: Too hot, and you’ll kill the yeast. Too cold, and the yeast won’t activate properly. Aim for lukewarm, around 105-115°F (40-46°C).
- Don’t over-knead: While kneading is important, over-kneading can result in a tough loaf. Knead until the dough is smooth and elastic, but not overly firm.
- The poke test: To check if the dough is ready for baking, gently poke it with your finger. If the indentation slowly springs back, it’s ready. If it springs back immediately, it needs more time to rise. If the indentation doesn’t spring back at all, it’s over-proofed.
- Use a bread thermometer: For the most accurate results, use a bread thermometer to check the internal temperature of the loaf. It should reach 200-210°F (93-99°C).
Serving & Storage Suggestions
This classic white sandwich bread is incredibly versatile. Serve it fresh with butter, jam, or honey. Use it for sandwiches, toast, grilled cheese, or even as a base for homemade pizzas.
To store:
- Room Temperature: Store the cooled loaves in an airtight container or bread bag at room temperature for up to 3 days.
- Refrigerator: For longer storage (up to a week), store in the refrigerator. Note that refrigeration can slightly dry out the bread.
- Freezer: To freeze, wrap the cooled loaves tightly in plastic wrap, then place them in a freezer bag. Freeze for up to 2-3 months. Thaw at room temperature before slicing.
To reheat:
- Wrap the bread in foil and warm in a 350°F (175°C) oven for 10-15 minutes.
Nutritional Information
(Estimates are approximate and can vary based on specific ingredients used)
| Nutrient | Amount per Serving | % Daily Value |
|---|---|---|
| Calories | 1700 kcal | N/A |
| Total Fat | 25g | 38% |
| Saturated Fat | 14g | 67% |
| Cholesterol | 65mg | 21% |
| Sodium | 3622mg | 150% |
| Total Carbohydrate | 314g | 104% |
| Dietary Fiber | 13g | 49% |
| Sugars | 14g | N/A |
| Protein | 51g | 100% |
Variations & Substitutions
- Whole Wheat: Substitute up to half of the bread flour with whole wheat flour for a nuttier flavor and added fiber.
- Herbs: Add a tablespoon of dried herbs like rosemary, thyme, or oregano to the dough for an herbed loaf.
- Cheese: Incorporate shredded cheddar, parmesan, or other cheeses into the dough for a cheesy bread.
- Sweet Bread: Increase the sugar to 1/4 cup and add a teaspoon of vanilla extract for a sweeter loaf, perfect for French toast.
- Dairy-Free: Use a non-dairy milk alternative, such as almond or soy milk, and a plant-based butter substitute.
FAQs (Frequently Asked Questions)
Q: Why is my bread dense and not rising properly?
A: This could be due to several factors: the yeast might be old or inactive, the water or milk may have been too hot (killing the yeast), or the dough may not have been kneaded enough.
Q: Can I use all-purpose flour instead of bread flour?
A: Bread flour has a higher protein content than all-purpose flour, which helps to create a stronger gluten structure and a chewier texture. While you can use all-purpose flour, the bread might not rise as high and the texture will be slightly different.
Q: How do I prevent the crust from getting too dark?
A: If the crust is browning too quickly, you can tent the loaves with aluminum foil during the last 10-15 minutes of baking.
Q: Can I make this dough in a bread machine?
A: Yes, you can use a bread machine to make the dough. Simply follow the manufacturer’s instructions for your machine. Place all of the ingredients in the bread machine in the order recommended, and select the dough setting.
Q: My bread is gummy inside. What did I do wrong?
A: This usually indicates that the bread wasn’t cooled completely before slicing. Allow the bread to cool fully on a wire rack before cutting into it.
Final Thoughts
There’s a certain satisfaction that comes with baking your own bread. The aroma that fills your kitchen, the soft, yielding texture, the simple act of creating something nourishing with your own hands – it’s an experience that transcends mere cooking. This classic white sandwich bread is a perfect starting point for your baking journey. Don’t be afraid to experiment with variations, add your own personal touch, and most importantly, enjoy the process. Happy baking!