
The Unexpected Magic of Tarnish Removal: My Grandmother’s Secret
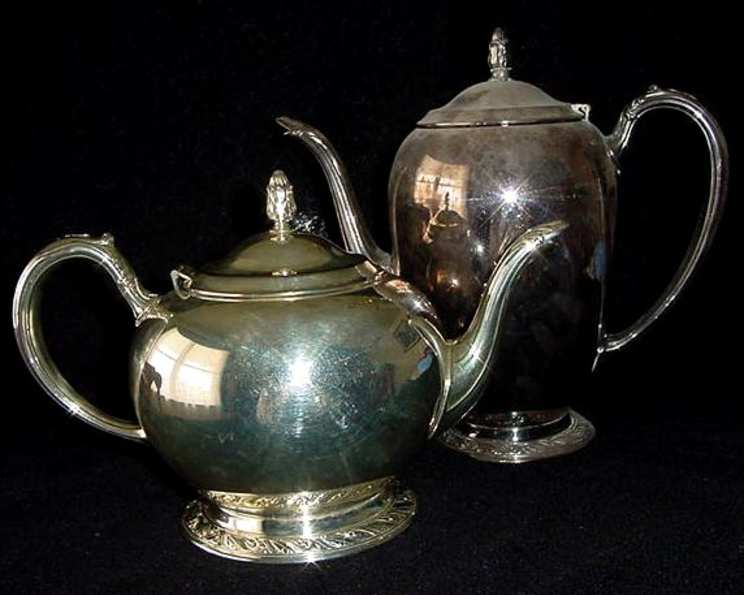
I remember being a child, perched on a stool in my grandmother’s kitchen, mesmerized as she polished her silver tea set. The tarnished surfaces transformed before my eyes, reflecting the warm light of the room. She always made it seem like a grand performance, and the gleaming silver was the star. Little did I know then that her secret wasn’t some fancy silver polish, but a simple, almost magical concoction of everyday household ingredients. That memory, and the scent of her lemon-scented kitchen, always comes rushing back whenever I need to restore the shine to my own silverware.
Recipe Overview
- Prep Time: 5 minutes
- Cook Time: 5 minutes (sitting time)
- Total Time: 10 minutes
- Yields: Varies based on items cleaned
- Dietary Type: N/A (Cleaning Solution)
Ingredients
- 1 sheet aluminum foil, large enough to line the bottom of your sink
- 1 tablespoon baking soda
- 1 tablespoon salt
- 2 cups very hot water (or more, as needed to submerge items)
Equipment Needed
- Clean kitchen sink
- Tongs (optional, for removing items)
Instructions
-
Begin by preparing your cleaning station. Line the bottom of your clean kitchen sink completely with a sheet of aluminum foil. Make sure the shiny side is facing up. The foil will act as an electrode in the cleaning process.
-
Pour very hot water into the sink, ensuring that the foil is submerged. The amount of water you’ll need depends on the size and number of silver items you plan to clean, so add enough to fully cover them.
-
Carefully add baking soda and salt to the hot water. Stir gently to dissolve them completely. The mixture might fizz slightly, which is perfectly normal.
-
Submerge your tarnished silver and silver-plated items into the sink, ensuring they are in contact with the aluminum foil. It’s crucial that the silver touches the foil for the cleaning process to work effectively. Avoid overcrowding the sink; clean in batches if necessary.
-
Let the items sit in the solution for a few minutes. You’ll notice the tarnish disappearing from the silver and transferring to the aluminum foil. The amount of time required will vary depending on the severity of the tarnish. Check the progress frequently, and remove items when they are sufficiently clean. Severely tarnished items may require up to 5 minutes of soaking.
-
Once the tarnish has been removed, carefully remove the silver items from the sink. You can use tongs to avoid touching the hot water.
-
Thoroughly rinse each item with clean water to remove any residue from the cleaning solution. This step is crucial to prevent pitting, especially on silver-plated items.
-
Dry the cleaned silver immediately and completely with a soft cloth. This will help prevent water spots and further tarnishing. A microfiber cloth works exceptionally well for this purpose.
-
For heavily tarnished pieces, you may need to repeat the process or gently rub the affected areas with a soft cloth while they are submerged in the solution.
Expert Tips & Tricks
- Don’t mix metals: Avoid cleaning silver and stainless steel together in the same batch, as this can cause unwanted reactions.
- Heat is key: Ensure the water is very hot for the cleaning process to be most effective. The heat helps to accelerate the chemical reaction that removes the tarnish. If the water cools too much, reheat it and continue the process.
- Gentle Approach: While this method is effective, it’s still important to be gentle. Avoid scrubbing aggressively, which can scratch the surface of the silver, particularly on delicate pieces.
- Pre-Cleaning: For heavily soiled or greasy silver, pre-clean with a mild dish soap before using the tarnish removal method. This will help the solution work more effectively on the tarnish itself.
- Polishing Cloth Finish: After cleaning and drying, a final polish with a dedicated silver polishing cloth can enhance the shine and provide a protective layer against future tarnishing.
- Tarnish Prevention: Store your cleaned silver in airtight bags or wrapped in tarnish-resistant cloth to minimize exposure to air and moisture, which are the primary causes of tarnish.
Serving & Storage Suggestions
This cleaning method is strictly for restoring silver and silver-plated items. Once cleaned, the items are ready for immediate use or storage. To maintain their shine, store them in a cool, dry place, preferably wrapped in tarnish-resistant cloth or placed in airtight bags. Avoid storing silver in direct sunlight or humid environments. Regularly polishing your silver, even if it’s not heavily tarnished, can help maintain its luster and prevent future buildup.
Nutritional Information
Since this is a cleaning method and not a food recipe, there is no nutritional information to provide.
Variations & Substitutions
While the basic recipe is very effective, here are some minor variations you can try:
- Washing Soda: In place of baking soda, you can try using washing soda (sodium carbonate). Be cautious, as it’s more alkaline and may require extra rinsing.
- Citric Acid: For a slightly gentler approach, add a tablespoon of citric acid along with the baking soda and salt. This can help brighten the silver without being too harsh.
- Vinegar: Some people add a splash of white vinegar to the solution for an extra boost. However, be careful, as vinegar is acidic and can potentially damage delicate silver if used in excess or left on for too long.
FAQs (Frequently Asked Questions):
Q: How does this cleaning method work?
A: This method uses a chemical reaction called ion exchange. The tarnish (silver sulfide) on the silver reacts with the aluminum foil in the presence of the baking soda and salt solution, transferring the sulfur to the aluminum and leaving the silver clean.
Q: Is this method safe for all types of silver?
A: It’s generally safe for most sterling silver and silver-plated items. However, it’s best to test it on a small, inconspicuous area first, especially for antique or delicate pieces. Avoid using it on items with glued components or stones, as the hot water can damage them.
Q: Can I reuse the cleaning solution?
A: No, the cleaning solution is most effective when freshly prepared. Once the chemical reaction has taken place, the solution is depleted and won’t effectively remove tarnish.
Q: How often should I clean my silver?
A: The frequency of cleaning depends on how often you use and expose your silver to air. For items used regularly, cleaning every few months might be sufficient. For items stored away, cleaning once or twice a year can help prevent tarnish buildup.
Q: What if the tarnish is very stubborn and doesn’t come off easily?
A: For stubborn tarnish, you can try increasing the concentration of baking soda and salt in the solution. You can also gently rub the affected areas with a soft cloth or a silver polishing cloth while the item is submerged in the solution. Repeating the process multiple times might also be necessary.
Final Thoughts
Cleaning silver might seem like a daunting chore, but with this simple and effective method, you can restore the shine to your cherished pieces with ease. It’s a cost-effective and environmentally friendly alternative to harsh chemical cleaners. So, gather your tarnished silver, try this method, and witness the magic for yourself. I hope this recipe brings back the same sense of satisfaction and nostalgia that I experienced in my grandmother’s kitchen. Feel free to share your results and any tips you discover along the way!