
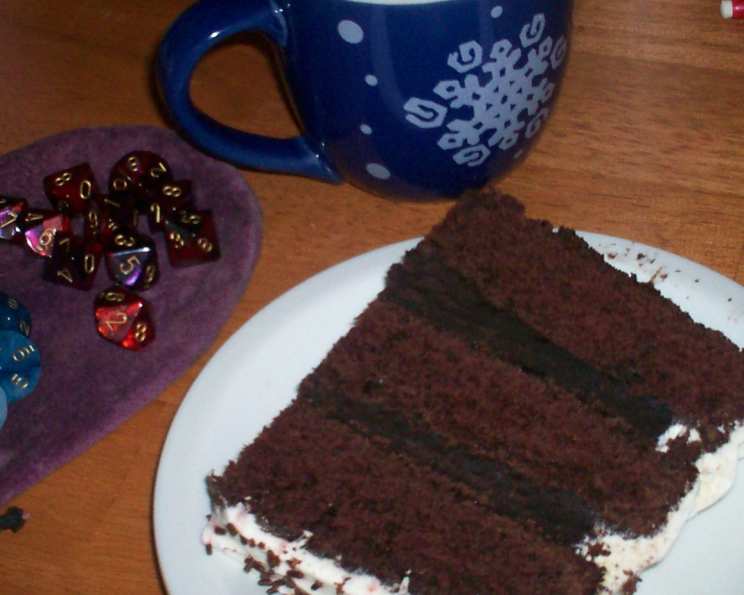
Cocoa and Cream Cake: A Chocolate Lover’s Dream
The aroma of chocolate cake baking has always been my personal time machine. One whiff, and I’m transported back to my grandmother’s kitchen, a warm and bustling space filled with the comforting scent of cocoa and vanilla. It was there, amidst flour-dusted countertops and the rhythmic whir of her ancient mixer, that I first experienced the magic of this Cocoa and Cream Cake – a tradition passed down through generations, a symbol of birthdays and celebrations, and a taste of pure, unadulterated joy. It’s a cake that never fails to impress, and one I’m excited to share with you.
Recipe Overview
- Prep Time: 45 minutes
- Cook Time: 30 minutes
- Total Time: 1 hour 15 minutes
- Servings: 16
- Yield: One 3-layer cake
- Dietary Type: Not specified
Ingredients
Cake
- 1 cup unsweetened cocoa powder
- 2 cups water, boiling hot
- 3 cups all-purpose flour
- 2 teaspoons baking soda
- ¾ teaspoon salt
- ½ teaspoon baking powder
- 1 cup butter, softened
- 2 ½ cups granulated sugar
- 4 eggs
- 1 ½ teaspoons vanilla extract
Filling
- 1 cup unsalted butter, softened
- 1 cup powdered sugar
- ½ cup unsweetened cocoa powder
- 2 eggs
Frosting
- 2 cups heavy cream
- ¾ cup powdered sugar
- 1 teaspoon vanilla extract (clear if possible)
- Chocolate shavings and curls to sprinkle over top (optional)
Equipment Needed
- Three 9×1 ½” layer cake pans
- Medium bowls
- Large bowl
- Electric mixer
- Sifter
- Wire racks
- Cake platter or stand
Instructions
-
Preheat your oven to 350°F (175°C).
-
In a medium bowl, sift the cocoa powder into the boiling hot water. Mix well until a smooth paste forms. Allow this mixture to cool completely. You can speed up the cooling process by placing the bowl in the refrigerator.
-
Meanwhile, grease and flour (or line with parchment paper) three 9×1 ½” layer cake pans. This ensures the cakes release easily after baking.
-
In another medium bowl, sift together the flour, baking soda, salt, and baking powder. This step is crucial for creating a light and airy cake. Set this dry mixture aside.
-
In a large bowl, using an electric mixer, beat together the softened butter and granulated sugar at high speed until well combined. Continue beating until the mixture is light and fluffy. This process can take several minutes and is essential for a tender cake crumb.
-
Add the eggs and vanilla extract to the butter and sugar mixture. Beat at high speed, scraping the sides of the bowl occasionally, until the mixture is light and fluffy – about 5 minutes. This incorporates air into the batter, resulting in a lighter cake.
-
Reduce the mixer speed to the lowest setting. Gradually add the dry flour mixture and the cooled cocoa mixture to the butter mixture, alternating between the two. Begin and end with the flour mixture in fourths and add the cooled cocoa mixture in thirds. Scrape the sides of the bowl after each addition to ensure everything is evenly incorporated. Be careful not to overbeat the batter, as this can lead to a tough cake.
-
Pour the batter evenly into the prepared cake pans.
-
Bake for 30 minutes, or until the surface of the cakes springs back when gently pressed with your fingertips. You can also use a toothpick inserted into the center of the cake; it should come out clean or with a few moist crumbs attached.
-
Cool the cakes in the pans for 10 minutes before gently removing them from the pans and placing them on wire racks to cool completely. Make sure the cakes are completely cool before frosting, or the frosting will melt.
-
To prepare the filling, in a small bowl with an electric mixer, cream the softened butter until smooth.
-
Sift in the powdered sugar and cocoa powder. Add the eggs, and beat until the filling is fluffy and smooth.
-
Refrigerate the filling until needed and until it has firmed up slightly. This will make it easier to spread.
-
For the frosting, in a medium bowl, combine the heavy cream, sifted powdered sugar, and vanilla extract. Beat with a mixer on high speed until stiff peaks form and the frosting is of spreading consistency. Sifting the powdered sugar helps prevent lumps in the frosting.
-
Refrigerate the frosting until needed. This helps it maintain its shape.
-
To assemble the cake, place one layer of cake, top side up, on a cake platter. Spread with half of the filling.
-
Invert the second cake layer on top of the first layer and filling. Spread with the remaining filling.
-
Place the third cake layer, top side up, over the second layer and filling.
-
Frost the top and sides of the cake with the prepared frosting.
-
Decorate the cake with chocolate shavings and curls, if desired.
-
Refrigerate the cake for at least 1 hour before serving to allow the flavors to meld and the frosting to set.
Expert Tips & Tricks
- Room Temperature Ingredients: Using room temperature butter and eggs is crucial for creating a smooth and emulsified batter, which results in a tender cake. Take them out of the refrigerator about an hour before you start baking.
- Don’t Overmix: Overmixing the batter develops the gluten in the flour, leading to a tough cake. Mix until just combined.
- Even Layers: To ensure even cake layers, use a kitchen scale to weigh the batter and divide it equally among the cake pans.
- Leveling the Layers: If your cake layers are uneven, use a serrated knife to carefully level the tops before assembling the cake.
- Chocolate Ganache Drizzle: For an extra touch of decadence, drizzle a warm chocolate ganache over the frosted cake.
Serving & Storage Suggestions
This Cocoa and Cream Cake is best served chilled. Garnish each slice with fresh berries, a dollop of whipped cream, or a sprinkle of cocoa powder for an elegant presentation. Leftover cake should be stored in an airtight container in the refrigerator. It will keep for up to 3 days. You can also freeze the cake for longer storage. Wrap it tightly in plastic wrap and then foil. Frozen cake can be thawed in the refrigerator overnight.
Nutritional Information
| Nutrient | Amount per Serving | % Daily Value |
|---|---|---|
| Calories | 611.4 kcal | N/A |
| Calories from Fat | 335 g | 55% |
| Total Fat | 37.2 g | 57% |
| Saturated Fat | 22.7 g | 113% |
| Cholesterol | 181.1 mg | 60% |
| Sodium | 401.4 mg | 16% |
| Total Carbohydrate | 67.7 g | 22% |
| Dietary Fiber | 3.3 g | 13% |
| Sugars | 44.5 g | N/A |
| Protein | 7.2 g | 14% |
Note: Nutritional information is an estimate and may vary based on specific ingredients and portion sizes.
Variations & Substitutions
- Gluten-Free: Substitute the all-purpose flour with a gluten-free blend. Be sure to add a binder like xanthan gum for the best texture.
- Dairy-Free: Replace the butter with a plant-based butter alternative, the heavy cream with coconut cream (refrigerated overnight and only using the solid part), and ensure your chocolate shavings are dairy-free.
- Mocha Cake: Add 2 tablespoons of instant espresso powder to the boiling water when preparing the cocoa mixture for a rich mocha flavor.
- Chocolate Chips: Fold in 1 cup of chocolate chips to the batter before baking for an extra burst of chocolate.
FAQs (Frequently Asked Questions)
Q: Can I make this cake ahead of time?
A: Yes, you can bake the cake layers a day in advance. Wrap them tightly in plastic wrap and store them at room temperature. The filling and frosting can also be made a day ahead and stored in the refrigerator.
Q: My frosting isn’t stiff enough. What can I do?
A: Place the frosting in the refrigerator for 30 minutes to an hour. This will help it firm up. You can also add a tablespoon of powdered sugar at a time until it reaches the desired consistency.
Q: Can I use a different size cake pan?
A: Yes, you can use two 9-inch round cake pans instead of three. You may need to adjust the baking time slightly. Keep an eye on the cakes and test for doneness with a toothpick.
Q: What can I use instead of vanilla extract?
A: You can use almond extract, coffee extract, or even a tablespoon of rum for a unique flavor.
Q: How do I prevent the cake from sticking to the pan?
A: Grease and flour the cake pans thoroughly, or line the bottoms with parchment paper rounds. This ensures that the cakes release easily after baking.
Final Thoughts
I truly hope this Cocoa and Cream Cake recipe brings as much joy to your kitchen as it has to mine over the years. It’s a labor of love, but the resulting layers of rich chocolate cake, velvety filling, and creamy frosting are well worth the effort. Gather your ingredients, preheat your oven, and prepare to embark on a baking adventure that will tantalize your taste buds and create memories that will last a lifetime. Don’t hesitate to experiment with variations, share your feedback, and perhaps pair it with a scoop of vanilla ice cream or a warm cup of coffee. Happy baking!