
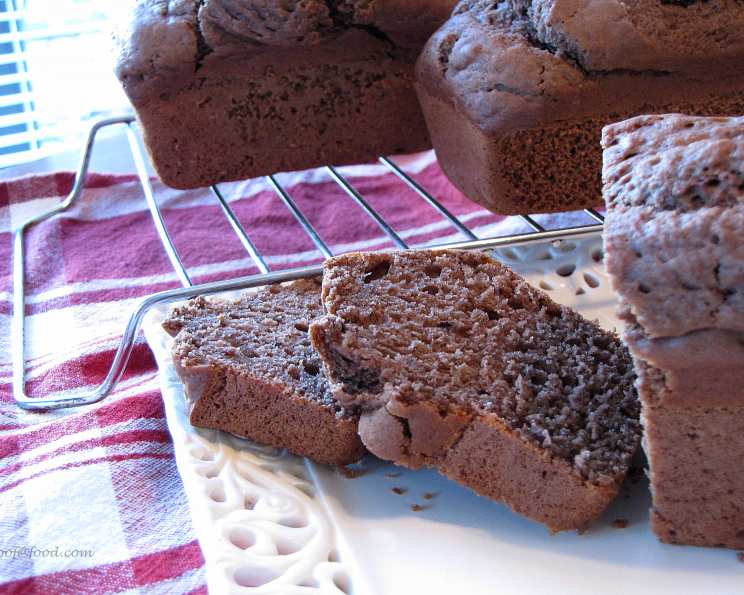
The Comfort of Cocoa Bread: A Simple Pleasure
There are some flavors that just instantly transport you back to childhood. For me, the aroma of cocoa baking in the oven is one of them. I remember my grandmother, her hands dusted with flour, pulling a dark, fragrant loaf from her ancient oven. The slightly bitter chocolate, mellowed by sugar and warmth, always felt like a hug in bread form – simple, comforting, and utterly satisfying. It’s been a while since I’ve made this bread myself, but the memory of its taste is vivid, and I’m so happy to share my tried and true recipe with you.
Recipe Overview
- Prep Time: 15 minutes
- Cook Time: 45 minutes
- Total Time: 1 hour
- Yields: 1 loaf
- Serves: 8
- Dietary Type: Vegetarian
Ingredients
- 2 1⁄2 cups flour, sifted
- 3 teaspoons baking powder
- 1⁄2 teaspoon salt
- 1⁄4 cup cocoa
- 1⁄3 cup sugar
- 1 egg
- 1 1⁄3 cups milk
- 1⁄4 cup oil
Equipment Needed
- Sifter
- Mixing bowls
- Measuring cups and spoons
- Loaf pan (9×5 inch recommended)
- Whisk or fork
- Oven
Instructions
-
Begin by preheating your oven to 350 degrees Fahrenheit (175 degrees Celsius). Grease a loaf pan thoroughly. This ensures that the bread releases cleanly after baking.
-
In a large mixing bowl, sift together the flour, baking powder, salt, cocoa, and sugar. Sifting is important as it aerates the dry ingredients, contributing to a lighter texture in the finished loaf. Make sure everything is thoroughly combined.
-
In a separate bowl, beat the egg. Add the milk and oil, and mix these wet ingredients together until they are well combined.
-
Now, gently stir the wet ingredients into the dry ingredients. The key here is to mix just enough to dampen the dry ingredients. Avoid overmixing, as this can develop the gluten in the flour and result in a tough bread. A few lumps are perfectly fine.
-
Carefully pour the batter into the prepared loaf pan, spreading it evenly.
-
Bake in the preheated oven for approximately 45 minutes. To check for doneness, insert a wooden skewer or toothpick into the center of the loaf. If it comes out clean or with only a few moist crumbs clinging to it, the bread is ready. If the skewer comes out with wet batter, continue baking for a few more minutes and check again. Be sure to check it periodically to avoid it drying out.
-
Once baked, remove the loaf pan from the oven and let it cool in the pan for about 10-15 minutes before transferring it to a wire rack to cool completely. This prevents the bread from sticking to the pan and allows it to finish setting up.
Expert Tips & Tricks
- For a richer chocolate flavor, consider using dark cocoa powder. You can also add a teaspoon of vanilla extract to the wet ingredients for enhanced aroma.
- If you want to add some textural interest, try incorporating chopped nuts like walnuts or pecans into the batter. Chocolate chips are always a welcome addition as well.
- To prevent the top of the bread from browning too quickly, you can loosely tent it with aluminum foil during the last 15-20 minutes of baking.
- Ensure that your baking powder is fresh for the best rise. An old batch of baking powder may result in a flat bread.
- If you don’t have a sifter, whisk the dry ingredients together thoroughly to help break up any clumps.
- For a shinier crust, brush the top of the loaf with melted butter or milk before baking.
Serving & Storage Suggestions
Cocoa bread is delicious served warm or at room temperature. It’s wonderful on its own, or you can spread it with butter, cream cheese, or your favorite jam. For an extra indulgent treat, try toasting a slice and topping it with Nutella.
To store leftover cocoa bread, wrap it tightly in plastic wrap or place it in an airtight container at room temperature. It will stay fresh for about 2-3 days. For longer storage, you can freeze the bread for up to 2-3 months. Thaw it overnight in the refrigerator before serving. To reheat frozen cocoa bread, you can toast individual slices or warm the entire loaf in a low oven (around 300°F/150°C) for about 10-15 minutes.
Nutritional Information
| Nutrient | Amount per Serving | % Daily Value |
|---|---|---|
| Calories | 280.5 kcal | N/A |
| Calories from Fat | N/A | 31% |
| Total Fat | 9.5 g | 14% |
| Saturated Fat | 2.1 g | 10% |
| Cholesterol | 28.9 mg | 9% |
| Sodium | 311.2 mg | 12% |
| Total Carbohydrate | 42 g | 13% |
| Dietary Fiber | 1.6 g | 6% |
| Sugars | 8.4 g | N/A |
| Protein | 6.7 g | 13% |
Note: Nutritional information is an estimate and may vary based on specific ingredients and portion sizes.
Variations & Substitutions
- Dairy-Free: Substitute the milk with your favorite non-dairy alternative, such as almond milk, soy milk, or oat milk. Ensure your oil is also plant-based.
- Gluten-Free: Use a gluten-free all-purpose flour blend, ensuring it contains xanthan gum or a similar binding agent for optimal texture.
- Spiced Cocoa Bread: Add 1 teaspoon of cinnamon or mixed spice to the dry ingredients for a warm, comforting flavor.
- Citrus Twist: Add the zest of one orange or lemon to the wet ingredients for a bright, refreshing twist.
- Coffee Infusion: Substitute 1/4 cup of the milk with strong brewed coffee for a mocha-flavored bread.
FAQs (Frequently Asked Questions)
Q: Can I use self-rising flour for this recipe?
A: No, it’s best to use all-purpose flour and baking powder as specified in the recipe. Self-rising flour already contains baking powder and salt, and using it in this recipe might result in a bread that rises too much or tastes too salty.
Q: My bread is sinking in the middle. What could be the cause?
A: This could be due to several factors, including overmixing the batter, using too much liquid, or opening the oven door frequently during baking. Make sure to follow the recipe instructions carefully and avoid opening the oven door unnecessarily. Also, make sure your oven is properly calibrated.
Q: Can I bake this recipe in muffin tins instead of a loaf pan?
A: Yes, you can bake this recipe in muffin tins. Reduce the baking time to approximately 20-25 minutes, or until a toothpick inserted into the center comes out clean.
Q: How do I prevent the bread from sticking to the loaf pan?
A: Ensure that you grease the loaf pan thoroughly with butter, oil, or cooking spray before pouring in the batter. You can also line the bottom of the pan with parchment paper for extra insurance.
Q: What if I don’t have any oil?
A: Melted butter or shortening can be used as a 1:1 substitute for the oil in this recipe.
Final Thoughts
This simple cocoa bread recipe offers a slice of comfort and nostalgia with every bite. It’s a perfect treat for breakfast, afternoon tea, or a cozy evening snack. Don’t hesitate to adapt the recipe to your liking with variations and substitutions. Once you get the base recipe down, feel free to make it your own! So go ahead, preheat that oven and fill your kitchen with the irresistible aroma of cocoa bread. I hope you enjoy baking and eating this bread as much as I do!