
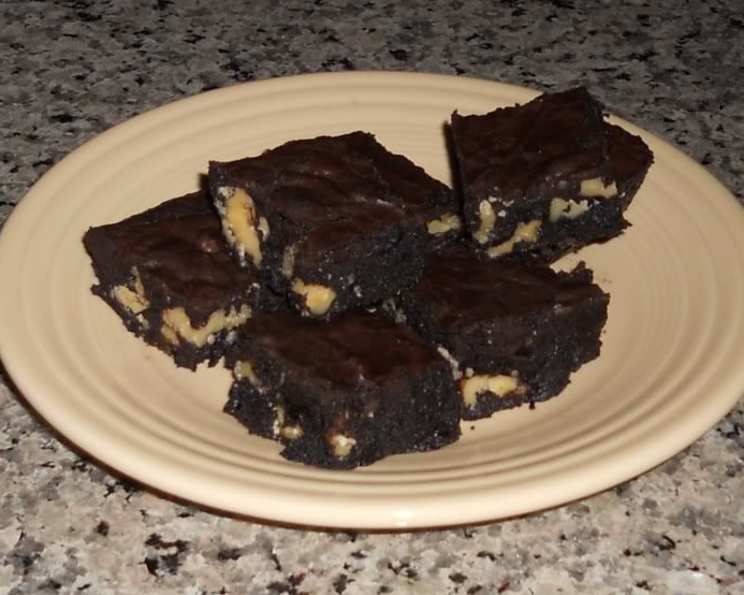
Decadent Cocoa Brownies with Browned Butter and Walnuts
The scent of warm brownies baking always transports me back to my grandmother’s kitchen. I can almost see her now, a dusting of flour on her apron, patiently guiding me through the steps. But these weren’t just any brownies; they were rich, fudgy squares infused with the nutty aroma of browned butter – a secret ingredient that elevated them to something truly special. The crunchy walnuts were always my favorite part, adding a delightful textural contrast to the melt-in-your-mouth goodness.
Recipe Overview
- Prep Time: 10 minutes
- Cook Time: 25 minutes
- Total Time: 35 minutes
- Yields: 16 2 x 2 brownies
- Serves: 16
- Dietary Type: Not specified
Ingredients
- Nonstick vegetable oil cooking spray
- 10 tablespoons unsalted butter, cut into 1-inch pieces
- 1 1/4 cups sugar
- 3/4 cup natural unsweetened cocoa powder (spooned into cup to measure, then leveled)
- 2 teaspoons water
- 1 teaspoon vanilla extract
- 1/4 teaspoon salt (generous)
- 2 large eggs, chilled
- 1/3 cup plus 1 tablespoon unbleached all-purpose flour
- 1 cup walnut pieces
Equipment Needed
- 8x8x2-inch metal baking pan
- Foil
- Medium saucepan
- Whisk or spoon
Instructions
- Position a rack in the bottom third of the oven and preheat the oven to 325°F (160°C).
- Line an 8x8x2-inch metal baking pan with foil, pressing the foil firmly against the pan sides and leaving a 2-inch overhang on all sides. This overhang will act as handles to easily remove the brownies later.
- Coat the foil lining generously with nonstick cooking spray. This ensures the brownies don’t stick and are easily released after baking.
- In a medium saucepan set over medium heat, melt the butter. Keep a close eye on it – this is where the magic happens!
- Continue cooking the butter, stirring often, until it stops foaming and browned bits start to form at the bottom of the pan. This process should take about 5 minutes. The butter will have a distinctive nutty aroma and a golden-brown color. This browned butter is the key to the brownies’ exceptional flavor.
- Remove the saucepan from the heat. Immediately add the sugar, cocoa powder, 2 teaspoons of water, vanilla extract, and 1/4 teaspoon of salt (generous).
- Stir the mixture thoroughly to blend all the ingredients together. The cocoa powder will initially seem dry, but it will incorporate as you stir.
- Let the mixture cool for about 5 minutes. It will still be hot, but this cooling period is essential to prevent the eggs from cooking when added.
- Add the chilled eggs to the hot cocoa mixture one at a time. After each addition, beat vigorously to ensure the egg is fully incorporated and the mixture is smooth.
- Once both eggs are incorporated, continue beating until the mixture looks thick and shiny. This step is important for creating the signature crackly top on the brownies.
- Add the flour to the mixture and stir until just blended. Be careful not to overmix, as this can lead to tough brownies.
- Now for the secret: Beat vigorously for 60 strokes. Yes, you read that right! This step helps develop the gluten in the flour, contributing to the chewy texture of the brownies.
- Gently stir in the walnut pieces until they are evenly distributed throughout the batter.
- Transfer the brownie batter to the prepared baking pan, spreading it evenly.
- Bake the brownies in the preheated oven until a toothpick inserted into the center comes out almost clean, with a few moist crumbs attached. This typically takes about 25 minutes, but baking times can vary depending on your oven. Start checking for doneness around 23 minutes.
- Once baked, remove the pan from the oven and let the brownies cool completely in the pan on a wire rack.
- Once cooled, use the foil overhang to lift the brownies from the pan.
- Place the brownies on a cutting board and cut them into 4 strips. Then, cut each strip crosswise into 4 brownies, resulting in 16 squares.
Expert Tips & Tricks
- For an even richer flavor, use dark chocolate cocoa powder.
- Don’t skip the browning of the butter – it’s what gives these brownies their unique depth of flavor. Watch it carefully to avoid burning.
- Chilling the eggs helps to prevent them from cooking when added to the hot butter mixture.
- If you don’t have walnuts, you can substitute other nuts like pecans or hazelnuts. You can also omit the nuts altogether if you prefer.
- For even fudgier brownies, slightly underbake them. If you like a more cake-like brownie, bake them for a few minutes longer.
- If you’re short on time, you can make the batter ahead of time and store it in the refrigerator for up to 24 hours. Bring it to room temperature before baking.
Serving & Storage Suggestions
These brownies are delicious served warm or at room temperature. For an extra treat, serve them with a scoop of vanilla ice cream or a dollop of whipped cream. They also pair well with a cup of coffee or a glass of milk.
Store leftover brownies in an airtight container at room temperature for up to 3 days, in the refrigerator for up to a week, or in the freezer for up to 2 months. To reheat frozen brownies, thaw them overnight in the refrigerator or microwave them for a few seconds until warmed through.
Nutritional Information
| Nutrient | Amount per Serving | % Daily Value (approximate) |
|---|---|---|
| Calories | 200 kcal | 10% |
| Total Fat | 13 g | 17% |
| Saturated Fat | 6 g | 30% |
| Cholesterol | 42 mg | 14% |
| Sodium | 47 mg | 2% |
| Total Carbohydrate | 21 g | 7% |
| Dietary Fiber | 2 g | 7% |
| Sugars | 16 g | – |
| Protein | 3 g | 6% |
Variations & Substitutions
- Extra Chocolatey: Add 1/2 cup of chocolate chips (milk, dark, or semi-sweet) to the batter along with the walnuts.
- Espresso Boost: Stir in 1 teaspoon of instant espresso powder with the cocoa powder for a mocha-flavored brownie.
- Peanut Butter Swirl: Swirl a few tablespoons of peanut butter into the batter before baking for a delightful peanut butter and chocolate combination.
- Gluten-Free: Substitute the all-purpose flour with a gluten-free all-purpose blend. Be sure to check the blend contains xanthan gum or add 1/2 teaspoon for improved texture.
- Different Nuts: Try using pecans, macadamia nuts, or even chopped almonds instead of walnuts.
FAQs (Frequently Asked Questions)
Q: What does browning the butter do for the brownies?
A: Browning the butter enhances its natural nutty flavors, which adds depth and complexity to the brownies. It also creates a richer, more caramel-like taste.
Q: Can I use a different size pan?
A: While an 8×8-inch pan is recommended, you can use a 9×9-inch pan, but the brownies will be slightly thinner and may bake a few minutes faster.
Q: How do I know when the brownies are done?
A: Insert a toothpick into the center of the brownies. It should come out almost clean, with a few moist crumbs attached. Overbaking will result in dry brownies.
Q: Can I make these brownies ahead of time?
A: Yes, you can bake the brownies a day or two in advance. Store them in an airtight container at room temperature.
Q: Why are my brownies dry?
A: Overbaking is the most common cause of dry brownies. Make sure to check for doneness at the minimum baking time and adjust as needed based on your oven.
Final Thoughts
These Cocoa Brownies with Browned Butter and Walnuts are more than just a dessert; they’re an experience. The rich, fudgy texture, the nutty aroma, and the satisfying crunch of walnuts create a symphony of flavors that will tantalize your taste buds. Whether you’re baking for a special occasion or simply craving a sweet treat, these brownies are sure to impress. So go ahead, gather your ingredients, and embark on a baking adventure. And don’t forget to share your creations and feedback with me – I can’t wait to hear how they turn out! Pair them with a scoop of vanilla ice cream or a steaming mug of coffee for the ultimate indulgence.