
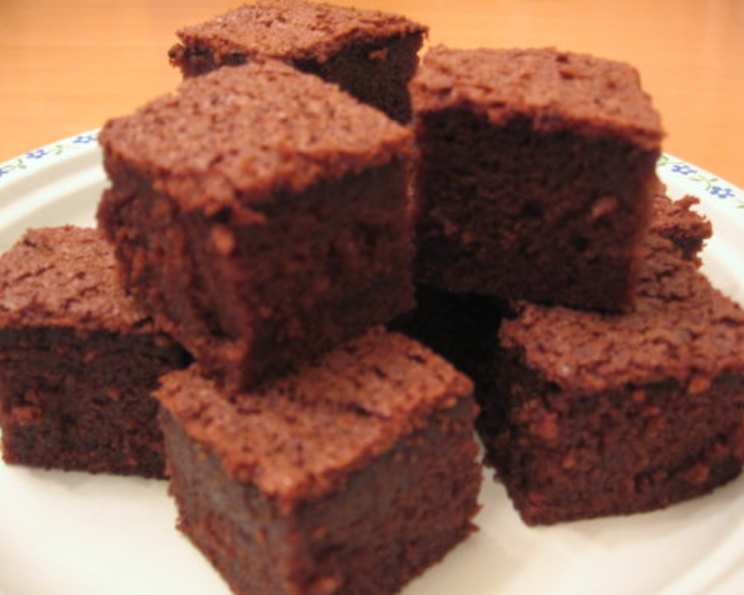
Cocoa Butter Mochi: A Sweet, Chewy Indulgence
My first encounter with butter mochi wasn’t in a fancy bakery or a trendy cafe. It was in the breakroom of a small accounting firm, offered by a kind secretary who always had a stash of homemade goodies. This wasn’t the delicate, snow-white mochi I associated with Japanese New Year. It was denser, richer, and hinted at chocolate – a delightful surprise that sparked a lasting culinary curiosity. The chewy texture combined with the subtle cocoa notes was simply irresistible, and it became an instant favorite.
Recipe Overview
- Prep Time: 15 minutes
- Cook Time: 1 hour
- Total Time: 1 hour 15 minutes
- Servings: 32
- Yield: One 9×13 inch pan
- Dietary Type: Not specified
Ingredients
- 2 cups mochiko sweet rice flour
- 1 3/4 cups granulated sugar
- 3 tablespoons ground cocoa (such as Ghiradelli)
- 1 tablespoon baking soda
- 12 ounces evaporated milk
- 13 1/2 ounces coconut milk
- 1/4 cup butter, melted
- 2 eggs, beaten
- 1 1/2 teaspoons pure vanilla extract
Equipment Needed
- Large mixing bowl
- Separate bowl
- 9″ x 13″ baking pan (or two 8″ x 8″ pans)
- Sifter
- Whisk or mixer
- Toothpick
Instructions
-
Preheat your oven to 350 degrees Fahrenheit (175 degrees Celsius). This is crucial for even baking and the perfect mochi texture.
-
In a large mixing bowl, sift together the mochiko sweet rice flour, granulated sugar, ground cocoa, and baking soda. Sifting ensures that these dry ingredients are evenly distributed and prevents clumps, resulting in a smoother batter.
-
In a separate bowl, combine the evaporated milk, coconut milk, melted butter, beaten eggs, and pure vanilla extract. Whisk these wet ingredients together until well combined. The combination of evaporated and coconut milk contributes to the richness and unique flavor profile of this mochi.
-
Gradually add the dry mixture to the wet mixture in small amounts, mixing continuously. This prevents the formation of lumps and ensures a homogeneous batter. Mix until all ingredients are thoroughly combined. Don’t overmix, as this can develop the gluten in the rice flour and lead to a tougher mochi.
-
Pour the mixture into a 9″ x 13″ buttered pan. Alternatively, you can divide the mixture between two 8″ x 8″ pans. Buttering the pan is essential to prevent the mochi from sticking and ensures easy removal after baking.
-
Bake for 1 hour. The baking time may vary slightly depending on your oven, so it’s important to check for doneness.
-
Test for doneness by inserting a toothpick into the center of the mochi. If the toothpick comes out clean, the mochi is done. If there’s wet batter clinging to the toothpick, continue baking for a few more minutes and check again.
-
Let the mochi cool completely in the pan before cutting. This allows the mochi to set properly and makes it easier to cut into clean squares or rectangles.
-
Once cooled, cut the mochi into squares or 1″ x 2″ rectangles. The yield may vary depending on the size of the pieces. The mochi is quite rich, so smaller pieces are often preferred.
Expert Tips & Tricks
- Use high-quality cocoa: The quality of the cocoa powder will significantly impact the flavor of the mochi. Using a good-quality brand, such as Ghirardelli, will result in a richer, more intense chocolate flavor.
- Don’t overbake: Overbaking can lead to a dry, tough mochi. Keep a close eye on it during the last 15 minutes of baking and test frequently for doneness.
- Experiment with flavors: Feel free to add other flavorings to the batter, such as a pinch of cinnamon, a few drops of almond extract, or a handful of chocolate chips.
- Adjust sweetness: If you prefer a less sweet mochi, you can reduce the amount of sugar by 1/4 cup.
- Make it ahead: This mochi can be made a day or two in advance and stored in an airtight container at room temperature. The flavors will actually develop and deepen over time.
Serving & Storage Suggestions
Cocoa butter mochi is delicious served at room temperature. Its chewy texture and rich flavor make it a perfect snack, dessert, or addition to a potluck.
To store leftovers, cut the mochi into individual pieces and place them in an airtight container. It will keep well at room temperature for up to 3 days, in the refrigerator for up to a week, or in the freezer for up to a month. To reheat, simply microwave individual pieces for a few seconds until softened. Frozen mochi can be thawed at room temperature or in the refrigerator.
Nutritional Information
| Nutrient | Amount per Serving | % Daily Value |
|---|---|---|
| Calories | 135.9 kcal | N/A |
| Calories from Fat | N/A | 35% |
| Total Fat | 5.3 g | 8% |
| Saturated Fat | 3.8 g | 19% |
| Cholesterol | 18.5 mg | 6% |
| Sodium | 147.5 mg | 6% |
| Total Carbohydrate | 20.6 g | 6% |
| Dietary Fiber | 0.3 g | 1% |
| Sugars | 11 g | N/A |
| Protein | 2 g | 4% |
Note: Nutritional information is an estimate and may vary based on specific ingredients and portion sizes.
Variations & Substitutions
- Gluten-Free: This recipe is naturally gluten-free since it uses mochiko sweet rice flour.
- Dairy-Free: You can substitute the evaporated milk with another 12 ounces of coconut milk or your favorite plant-based milk alternative. Ensure the substitute is unsweetened to control the overall sweetness.
- Nut Variations: Add chopped macadamia nuts, pecans, or walnuts to the batter for added texture and flavor.
- Flavor Infusion: Steep spices like cardamom, star anise, or orange peel in the coconut milk before adding it to the batter for a unique twist.
FAQs (Frequently Asked Questions)
Q: What is mochiko sweet rice flour?
A: Mochiko sweet rice flour is a type of glutinous rice flour that is essential for achieving the chewy texture of butter mochi. It can typically be found in the Asian section of most grocery stores or in Asian supermarkets.
Q: Can I use regular cocoa powder instead of ground cocoa?
A: Yes, you can use regular unsweetened cocoa powder. However, ground cocoa, which is often slightly coarser, may provide a more intense chocolate flavor.
Q: How do I prevent the mochi from sticking to the pan?
A: Buttering the pan thoroughly is crucial. You can also line the bottom of the pan with parchment paper for extra insurance.
Q: My mochi is still gooey in the center after an hour. What should I do?
A: If the mochi is still too soft after an hour, continue baking for another 10-15 minutes, checking for doneness every few minutes with a toothpick. Ovens can vary in temperature, so adjust baking time accordingly.
Q: Can I freeze butter mochi?
A: Yes, butter mochi freezes well. Cut it into individual pieces and wrap them tightly in plastic wrap before placing them in a freezer-safe bag or container. Thaw at room temperature before serving.
Final Thoughts
I encourage you to try this Cocoa Butter Mochi recipe and experience the unique joy of this chewy, chocolatey treat. Its delightful texture and comforting flavor make it a perfect treat to share with friends and family or enjoy all by yourself. Don’t hesitate to experiment with different flavor variations and share your creations! This recipe is a wonderful way to bring a touch of homemade happiness to any occasion. Enjoy!