
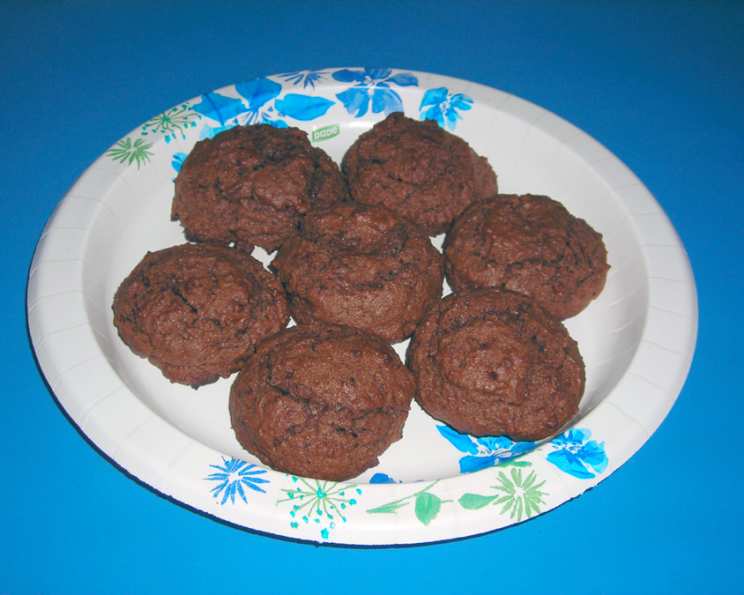
Nostalgic Nibbles: Baking a Batch of Cocoa Drop Cookies
The scent of cocoa always transports me back to my grandmother’s kitchen. She had a knack for making the simplest things taste extraordinary, and her cocoa drop cookies were a testament to that. I remember standing on a stool, barely tall enough to see over the counter, watching her deftly mix the ingredients, a gentle smile playing on her lips. The anticipation of that first warm, fudgy bite was almost unbearable, and to this day, that memory is forever intertwined with the comforting aroma of baking and the warmth of family. These cookies are more than just a treat; they are a delicious reminder of simpler times and cherished moments.
Recipe Overview
- Prep Time: 20 minutes
- Cook Time: 8-10 minutes
- Total Time: 1 hour 20-30 minutes (includes chilling)
- Yields: Approximately 24 cookies
- Dietary Type: Not specified, contains dairy and egg
Ingredients
- ½ cup soft shortening (part butter)
- 1 cup sugar
- 1 large egg
- ¾ cup buttermilk
- 1 teaspoon vanilla
- 1 ¾ cups flour
- ½ teaspoon baking soda
- ½ teaspoon salt
- ½ cup cocoa
Equipment Needed
- Mixing bowls
- Measuring cups and spoons
- Cookie sheets
- Cooling rack
- Electric mixer (optional, but helpful)
Instructions
- In a large mixing bowl, mix together the soft shortening, sugar, and egg until well combined and creamy. An electric mixer can be used for this step, but mixing by hand works just as well.
- Stir in the buttermilk and vanilla until everything is well incorporated. The mixture will be slightly liquid at this stage, which is perfectly normal.
- In a separate bowl, sift together the flour, baking soda, salt, and cocoa. Sifting ensures that there are no lumps and that the dry ingredients are evenly distributed.
- Gradually add the dry ingredients to the buttermilk mixture, stirring until just combined. Be careful not to overmix the dough, as this can lead to tough cookies.
- Cover the bowl with plastic wrap and chill the dough in the refrigerator for at least 1 hour. Chilling is essential for preventing the cookies from spreading too thin during baking. You can even chill the dough overnight for an even better result.
- Preheat your oven to 400°F (200°C). Lightly grease your cookie sheets. Parchment paper can also be used, but greasing the sheets directly helps the cookies to brown slightly on the bottom.
- Drop the chilled dough by rounded teaspoons onto the prepared cookie sheets, leaving about 2 inches of space between each cookie. This prevents them from sticking together as they bake.
- Bake for approximately 8-10 minutes, or just until almost no imprint remains when lightly touched. Be careful not to overbake, as these cookies are best when they are soft and fudgy.
Expert Tips & Tricks
- For a richer, more decadent flavor, use dark cocoa powder instead of regular cocoa powder.
- If you don’t have buttermilk, you can make a quick substitute by adding 1 tablespoon of white vinegar or lemon juice to a liquid measuring cup, then filling it with milk to the ¾ cup mark. Let it stand for a few minutes before using.
- For perfectly round cookies, try using a small ice cream scoop to portion the dough.
- If your cookies spread too thin during baking, try chilling the dough for a longer period or adding a tablespoon or two of flour to the dough.
- Don’t skip chilling the dough! This step is crucial for controlling the spread of the cookies and developing their flavor.
- To prevent the bottoms from burning, place the baking sheet on the middle rack of the oven.
- If you prefer a flatter cookie, gently press down on each dough ball with the back of a spoon before baking.
- Experiment with adding chocolate chips, nuts, or dried fruit to the dough for extra flavor and texture.
Serving & Storage Suggestions
These cocoa drop cookies are delicious on their own, but they can also be enjoyed with a variety of accompaniments. They are particularly good with a cold glass of milk, a scoop of vanilla ice cream, or a warm cup of coffee or tea.
To store, place the cooled cookies in an airtight container at room temperature. They will stay fresh for up to 3-4 days. For longer storage, you can freeze the cookies for up to 2 months. Thaw them at room temperature before serving. You can also freeze the dough for later use. Simply scoop the dough into balls, freeze them on a baking sheet, and then transfer them to a freezer bag. When ready to bake, thaw the dough slightly and bake as directed.
Nutritional Information
| Nutrient | Amount per Serving | % Daily Value |
|---|---|---|
| Calories | 116.4 kcal | N/A |
| Calories from Fat | 43 kcal | 37% |
| Total Fat | 4.8 g | 7% |
| Saturated Fat | 1.2 g | 5% |
| Cholesterol | 8.1 mg | 2% |
| Sodium | 86 mg | 3% |
| Total Carbohydrate | 16.7 g | 5% |
| Dietary Fiber | 0.6 g | 2% |
| Sugars | 8.7 g | 34% |
| Protein | 1.8 g | 3% |
Note: Nutritional information is an estimate and may vary based on specific ingredients and portion sizes.
Variations & Substitutions
- Chocolate Chip Cocoa Cookies: Add 1 cup of chocolate chips to the dough for an extra chocolatey treat.
- Nutty Cocoa Cookies: Mix in ½ cup of chopped walnuts or pecans for added crunch and flavor.
- Spiced Cocoa Cookies: Add ½ teaspoon of cinnamon, nutmeg, or ginger to the dry ingredients for a warm, comforting flavor.
- Peanut Butter Cocoa Cookies: Add ½ cup of peanut butter to the wet ingredients for a delicious peanut butter twist.
- Mint Chocolate Cocoa Cookies: Add a few drops of peppermint extract to the wet ingredients and top with crushed candy canes after baking.
- Gluten-Free Option: Substitute the all-purpose flour with a gluten-free all-purpose flour blend. Be sure to choose a blend that contains xanthan gum or guar gum for binding.
FAQs (Frequently Asked Questions)
Q: Why do I need to chill the dough?
A: Chilling the dough prevents the cookies from spreading too thin during baking, resulting in a thicker, chewier cookie. It also allows the flavors to meld together.
Q: Can I use margarine instead of shortening?
A: Yes, you can use margarine, but shortening will give the cookies a softer texture. If using margarine, make sure it is softened but not melted.
Q: How do I know when the cookies are done?
A: The cookies are done when they are set around the edges and almost no imprint remains when lightly touched in the center. Be careful not to overbake them, as they will continue to firm up as they cool.
Q: Can I freeze the cookie dough?
A: Yes, you can freeze the cookie dough. Scoop the dough into balls and freeze them on a baking sheet. Once frozen, transfer them to a freezer bag. Thaw slightly before baking.
Q: What if I don’t have buttermilk?
A: You can make a buttermilk substitute by adding 1 tablespoon of white vinegar or lemon juice to a liquid measuring cup, then filling it with milk to the ¾ cup mark. Let it stand for a few minutes before using.
Final Thoughts
These cocoa drop cookies are a delightful treat that is perfect for any occasion. Whether you are baking them for a family gathering, a holiday celebration, or simply a cozy night in, they are sure to be a hit. So, gather your ingredients, preheat your oven, and let the aroma of cocoa fill your kitchen. Don’t be afraid to experiment with different variations and substitutions to create your own signature cocoa drop cookie recipe. And most importantly, enjoy the process of baking and sharing these delicious treats with your loved ones. Happy baking!