
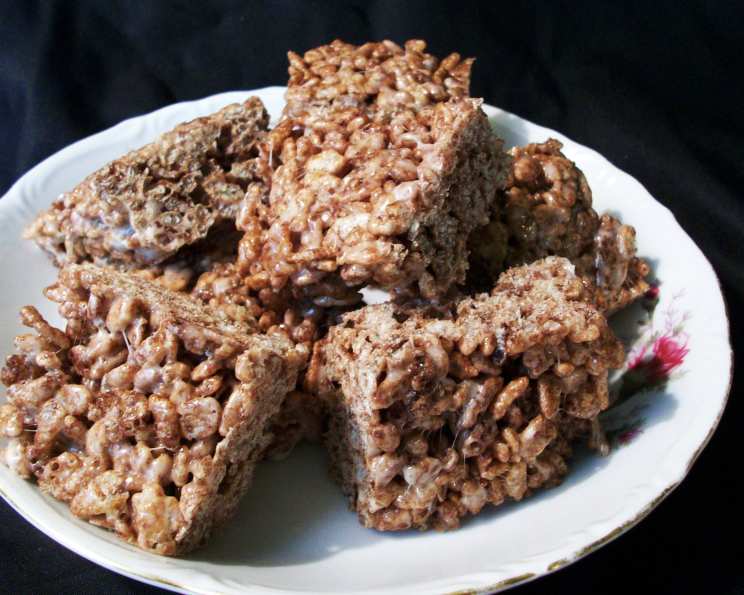
Cocoa Krispies Treats: An Elevated Childhood Classic
The scent of melting marshmallows always takes me back to my grandmother’s kitchen. She wasn’t a fancy baker, but her Cocoa Krispies Treats were legendary. They were the perfect balance of sweet, chocolatey, and delightfully chewy. I remember eagerly anticipating the moment she’d let me lick the spoon – that sticky, gooey, chocolate marshmallow mixture was pure bliss. Now, decades later, I’ve refined her classic recipe, but the heart of it remains the same: a simple, irresistible treat that brings joy with every bite.
Recipe Overview
- Prep Time: 5 minutes
- Cook Time: 5 minutes
- Total Time: 10 minutes
- Servings: 18 squares
- Yield: 1 (13×9 inch) pan
- Dietary Type: Vegetarian
Ingredients
- 6 cups COCOA KRISPIES® cereal
- 3 tablespoons butter
- 1 (10 ounce) package chocolate marshmallows
Equipment Needed
- 13x9x2 inch baking pan
- Large bowl
- Large saucepan
- Measuring cups and spoons
- Spatula or wooden spoon
Instructions
-
Begin by preparing your baking pan. You can either butter a 13x9x2 inch baking pan thoroughly or line it with waxed paper, depending on your preference. Buttering allows for easy removal, while waxed paper makes it even simpler, especially if you plan to slice and serve the treats later.
-
Measure out 6 cups of COCOA KRISPIES® cereal and place them in a large bowl. Set the bowl aside. Having the cereal pre-measured and ready to go is crucial for preventing the marshmallow mixture from hardening before you can incorporate it properly.
-
In a large saucepan, melt 3 tablespoons of butter over low heat. It’s important to use low heat to prevent the butter from burning. Burnt butter will impart an undesirable flavor to your treats.
-
Once the butter is completely melted, add the 10-ounce package of chocolate marshmallows to the saucepan. Stir continuously until the marshmallows are completely melted and smooth. Again, maintain low heat to prevent scorching. The marshmallows should be melted evenly and have a glossy appearance.
-
Remove the saucepan from the heat. Immediately pour the melted marshmallow mixture over the COCOA KRISPIES® cereal in the large bowl.
-
Quickly stir the cereal and marshmallow mixture together until the cereal is evenly coated. Ensure that every piece of cereal is coated in the melted chocolate marshmallow mixture. Work quickly and efficiently, as the mixture will start to set as it cools.
-
Press the mixture firmly into the prepared baking pan. You can use a spatula, the back of a spoon, or even your hands (lightly buttered or dampened to prevent sticking) to press the mixture evenly across the bottom of the pan. Press firmly to create a compact and uniform layer.
-
Allow the Cocoa Krispies Treats to cool completely before cutting them into squares. This usually takes about 30 minutes to an hour at room temperature.
-
Once cooled, cut the mixture into 18 squares, arranging them in 3 rows of 6. Serve and enjoy!
Expert Tips & Tricks
-
Fresh Marshmallows are Key: Using fresh marshmallows will make a noticeable difference in the texture of your treats. Stale marshmallows tend to melt unevenly and can result in a tougher, less chewy texture.
-
Gentle Melting: Don’t rush the melting process. Low and slow is the way to go. This prevents the marshmallows from burning and ensures a smooth, even consistency.
-
Keep it Moving: Stir constantly while the marshmallows are melting. This prevents them from sticking to the bottom of the pan and scorching.
-
Butter Your Utensils: Lightly butter your spatula or hands before pressing the mixture into the pan to prevent sticking. Alternatively, you can use a piece of parchment paper to press down on the mixture.
-
Room Temperature is Best: Allow the treats to cool completely at room temperature. Refrigerating them can make them too hard and difficult to cut.
-
Customize with Toppings: Before the treats fully set, sprinkle the top with chocolate sprinkles, mini chocolate chips, or even a drizzle of melted chocolate for an extra touch of indulgence.
Serving & Storage Suggestions
Cocoa Krispies Treats are best served at room temperature. They’re perfect as an after-school snack, a party treat, or a simple dessert.
To store, cut the treats into squares and place them in an airtight container at room temperature. They will stay fresh for up to 2-3 days. Avoid storing them in the refrigerator, as this can make them hard and less chewy.
For longer storage, you can freeze Cocoa Krispies Treats. Wrap each square individually in plastic wrap and then place them in a freezer-safe bag or container. They can be frozen for up to 2 months. Thaw at room temperature before serving.
Nutritional Information
| Nutrient | Amount per Serving | % Daily Value |
|---|---|---|
| Calories | 69.5 kcal | N/A |
| Calories from Fat | 20 g | 30% |
| Total Fat | 2.3 g | 3% |
| Saturated Fat | 1.5 g | 7% |
| Cholesterol | 5.1 mg | 1% |
| Sodium | 101.1 mg | 4% |
| Total Carbohydrate | 11.9 g | 3% |
| Dietary Fiber | 0.3 g | 1% |
| Sugars | 4.7 g | 18% |
| Protein | 0.7 g | 1% |
Note: Nutritional information is an estimate and may vary based on specific ingredients and serving sizes.
Variations & Substitutions
-
Gluten-Free: Ensure your Cocoa Krispies cereal is certified gluten-free for a gluten-free version.
-
Different Cereals: Experiment with other cereals like Rice Krispies, Fruity Pebbles, or even a combination of cereals.
-
Different Flavored Marshmallows: Use vanilla marshmallows or other flavored marshmallows for a unique twist.
-
Add-Ins: Incorporate other ingredients like chopped nuts, dried fruit, or pretzels for added texture and flavor.
-
Chocolate Drizzle: After the treats have cooled, drizzle melted white chocolate or dark chocolate over the top for a more decadent treat.
-
Espresso Powder: Add a teaspoon of espresso powder to the marshmallow mixture to enhance the chocolate flavor.
FAQs (Frequently Asked Questions)
Q: Can I use regular marshmallows instead of chocolate marshmallows?
A: Yes, you can substitute regular marshmallows for chocolate marshmallows. However, the flavor will be less chocolatey. You could add a tablespoon or two of cocoa powder to the melted marshmallow mixture to compensate.
Q: My treats are too hard. What did I do wrong?
A: Overcooking the marshmallows or pressing the mixture too firmly into the pan can result in hard treats. Be sure to melt the marshmallows over low heat and press the mixture gently into the pan.
Q: My treats are too sticky. How can I fix this?
A: Using too much butter or not allowing the treats to cool completely can make them sticky. Make sure to use the correct amount of butter and allow the treats to cool fully before cutting.
Q: Can I make these ahead of time?
A: Yes, Cocoa Krispies Treats can be made ahead of time. Store them in an airtight container at room temperature for up to 2-3 days.
Q: How do I prevent the marshmallow mixture from sticking to everything?
A: Buttering your saucepan, spatula, and hands will help prevent the marshmallow mixture from sticking. You can also use parchment paper to press the mixture into the pan.
Final Thoughts
These Cocoa Krispies Treats are more than just a simple recipe; they’re a nostalgic trip back to childhood, a reminder of simple pleasures, and a blank canvas for your culinary creativity. Whether you stick to the classic recipe or experiment with variations, I encourage you to try this recipe and share your own delightful experiences. Whip up a batch for your family, friends, or even just yourself – you deserve a little bit of sweet, chocolatey joy! Don’t forget to share your creations and feedback – I’d love to hear how you make this recipe your own. Enjoy!